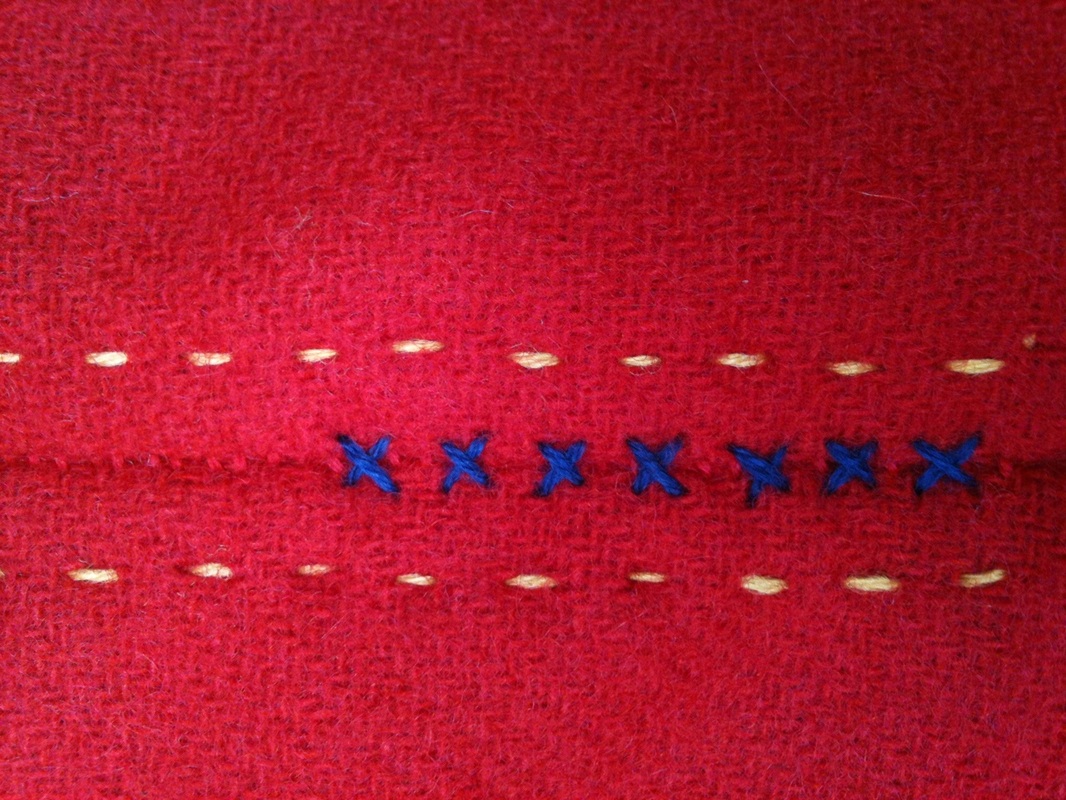
As I stated some time ago, I recently started looking deeper at certain items that I see in proliferation in the reenacting community. While many of these treatments are lovely they seem to have little evidence among archaeological finds. An example of this is the herringbone stitch that we commonly see decorating every seam of a garment (you can see the results of that research HERE). While on my mission to find use of that stitch, I came across several fantastic ways to embellish or strengthen garments that are, in fact, well documented to the Viking age. This article is to share my discoveries in this area.
For this research project, the use of cord, braid or binding on garment edges, I chose to look at how often certain things we do know of occur in extant objects. The criteria I used to weed through my data is as follows:
Types of edges included:
This survey is, of course, a work-in-progress. I will be adding items to it as learn about them and as I have a chance to experiment with these finishing treatments myself. If you have additions, comments or questions, please drop me a note so that I can look into the sources!
For this research project, the use of cord, braid or binding on garment edges, I chose to look at how often certain things we do know of occur in extant objects. The criteria I used to weed through my data is as follows:
- Dated between 800-1050AD
- Location had to be Scandinavia or areas that had Viking settlements such as Dublin and York
- Use of textile material only (metal thread work and possaments are not included in this survey)
- The fragments have to be from a garment or that are assumed to be part of a garment by the professionals that surveyed them
- This survey does not include tablet weaving applied as trim at the edge of a garment
Types of edges included:
- Cord/braid applied to the edge, or near the edge, of a garment
- Binding
- Stitching
This survey is, of course, a work-in-progress. I will be adding items to it as learn about them and as I have a chance to experiment with these finishing treatments myself. If you have additions, comments or questions, please drop me a note so that I can look into the sources!
Cord & Braid
Cord or braid was applied at the edge of several extant items including caps from Dublin and smokkrs (aprondresses) from several sites. In the article ““Two Women’s Graves with Textiles from Kaupang”, author Anne Stein Ingstad stated that she believed that a fragment of cloth from Kaupang that had brocaded tablet weaving at one edge and a cord sewn to the outside of that edge was likely the hem of the garment because of the applied cord would take the wear from use and thereby protect the more painstakingly wrought woven trim.
While I find it more likely that such an item was at the top of the garment (as is also evidenced at Birka), I still see value in cord used at any garment opening to protect the edges of the woven textile from wear.
One common factor in these finds is that the cords or braids are quite narrow in diameter or width. Many of the cords or braids from Birka are noted for being constructed of very delicate or fine cords. I believe that those used at the edges of garments would have been of a sturdy wool, and well spun, even if the yarn diameter is thin. The exception to this is one of the Dublin caps that had string applied to the edge that was described as being wooly and produced from yarn that was not combed. This edge would have been purely decorative, and it makes sense given that there would be no wear on the edge of a cap.
Only a few finds have comments on how the braid or cord was attached to the garment. The pants from the Hedeby settlement, the caps from Dublin and the smokkr from Kaupang all employ an overcast stitch as a means of attachment. One of the two Dublin caps was noted as using longer stitches (6mm) set a steep angle to create a more decorative effect.
Unfortunately many of the reports just list that woolen string or cord was applied to a garment, and they give little details on the actual type of cord it actually was. A few, however, offer clues and those are listed below. One thing to note is that all corded edgings made use of very narrow cord only (only a few millimeters) and not coarse, chunky yarns.
Braids
Braids
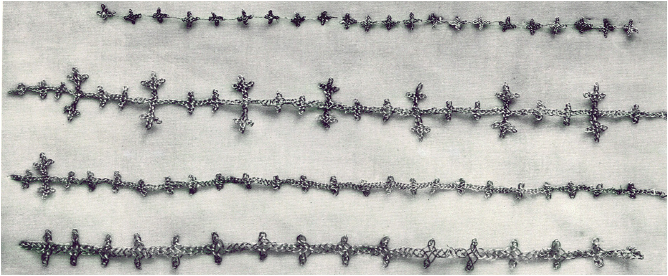
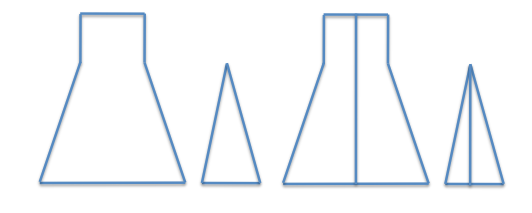
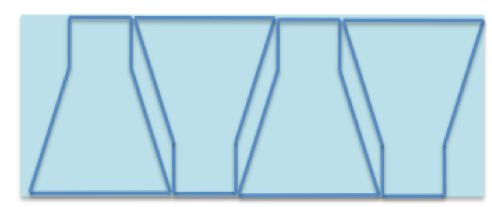
- Birka Grave 465 there was a braid with a triangular cross section that was 2-3mm wide. Three additional graves list similar cord that is 3-4mm wide.
- At Hedeby there was a six strand braid of of 2-ply wool dyed red and yellow (three strands of each). This was applied over a dart on a smokkr/aprondress, but because of its use on a garment I am including it here. 1-2mm wide.
- Birka Grave 466 lists a cord or braid with a triangular cross section. It is listed as similar to other examples or possibly made with a fork (I assume this is a reference to lucet, but the author said it is impossible to tell how it was made).
- Birka Grave 973 had a string consisting of fine 2-ply (Z) yarns that were then cabled to the left (S).
- Birka Grave 954 had a cord 2 mm in average, consisting of several threads around which another yarn is wound.
- Kaupang Grave B lists wool string made from twining several woollen threads together.
- The settlement at Hedeby has fragments (19E) from pants that has a doubled folded hem with a thin decorative thread whipstitched to the very edge. Twining is mentioned in the description so it might just be a plied yarn.
- While not evidenced in seams, there are cabled cords found in York and the ends of some of the scarves from Dublin are cabled (twining plied yarns together).
- At Sadanger there was a cord with several threads as a core wrapped around with another yarn.
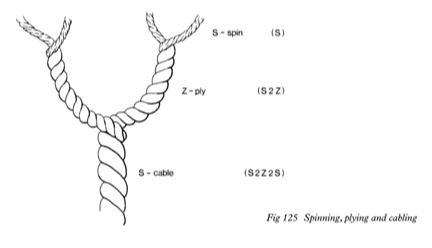
Diagram showing the difference in spinning, plying and cabling from Penelope Walton Roger's work with textiles at York.
Extant Cords and Braids
Birka 465
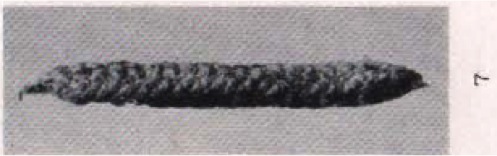
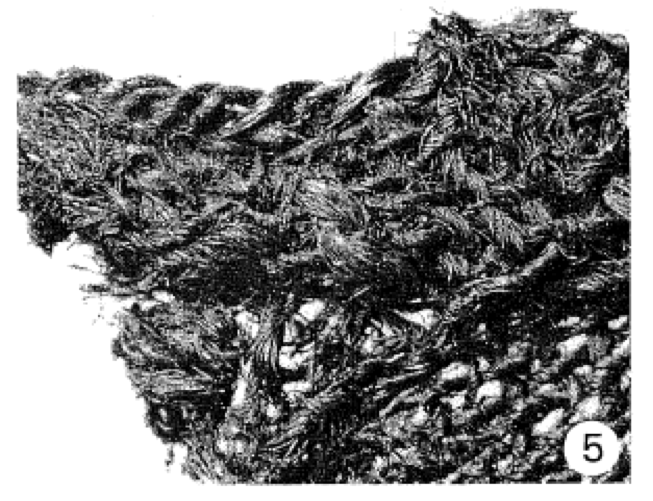
This item is a 2cm strip of braid 2-3mm wide, having a triangular cross section. This braid is referred to as type D3 in the Birka materials and was additionally found alongside tablet woven bands in several graves.
Birka III, p128, p159, plate 33; Kvinnodräkten i Birka, p60. Photo from Birka III.
This item is a 2cm strip of braid 2-3mm wide, having a triangular cross section. This braid is referred to as type D3 in the Birka materials and was additionally found alongside tablet woven bands in several graves.
Birka III, p128, p159, plate 33; Kvinnodräkten i Birka, p60. Photo from Birka III.
Birka 466
Fine woolen cord found on a wool tabby smokkr that was triangular in cross-section. Geijer suggests that is was manufactured as the other braids, or perhaps was made with a fork (which I presume references a lucet). The technique, however, cannot be determined with certainty.
Birka III, p128; Thunem, Smokkr; Photo from Historiska museet 2011.
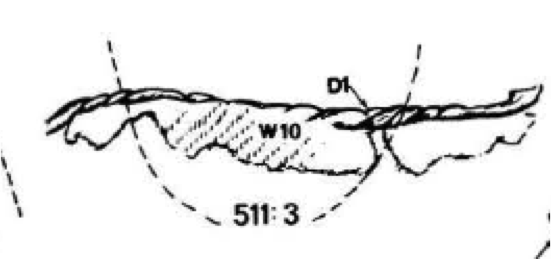
Birka 511
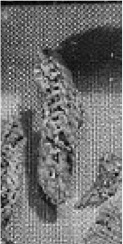
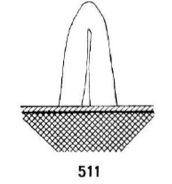
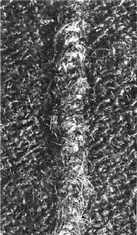
Diamond twill smokkr and with cord considered more coarse than similar pieces from other graves.
Birka III, p160; Kvinnodräkten i Birka, p123. Images from Kvinnodräkten i Birka.
Diamond twill smokkr and with cord considered more coarse than similar pieces from other graves.
Birka III, p160; Kvinnodräkten i Birka, p123. Images from Kvinnodräkten i Birka.
 |  |
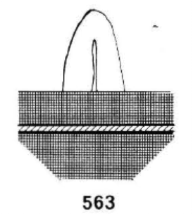
Birka 563
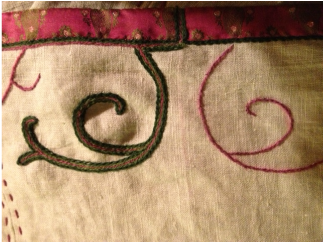
Linen smokkr fragment with cord applied over the seam from the hem. Hagg suggests that the cord was used to cover the hemming stitches (stitching on wool was often invisible, but the seams show more clearly on linen).
Thunem, Smokkr; Kvinnodräkten i Birka, p125. Images from Kvinnodräkten i Birka.
Linen smokkr fragment with cord applied over the seam from the hem. Hagg suggests that the cord was used to cover the hemming stitches (stitching on wool was often invisible, but the seams show more clearly on linen).
Thunem, Smokkr; Kvinnodräkten i Birka, p125. Images from Kvinnodräkten i Birka.
 |  |
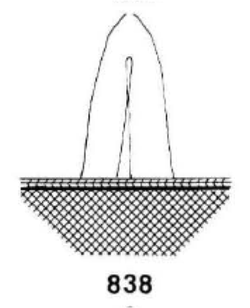
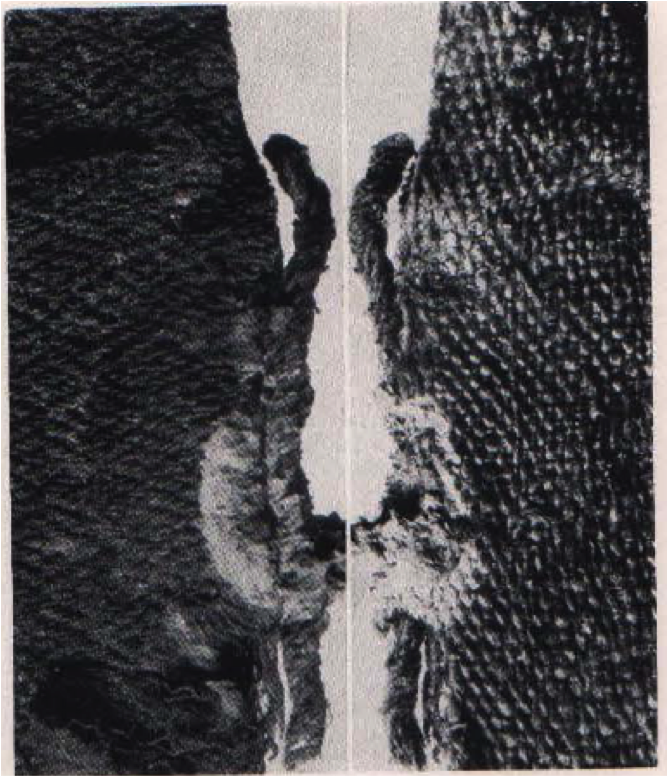
Birka 838
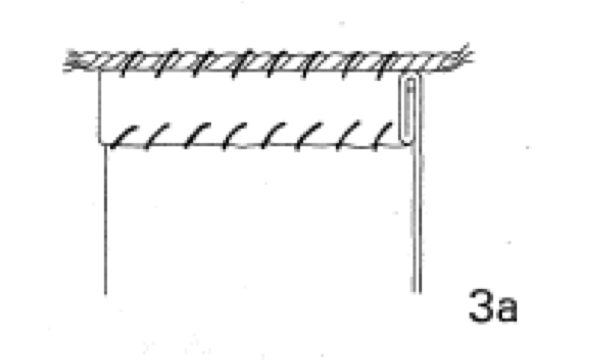
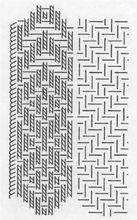
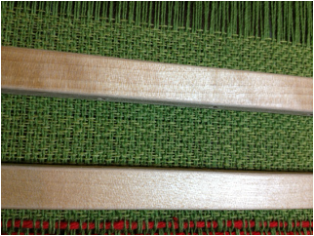
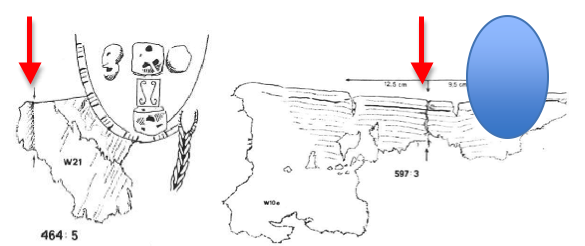
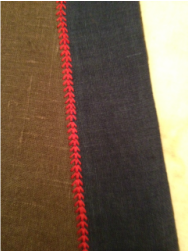
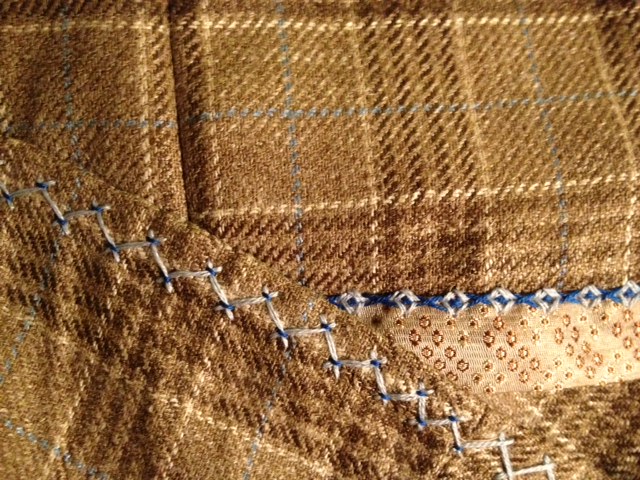
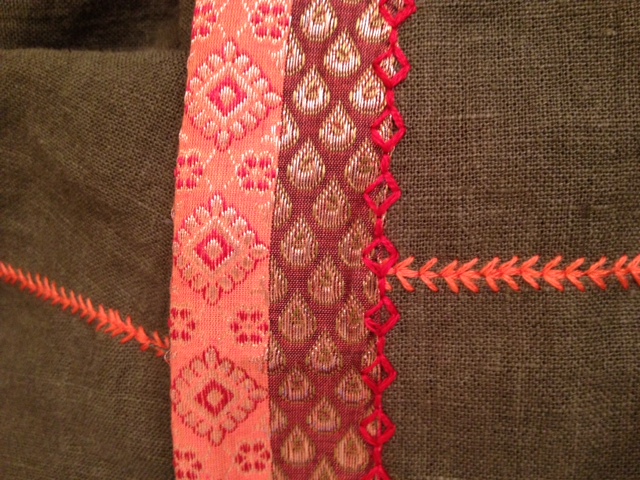
This smokkr fragment There is a tabby binding 1cm wide, turned to the outside and stitched down with stem stitch. Fine wool cord is applied to the outer edge. The stem stitches are in a straight line and are of twisted woolen yarn (Z). - The seam goes through both layers of fabric throughout and consists of unusually long (6-7 mm) stitches on the top and almost invisible stitches on the other side.
Birka III, p25, p109, p168; Kvinnodräkten i Birka. Image from Kvinnodräkten i Birka; Photo from Birka III.
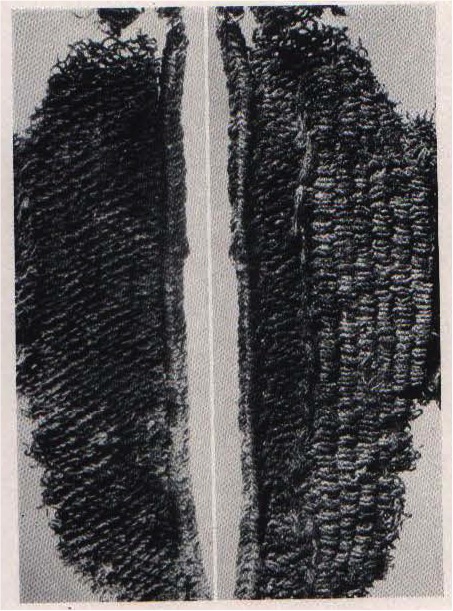 Image of fragment from 838. Left is the reverse and right is the front side. | 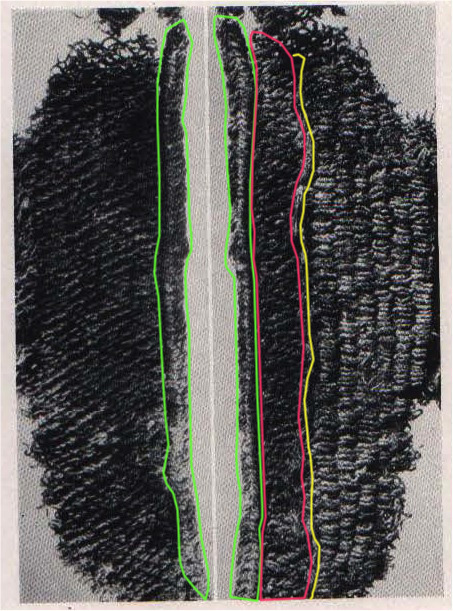 Fragment 838 with my attempt to highlight the finishing used. Green marks the braid, the red is the band, and yellow denotes the line of stem stitching. |
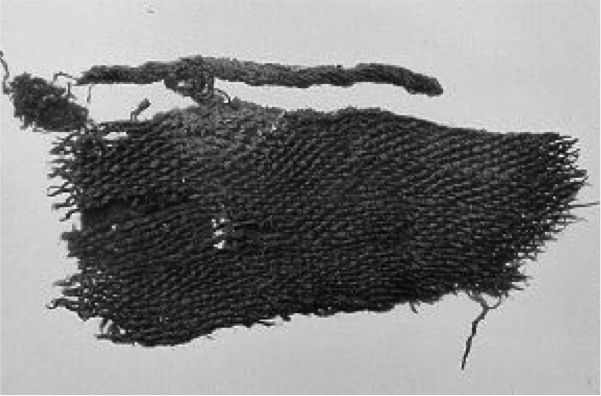
 Birka 1004 fragment
 Birka 839, 860, 1004
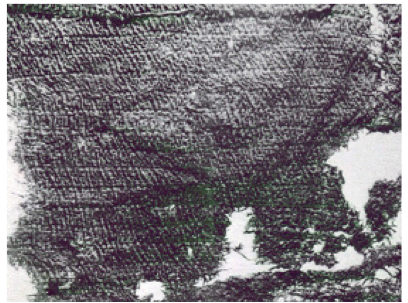
1004 has a wool cord is sewn to the edge of a fine, dark wool tabby garment. The cord has triangular cross-section but is more coarse than other samples(3-4 mm) and is sewn to a edge that was folded and hemmed. The same type of cord is found in graves 839 and 860.
Birka III, p128, p173, p168; Photo from Historiska museet 2011.
Birka 954
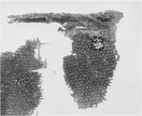
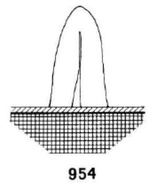
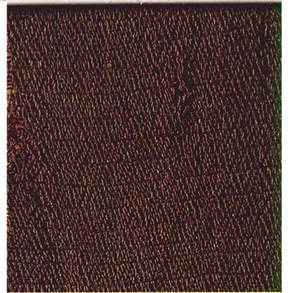
Very dark wool tabby smokkr (likely originally lined) with woolen cord. The cord, approximately 2 mm, consists of several threads together with another yarn wound around them.
Birka III, p128; p171; Kvinnodräkten i Birka. Image from Kvinnodräkten i Birka, photos from Birka III and Historiska museet 2011.
 | 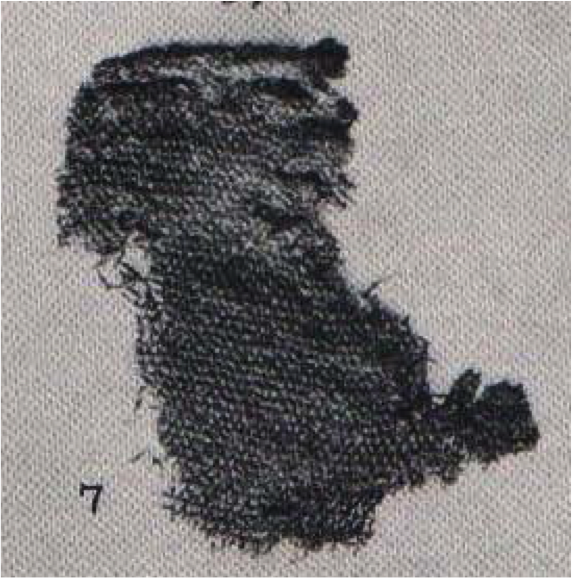 | 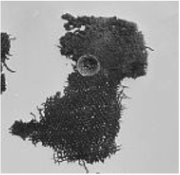 |
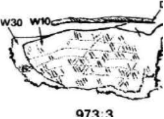
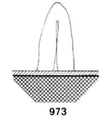
Birka 973
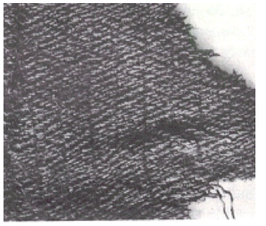
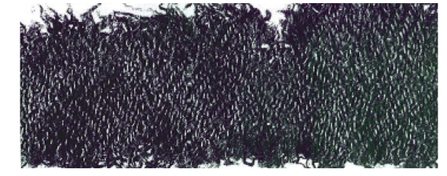
Diamond twill wool smokkr lined with tabby. Cord edge is described as several quite delicate, 2-ply threads (Z), which were then twisted together (S). This would be cabled cord.
Birka III, p128; p173; Images from Kvinnodräkten i Birka, photos form Birka III and Historiska museet 2011.
Diamond twill wool smokkr lined with tabby. Cord edge is described as several quite delicate, 2-ply threads (Z), which were then twisted together (S). This would be cabled cord.
Birka III, p128; p173; Images from Kvinnodräkten i Birka, photos form Birka III and Historiska museet 2011.
  |  |  |
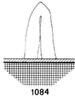
Birka 1084
Wool garment with string.
Thunem, Smokkr; Image from Kvinnodräkten i Birka.
Wool garment with string.
Thunem, Smokkr; Image from Kvinnodräkten i Birka.
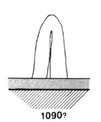
Birka 1090
Blue and maroon striped wool tabby (5mm stripes) has two cords (both the same color) that might have been applied to the garment or that might have been part of a now missing tablet woven band.
Birka III, p36; Thunem, Smokkr; Image from Kvinnodräkten i Birka.
Blue and maroon striped wool tabby (5mm stripes) has two cords (both the same color) that might have been applied to the garment or that might have been part of a now missing tablet woven band.
Birka III, p36; Thunem, Smokkr; Image from Kvinnodräkten i Birka.
Dublin
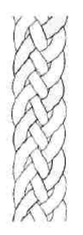
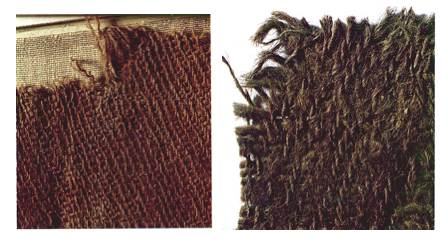
Two of the wool caps found at Dublin exhibit cord sewn to the edge. DHC30 is crafted from dark reddish brown tabby with an edging cord that is made of 6 Z spun strands that are S plied and then plaited. The cord is 3mm diameter and is sewn on with Z spun, 2 ply (S) Black wool thread, approx 1mm wide using 4 stiches per centimeter. Yarn is wooly and not combed.
DHC33 is a dark brown wool cap with edging dark brown edging cord, 5mm wide (same color as cap). 6 strands, 1mm each with each strand being Z spun, S plied (2ply) and then Z cabled. It is whipstitched onto hem edge with long slanting stitches (to make it more decorative). Stitches are 6mm in length, and there are 3 stitches every centimeter.
An additional fragment (DHC51) from Dublin has a cord inserted into a hem. The cord is 2mm wide, Z spun, 2 ply (Z), S cabled and then Z corded.
Heckett, p57.
Hedeby Settlement
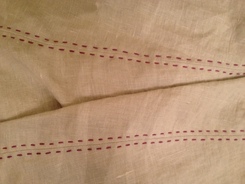
Fragment 19E is a fine wool tabby, likely originally blue or green. This is believed to be from pants. It has a double fold hem and with a cord attached with a whipstitch.
Photos and reference from Seidlung, p35, p108.
Fragment 19E is a fine wool tabby, likely originally blue or green. This is believed to be from pants. It has a double fold hem and with a cord attached with a whipstitch.
Photos and reference from Seidlung, p35, p108.
 |  |  |
Hedeby Harbor
From the harbor there is a fragment of a brown wool tabby smokkr. The applied treatment on this garment is not on the edge, but rather is sitting atop the darts that sit at the waist. I include it here because there are decent descriptions of the braid available and it might be also suitable as an edge treatment.
The braid is made of made of six 2ply (Z spun, S ply) threads, three red and three yellow. interpret the text as describing a 6-way plait in which each thread consists of two z-spun plies which have been twisted together in s-form. The braid is only 1-2mm wide.
Instructions on how to craft a similar braid can be found here: http://blog.eibeck.de/2014/plait-from-the-hedeby-apron-dress-fragment.html
Photos and reference from Hafen, p33-39.
 |  |
Kaupang
Grave C 27997 B has a smokkr with a tablet woven band is sewn to edge of fabric with. At the top of the edge of the band there is a firm, evenly twisted wool cord made from twining several S twisted threads together. It is sewn on with an overcast stitch.
Thunem, Smokkr; Two Women’s Graves with Textiles from Kaupang. Image from Two Women’s Graves with Textiles from Kaupang.
Køstrup
This find has a pleated smokkr that is accompanied by a tablet woven band with two woollen strings along each side of the band. Unfortunately, they are uncertain as to how the cords, dress and band were attached (aside from a few whip stitches that attached the cords to the loop of the dress).
Hilde, Smokkr
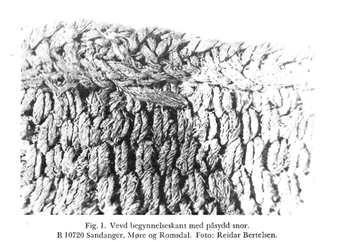
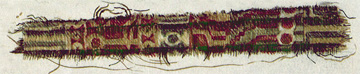
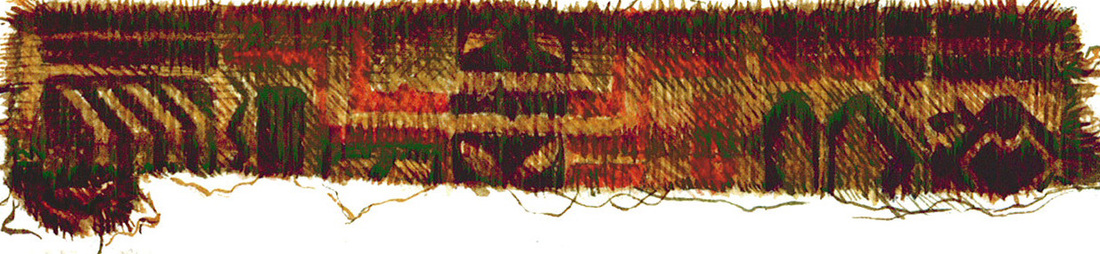
Sadanger (Western Norway) Grave B 10720
This grave held remnants of a possible wool smokkr in a broken diamond twill. There was a braided cord that is the to that found in Grave 838 in Birka.
Birka III, p128; photo from ”Noen Gravfunn Fra Vestlandet Some Kaster Lys Over Vikingtidens Kvinnedrak”
This grave held remnants of a possible wool smokkr in a broken diamond twill. There was a braided cord that is the to that found in Grave 838 in Birka.
Birka III, p128; photo from ”Noen Gravfunn Fra Vestlandet Some Kaster Lys Over Vikingtidens Kvinnedrak”
Sadanger (Western Norway) Grave B 10722
This is a fragment of diamond twill that was edged with a cord made by twining a string around a core made from several strings.
Thunem, Smokkr. Photo from ”Noen Gravfunn Fra Vestlandet Some Kaster Lys Over Vikingtidens Kvinnedrak”
This is a fragment of diamond twill that was edged with a cord made by twining a string around a core made from several strings.
Thunem, Smokkr. Photo from ”Noen Gravfunn Fra Vestlandet Some Kaster Lys Over Vikingtidens Kvinnedrak”

Part II (Silk Binding and Stitches) of this article can be found HERE, and tips for recreating these looks will be posted soon.
Resources
Christensen, Arne Emil and Nockert, Margareta. Osebergfunnet: bind iv, Tekstilene (Universitetet i Oslo), 2006.
Geijer, Agnes. Birka III, Die Textilefunde aus Den Grabern. Uppsala,1938.
Hägg, Inga. Die Textilefunde aus dem Hafen von Haithabu (Karl Wachlotz Verlag). 1984.
Hägg, Inga. Die Textilefunde aus der Siedlung und us den Gräbern von Haithabu (Karl Wachlotz Verlag). 1991.
Heckett, Elizabeth Wincott. Viking Age Headcoverings from Dublin (Royal Irish Academy), 2003.
Historiska museet 2011.
Holm-Olsen, Inger Marie. “Noen Gravfunn Fra Vestlandet Some Kaster Lys Over Vikingtidens Kvinnedrakt,” Viking Bind XXXIX, 1976.
Ingstad, Anne Stein. "The Textiles in the Oseberg Ship". http://forest.gen.nz/Medieval/articles/Oseberg/textiles/TEXTILE.HTM
Ingstad, Anne Stein. “Two Women’s Graves with Textiles from Kaupang”
Jones, Heather Rose. "Archeological Sewing". 2004. http://heatherrosejones.com/archaeologicalsewing/wool.html
Skre, Dagfinn. Things from the Town: Artefacts and Inhabitants in Viking-Age Kaupang (Aarhus University Press), 2011.
Thunem, Hilde. "Viking Women: Aprondress." January 2011. http://urd.priv.no/viking/smokkr.html
“Universitetsmuseenes Fotoportal,” 2013. http://www.unimus.no/foto/
Walton, P. "Textile Production at 16-22 Coppergate." The Archaeology of York Volume 17: The Small Finds. 1977.
Zubkova, E.S, Orinskaya, O.V, and Mikhailov, K.A. “Studies of the Textiles from the Excavation of Pskov in 2006,” NESAT X, 2009.
Zubkova, E.S, Orinskaya, O.V., and Likhachev, D. “New Discovery of Viking Age Clothing from Pskon, Russia.” (Notes and summary by Perer Beatson) http://members.ozemail.com.au/~chrisandpeter/sarafan/sarafan.htm
Walton Rogers, Penelope. “The Textiles,” Archaeology of York (28-29 High Ousegate), Web Series, No. 3.


 RSS Feed