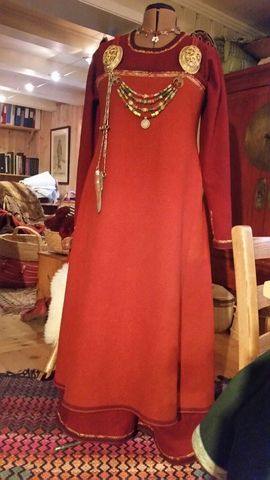
I have gone through a number of variations for design on this dress over the years, and will share my current favorites below. I do want to make one comment though regarding terminology here. The word "aprondress" was coined by a reenactor. This is not something that shows up in the earlier records for textiles or digs. It is, in fact, very much a misnomer and tends to create confusion when people truncate it to "apron". I do absolutely use the term aprondress because everyone knows what I mean when I say that, but I want to make it clear that it is not at all an "apron" in the modern sense and the word "aprondress" should not be shortened (just to avoid further confusion). Other words you will see are smokkr, hangerock, tragerock, suspended skirt and even pinafore.
Now that I have that out of my system, let us talk about how I currently choose to reconstruct the garments, and why.
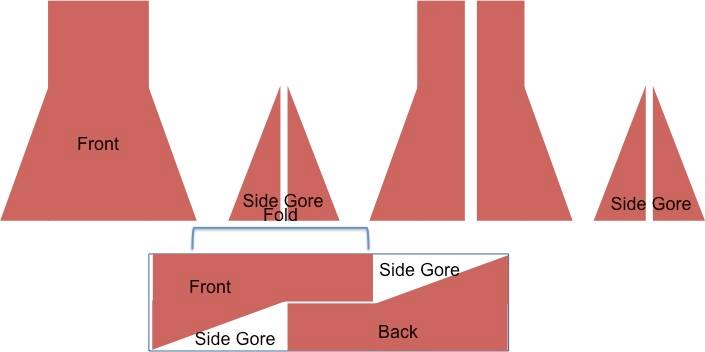
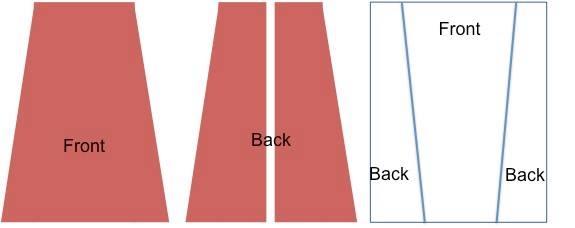
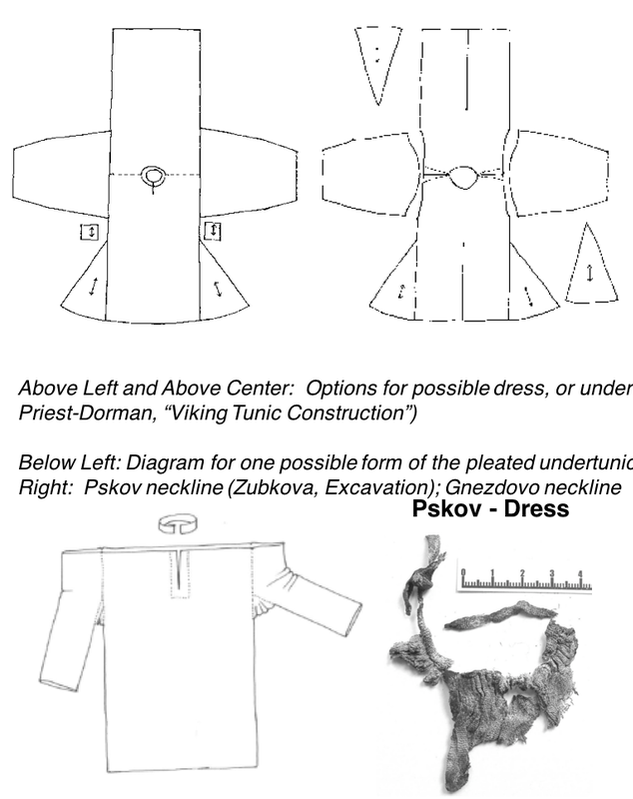
Until a few years ago, one of my favorite diagrams was the one below. This cutting method is extremely economical when it comes to textile use, and makes for a very flattering, slim-bodied garment. The first few I did made use of the full width of fabric and I ended up with these billowing hemlines that, even in my early days at this, read as "wrong" to me, so I corrected that by narrowing the bottom of both the gores and the body panels.
Spinning and weaving gave me an entirely new perspective on pretty much everything I was doing with Viking Age clothing. It took working with the textile process to really make me understand how precious, and how important, cloth was in period. The time investment in crafting one dress, by historic methods, was steep. Realistically, if had more than a couple of garments, I was a lucky woman indeed!
This made me rethink my entire process for crafting clothing. Any garment that I would have had in period would need to be crafted with life's changes in mind, because I would likely own the item for several years before it was damaged enough to be repurposed into other items, or cast off for someone else to wear. This means I need to consider weight gain or loss, as well as pregnancy, with each item. (And yes, this also helped me start to "get over myself" and my modern mentality when it comes to fit of clothing.)
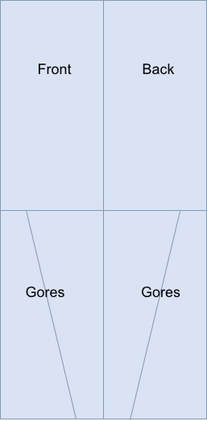
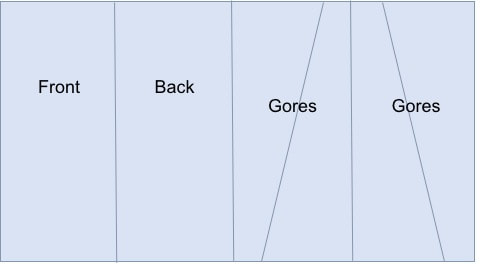
Eventually I tested out the patterning diagram shown below. This creates a very, very simple garment (three seams and two hems). I did allow myself some tailoring on the top of the back panels only, as well as a bit down the center back. The result is what I call my Second Breakfast Dresses. They are comfortable, have silhouette that seems to conform with period icons, and it can accommodate some life changes.
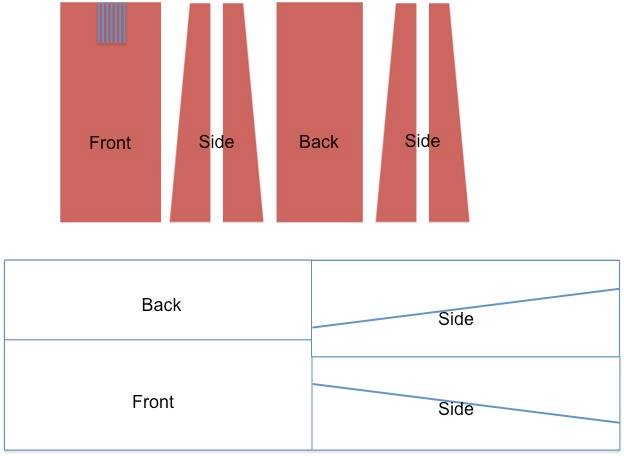
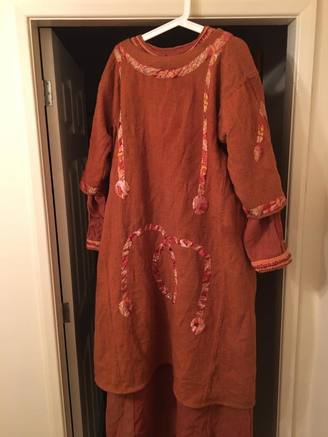
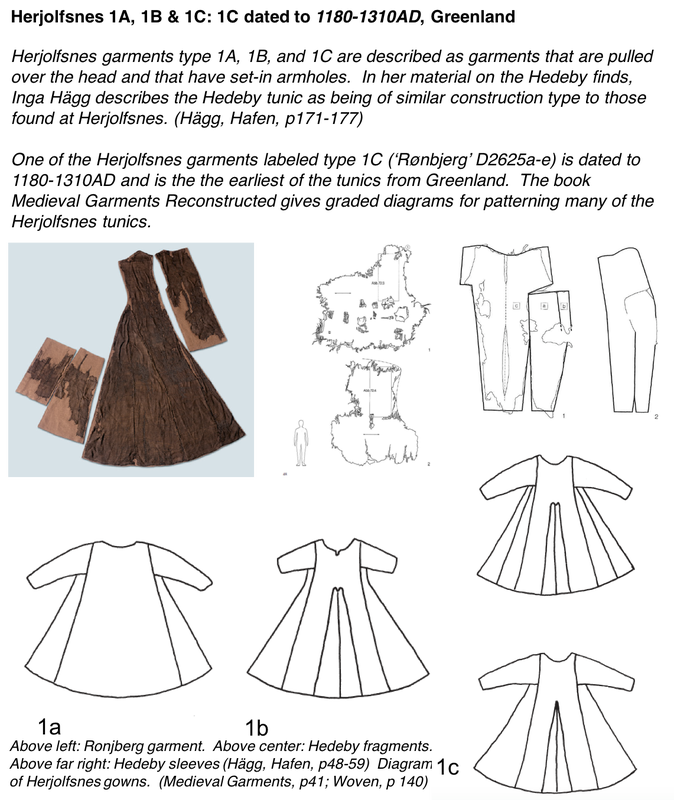
My current favorite pattern is a slightly more complex variation of the one above. It was inspired by tailoring from Hedeby as well as Inga Hägg's comparison of Hedeby garments to those from later Herjolfsnes. As with the above example, I do allow myself some subtle tailoring to the upper back of the garment, while preferring a looser fit to the front. This works for both flat-front dresses and those with pleats (see my pleated dress using this pattern here http://awanderingelf.weebly.com/blog-my-journey/looking-deeper-the-problem-with-pleats ).
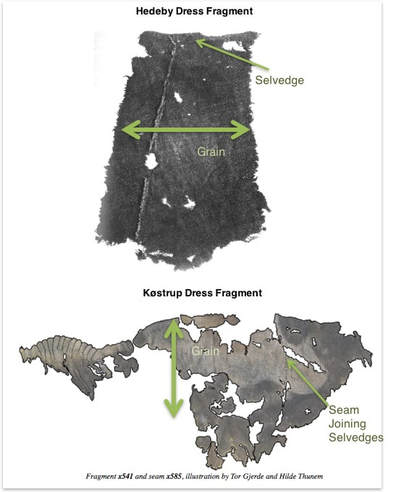
And lastly, just because I have a clear (current) favorite, does not mean that this is the only way to make a garment. (It also does not mean that I will stop experimenting.) I think that in period there were many possible configurations, and while some might make use of more blocky construction, and others might be more tailored, some could use gores or godets, I think that they all likely made good use of the textiles with little waste, and I feel strongly they they all very likely could be worn during more than one phase of life. (Heck, adding or removing pleats could even help assist with fitting life's changes.)



 RSS Feed