My first attempt at a handsewn garment was somewhere around 1994 when I was working on a houppeland with a train and long hanging sleeves. Overkill? Yes. Also, I never finished but one sleeve by hand and then moved on to finish the rest by machine. I just did not have the patience at the time, nor did I actually care enough to sew the whole thing by hand.
Over the next decade or two, I attempted several more times to hand sew items. I was using a running stitch to sew two pieces of fabric together and each time the stitch was a fraction of a millimeter to the side of the row, it drove me bonkers. I felt it made a lumpy, gappy area (even though it likely was just fine to anyone else). Eventually, as I started down a path towards more historical accuracy, I decided I needed to hand sew at least a few items of my Viking kit. I was also researching more and more and learned something that changed my entire perspective.
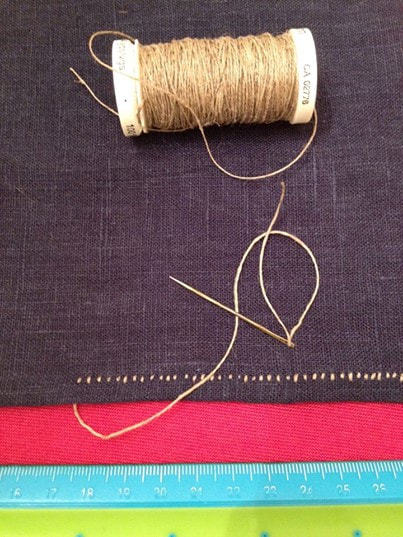
I commissioned several types of period and reproduction needles. I found that they did not function at all well for the type of running stitch that I was used to. My mundane preference is for a long, slim needle on which I can gather up several neat stitches at once and then pull the needle through the cloth and align the next series. I could NOT do this with the period needles. Instead, I found myself executing a stab type stitch, where the needle comes up from behind the cloth, gets pulled completely through it, and then passed from the front to the back again. This takes three times as long as my former process and was three times as frustrating.
Fortunately, I was also doing more research at this time, and learned that in Viking Age textiles, types of oversewing were more common than running stitch by far. That proverbial lightbulb went off and I realized that both hemming and joining seams like this works very well with a period needle, AND was much faster than stabbing at the cloth.
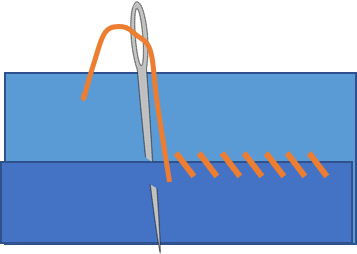
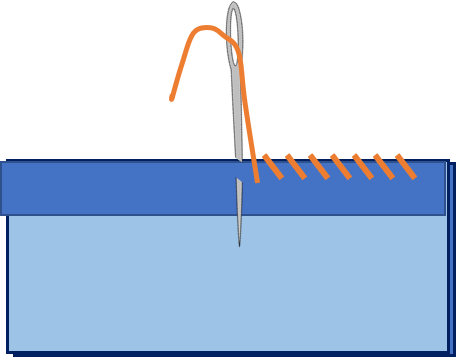
What does this look like? I made illustrations below to show the items that are often called oversewing, overcast, whip stitch or hem stitch.
In the illustration on the left, you can see the hem is folded up and fixed down with the oversewing stitch. The inside of the textile will show a row of diagonal stitches while the outside has only tiny parallel stitches on it. If your thread matches the cloth and you work small, this sewing can be fairly invisible on wool textiles.
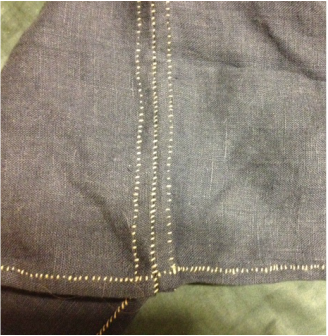
The next illustration is of an oversewn seam. The two textiles to be joined have their seam allowances folded over (and I sew these down with a hem stitch first, but that is not noted in the image for clarity). They are held together and the needed passes through the very edge of the folds creating a joining seam. When finished, the fabric can be opened flat and pressed. This creates seam that is quite strong. Again, on the inside you see a row of diagonal stitches and on the outside it will appear to be a row of parallel stitches. In the photo of a linen Dublin Cap below, you can see that I used oversewing for the hems and for the seam.
The next illustration is of an oversewn seam. The two textiles to be joined have their seam allowances folded over (and I sew these down with a hem stitch first, but that is not noted in the image for clarity). They are held together and the needed passes through the very edge of the folds creating a joining seam. When finished, the fabric can be opened flat and pressed. This creates seam that is quite strong. Again, on the inside you see a row of diagonal stitches and on the outside it will appear to be a row of parallel stitches. In the photo of a linen Dublin Cap below, you can see that I used oversewing for the hems and for the seam.
The best part of this? I can execute this type of seam very easily with a period needle, and my stitches tend to be less wonky than my running stitch.
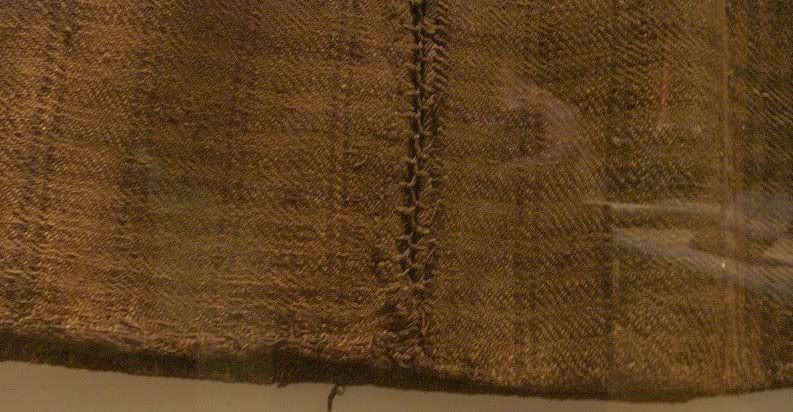
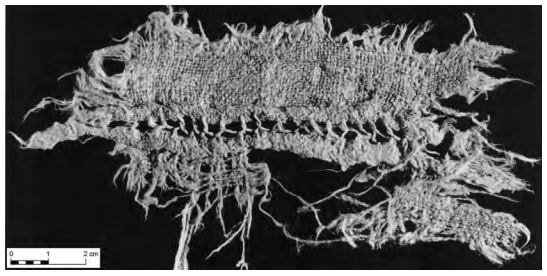
Now, how is this relevant to early Celtic costume? These stitches are the same ones used at Hallstatt and Dürrnberg. These two sites provide a wealth of extant textiles for Celtic Central Europe because of the preservation conditions found in the salt mines. For Hallstatt, Karina Grömer states that three quarters of the textiles used oversewing (hem and overcast stitches). Two additional pieces employed a Trailing Stitch (which uses the same type of stitch, but they are so packed together that you cannot see the fabric between the stitches).
Running Stitch is only used once to sew two textiles together. There is one example of Bronze Age use of Stem Stitch (or potentially back stitch) and two from the Iron Age. Blanket Stitch/Buttonhole Stitch is more common in the Bronze Age than the Iron Age in Hallstatt.
Grömer also notes that the stitching at Dürrnberg is similar in proportions to the Hallstatt finds.
Can I just say that this all makes me really happy?
Also, there are two finds from Dürrnbeg that use "wide feather stitches". This is very similar to the Huldremose Skirt found in Denmark. I plan to test this out on the peplos I am currently sewing!
References
Peter Bichler, Karina Grömer, Regina Hofmann-de Keijzer, Anton Kern and Hans Reschreiter. Hallstatt Textiles, BAR International Series, 2005.
Grömer, Karina. "Austria: Bronze and Iron Ages", Textiles and Textile Production in Europe: From Prehistory to AD 400. Oxford, Oxbow Books, 2012. 27-64
Grömer, Karina. "Textile Materials and Techniques in Central Europe in the 2nd and 1st Millennia BC" (2014). Textile Society of America Symposium Proceedings. 914.
Grömer, Karina, Anton Kern, Hans Reschreiter and Helga Rosel-Mautendorfer. Textiles from Hallstatt, Archaeolingua, 2013.
Susanna Harris, Helga Rösel-Mautendorfer, Karina Grömer, and Hans Reschreiter. “Cloth cultures in prehistoric Europe: the Bronze Age evidence from Hallstatt”, ARCHAEOLOGY INTERNATIONAL 12.
Stollner, Thomas. Durrnberg-Forschungen: Der prahistorische Salzbergbau am Durrnberg bei Hallein I & II, 2002.
 RSS Feed