 My miniature warp-weighted loom
 I enjoy experimenting with many different arts and crafts in the SCA. I have helped cook feasts (though have no desire to do an entire feast myself), dabble in period cooking for potluck events, I started archery a bit over a year ago and I want to try my hand at other things too, things like illumination and creating scrolls. On that list was also woodworking, which I finally started playing with this past year.
The thing I enjoy most, however, the process of truly trying to understand the period methods of textile and clothing creation, which is why I have taken up both spinning and weaving. I spin with both a wheel and drop spindle (only the latter is period for my Viking persona) and weave on rigid heddle and countermarche looms. I do not have the space (nor likely the time at the point in my life) to have a full scale warp-weighted loom, so I decided to attempt some basic woodworking in order to construct a smaller version of a loom that could have been used in my chosen time period. Below shows my research and the process of creating a warp-weighted woven sample.
I would like to note that I did not always get the best photos of the warping and weaving process. When I attempt my next sample, I will take better pictures and create a more solid, step-by-step tutorial.
Period Looms
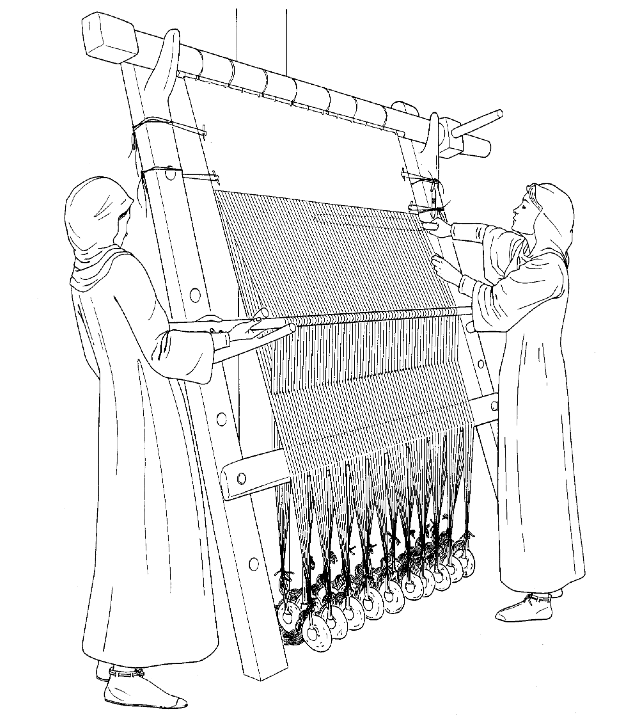
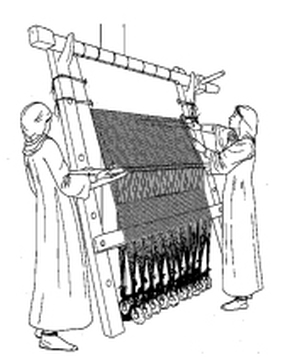 Warp-weighted loom being operated by two weavers. (Walton, 1751)
 There were two probable types of looms for fabric weaving available to the Viking-era Norse. The first was a warp-weighted loom and the second a two-beam vertical loom. The former is considered the most common given the number of loom weights that have been discovered at various Viking era sites. Norway specifically has more discoveries of loomweights than any other country (dating from pre-history until the 16th century). (Hoffman, 20)
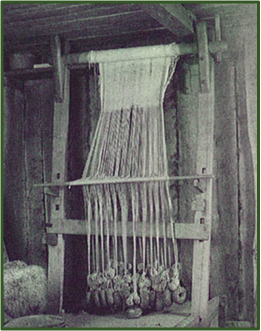
These looms could be impressively wide (wide enough that weaving took too people) and could likely also be disassembled when not in use. There was only one beam, located the top, and from this the warp hung freely down and was tensioned at the bottom with weights.
The frame of my replica loom is constructed of white oak. The braces/legs that support it the frame, however are red oak - because that was all that they had when I went to purchase the wood for that portion of the project. Most of the dowels I used are also hardwood. A woodworker who visited my display at Pennsic complemented my choice of woods and said that even on a small scale it would have been a mistake to use pine if I were planning to get much use from the loom (too much chance of twisting).
I had very limited tools at the start of this project and the initial steps were done only with a 6 inch hacksaw, a drill press and a dremmel tool. The loom has no nails in it, and the loom frame is held together by with wooden pegs (as well as a bit of wood glue between the layers). Historically, these looms would have rested against a wall, but I built a support for mine (I did have use of a compound miter saw for creating the angles at the bottoms of the back legs) and the support is attached with metal hinges and screws.
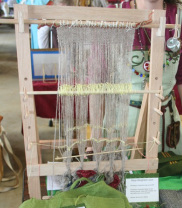
 Reconstructed loom from Moesgård Museum, Denmark (Helle, Plate #4). | 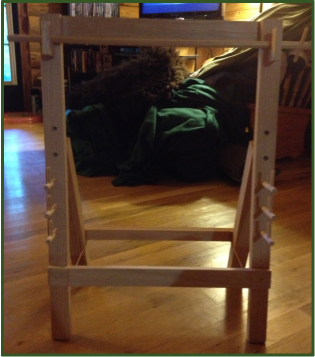 My finished warp-weighted loom |
Warping & Weaving
When I measure the warp for my countermarche loom, I use a warping board and wind the yarn as seen in the image to the left. In period, the process was a bit different.
The warp was often wound on pegs (one example of which I read had women using legs of a bench for measuring warp). The warp was not, however wound directly to the beam of the loom, but rather it passed through a piece of tablet weaving (as the weft) that could then be affixed to the beam, with the fabric warp hanging down. This is illustrated in the diagram below.
The warp was often wound on pegs (one example of which I read had women using legs of a bench for measuring warp). The warp was not, however wound directly to the beam of the loom, but rather it passed through a piece of tablet weaving (as the weft) that could then be affixed to the beam, with the fabric warp hanging down. This is illustrated in the diagram below.

A diagram showing a warp passing trough a woven band (as weft) and around pegs for measuring and then back through the band. The band becomes the header for the woven length of fabric. (Harte and Ponting, 84)
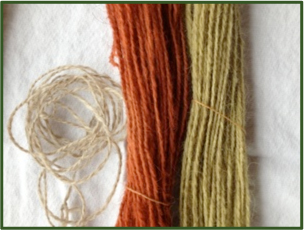 | To the left is the yarn I prepared for the tablet woven starting border. It was handspun from Icelandic pencil roving, then plied and dyed with madder and weld (the yarn to the far left shows the natural color of this wool). |
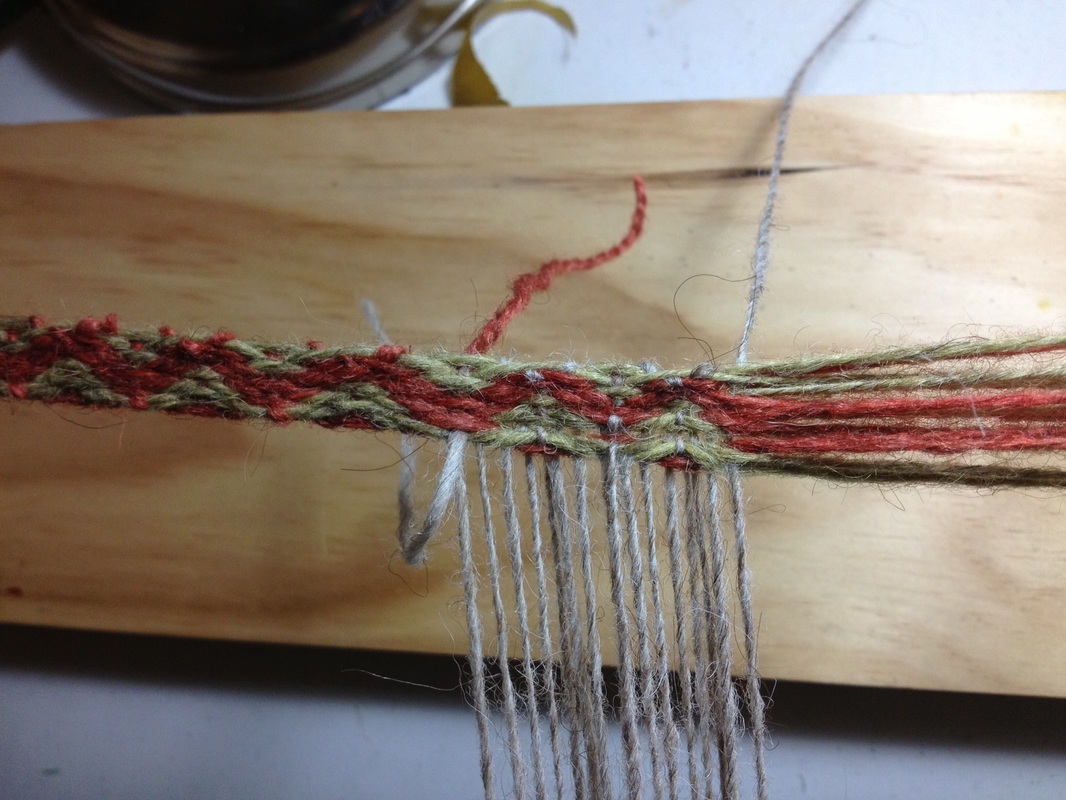 | Here is a close-up of the very simple weaving for the border. The pale yarn extending from the tablet band is the warp for weaving the fabric on the warp-weighted loom. |
 | The warp passes through the band (as the weft), around the peg (this is how I am measuring it), and back into the band. I turn the tablet woven cards a quarter turn with each pass. For this simple pattern I was turning four forward, then four back. |
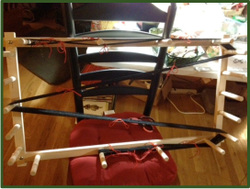
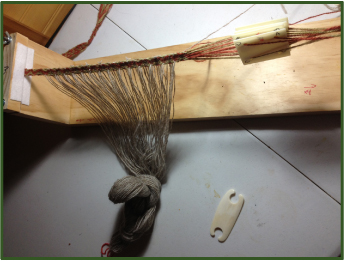 | Here is my finished warp, ready to be moved to the warp-weighted loom. (Yes, I also made that pretty sketchy looking tablet weaving loom.) The warp for the actual textile is the same Icelandic wool I used for the starting border, but this I left undyed and is a single rather than plied yarn. |
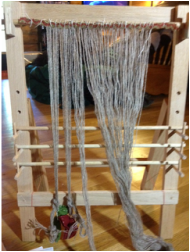
The next step was to tie the tablet woven band onto the beam of the loom. After that, I started to tie on the small, handsewn linen bags containing metal washers that would serve as my loom weights and allow the warp to be under proper tension for weaving. I tied approximately 11 warp threads to each linen bag.
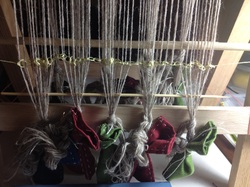
I actually had to do this step twice as I realized I needed to have every other thread tied to weights hanging behind the lower brace of the loom (creating a natural shed on the front).
You cannot see it in this photo, but I also have quite a few metal washers tied to the handle of my beam, which allows it to not roll around as I add the weights to the bottom.
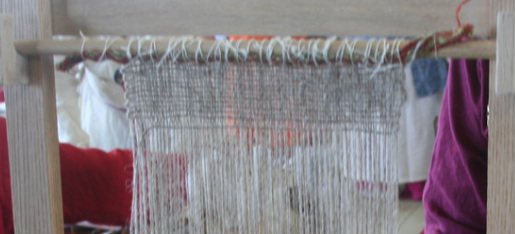
Here is my warp, weighted and with a chain of linen thread to help maintain spacing (yes, I need to work on chaining the warp in this manner). All of the odd numbered threads are in front of the brace at the bottom of the loom, the even numbered threads are chained and weighted behind that brace.
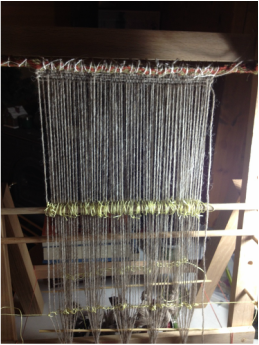
Finally, I was able to add heddles to the BACK row of warp yarns. I used a loop of linen thread which was slipped onto onto the heddle rod and then passed behind a single warp, and then looped onto the rod on the other side of the warp thread (trapping the warp thread between the two sides of the linen loop). And illustration for this process can be found here: http://2.bp.blogspot.com/-mq9OdoDpzKc/TvTA4rJsYpI/AAAAAAAAAME/RwCw7Qwtygs/s1600/heddle+copy.jpg
To weave fabric on this loom you use the "natural shed" that forms because half of the warm is already behind the loom. The weft is wound onto a stick shuttle and passed from one side to the other. A weaving sword (in this case, a pick-up stick) is inserted following that and it is pushed upwards to press the weft into place. (Photo of this step is forthcoming...)
For the next shed, heddle rod is pulled forward and set in place on the heddle rod support. This causes the threads from the back move to the front allowing me a new shed to be created. Again the weaving sword is inserted and pushed upwards (further packing the previous row of weft), and then the stick shuttle is passed back adding a new row of weft yarn. Press again with the weaving sword and it is time to weave another row using the natural shed.
Here heddle rod is drawn forward and is resting on the supports. The woman on the right is using a weaving sword to press the weft yarn into place. (Walton)
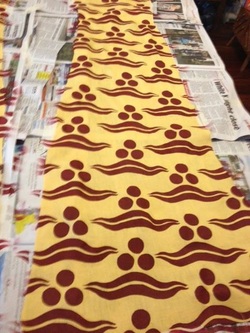
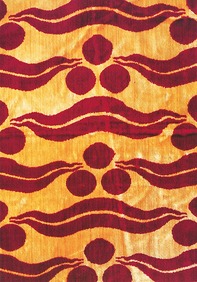
Woven fabric on the warp weighted loom.
(Note that the weft is actually thicker than the warp, which was quite common in period weaving.)
(Note that the weft is actually thicker than the warp, which was quite common in period weaving.)
Future Considerations and Changes
- I need to cut a bit more of an angle on the leg braces so that the loom can tilt back a bit more, giving me better access to the natural shed the angle creates.
- I need to construct longer shed rod holders.
- I will learn how to "knit heddles" as the loop technique I used kept causing issues with the knots of the loops hanging up on my warp threads, causing misses in the weaving.
- I am considering adding either some texture to the beam or drilling holes in it to make tying the tablet-woven header onto the beam easier. The whole band had a tendency to slip to the bottom on this sample.
- My warp was sticky. Unbelievably sticky. I need to use a combed wool preparation for spinning a wool warp, rather than carded, and spin tighter to allow less fuzzies to escape and cause havoc in the Pennsic humidity.
- I need to work out the logistics of creating more than two sheds so that I can weave twills.
Sources
Andersonn, Eva. Tools for Textile Production from Birka and Hedeby (The Birka Project for Riksantikvarieambetet), 2003
Harte, N.B. and Ponting, K.G. Cloth and Clothing in Medieval Europe, (Heinemann Educational Books), 1984.
Helle, Knut. Cambridge History of Scandinavia, Volume 1 (Cambridge University Press), 2003
Hoffman, Marta. Warp Weighted Loom (Scandinavian University Press), 1975.
Jenkins, David. The Cambridge History of Western Textiles (Cambridge University Press), 2003.
Ostergaard, Else. Woven into the Earth: Textile finds in Norse Greenland (Aarhus University Press), 2004.
Walton, P. "Textile Production at 16-22 Coppergate." The Archaeology of York Volume 17: The Small Finds. 1977.


 RSS Feed