A Wandering Elf
  • A Wandering Elf
  • Blog: My Journey
  • Iron Age Celtic Studies
  • A Wandering Elf in the Woods
  • Classes
  • Resources: Sheep & Wool
  • Resources: Costume and Textiles
  • Resources: Migration Era
  • Resources: Historic Glass Beads

Unexplored Areas: Baroness Anna's Hittite Clothing

6/26/2020

0 Comments

 
Picture
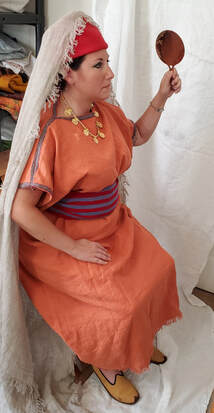
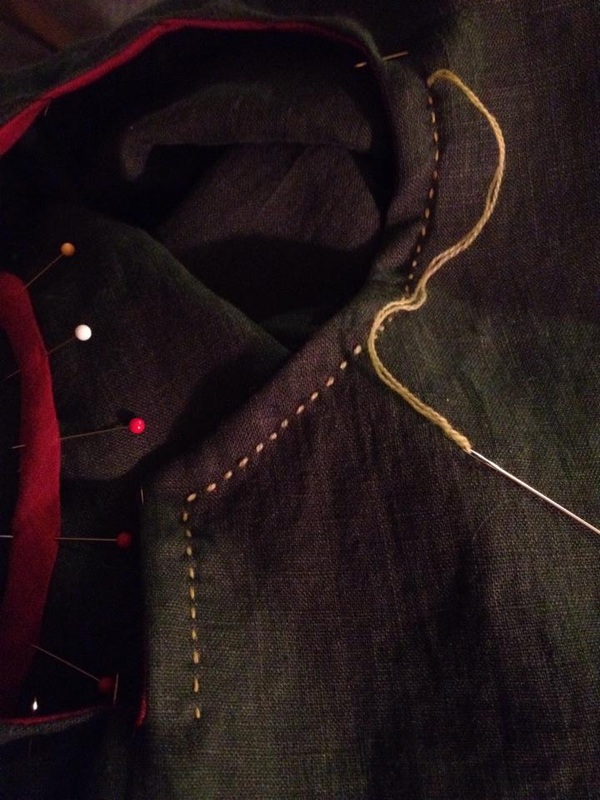
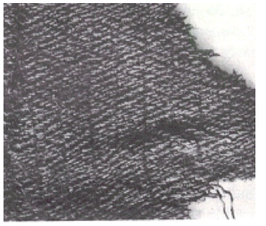
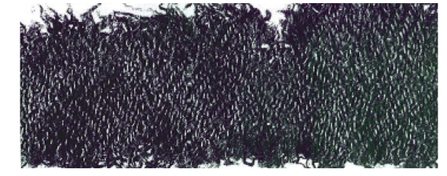
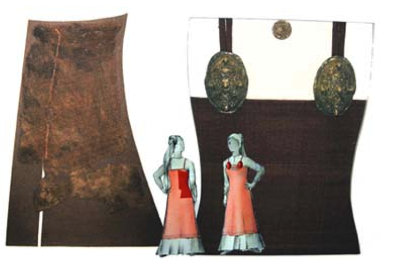
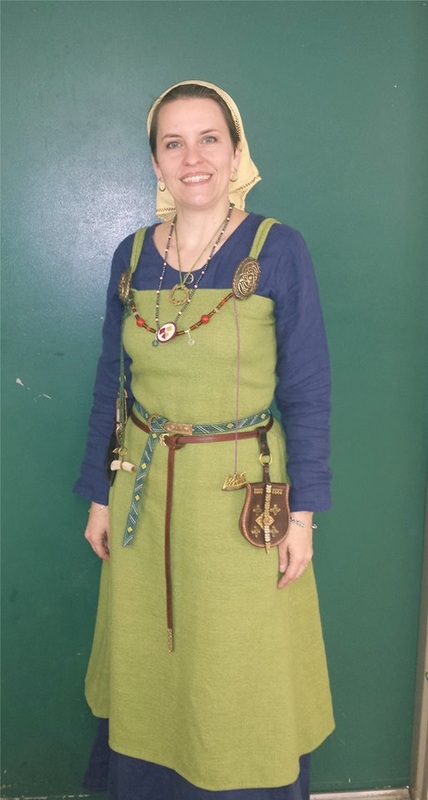
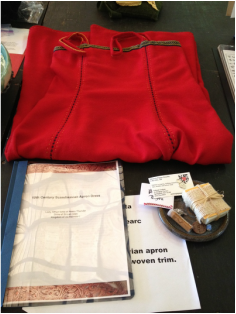
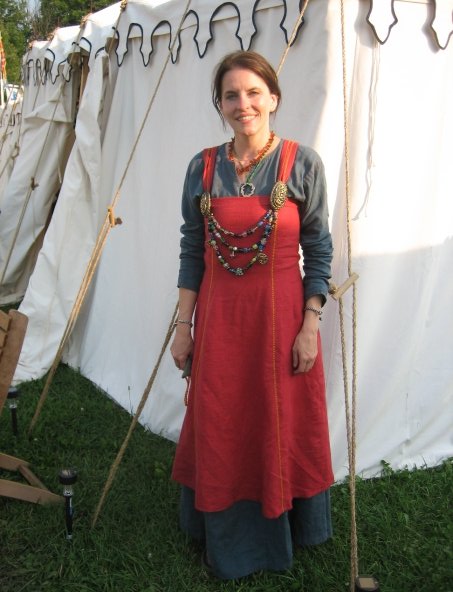
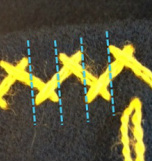
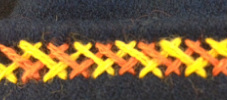
Anna's Hittite noble woman's dress (photo credit to Anna)
So a friend recently did an awesome thing, and I have to share it.  It is not only unique and visually quite stunning, but I absolutely love how she handled the overall process and I want to get it the bandwidth it deserves.

For those who have not met her, Hypatissa Anna Dokeianina Syrakousina, runs the blog Anna's New Rome, and is a Baroness and amazing researcher and artisan in the SCA.  She is also mundanely a historian, and that shows in her work, but I also think that this specific project really shows how others can make a step forward into new areas even without modern credentials to back them.

Her COVID project was Hittite clothing.  This is (I think) and unexplored are in the SCA and I love that people are starting to step away from the things we see at every event and digging into lesser known cultures or periods.  

Here entire thought process is part of her blog post which can be found HERE.  Please take your time to read it and check out the photos of the two outfits she presents as part of her first draft of this work.


I think it is obvious that I love to blog my own projects and experiences (even if rural internet is my downfall lately as it makes posting very difficult).  But I also love to look at the work of others and want to share some things I love about this project in particular.  If you are trying to figure out how to start something new, or want to organize it for a blog, this definitely serves as a nice example on How-to.
  1. It is well, and simply, organized.  She gives a brief introduction on who the Hittites were.  This is key because it is a lesser known culture in an SCA context and this allows the reader, who might love the outfit enough to want to craft one, to be able to also relay that information when someone complements their garb.
  2. She was starting fresh with this project (her area of expertise is Byzantine), so she gave a run-down of the types of sources there are, and what she knows about them. 
  3. As she lists her choices, she gives the rationale behind each.  This helps others understand they why's behind what they see and also might inspire other ideas for things to try.
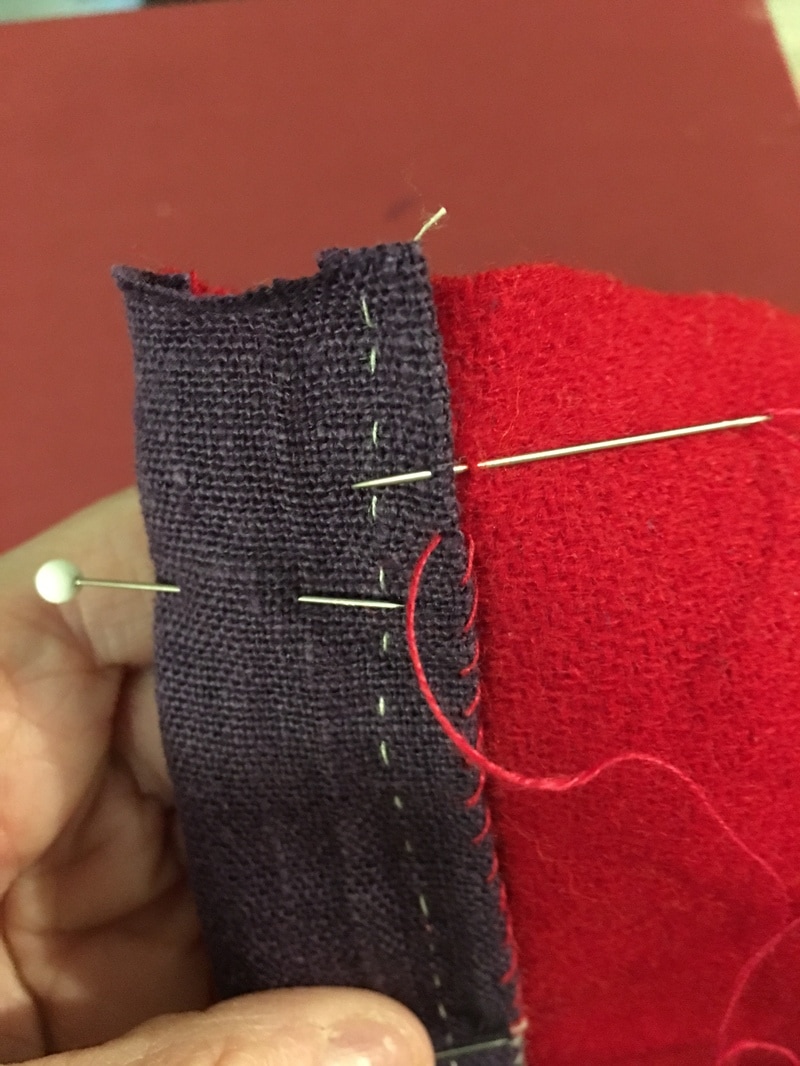
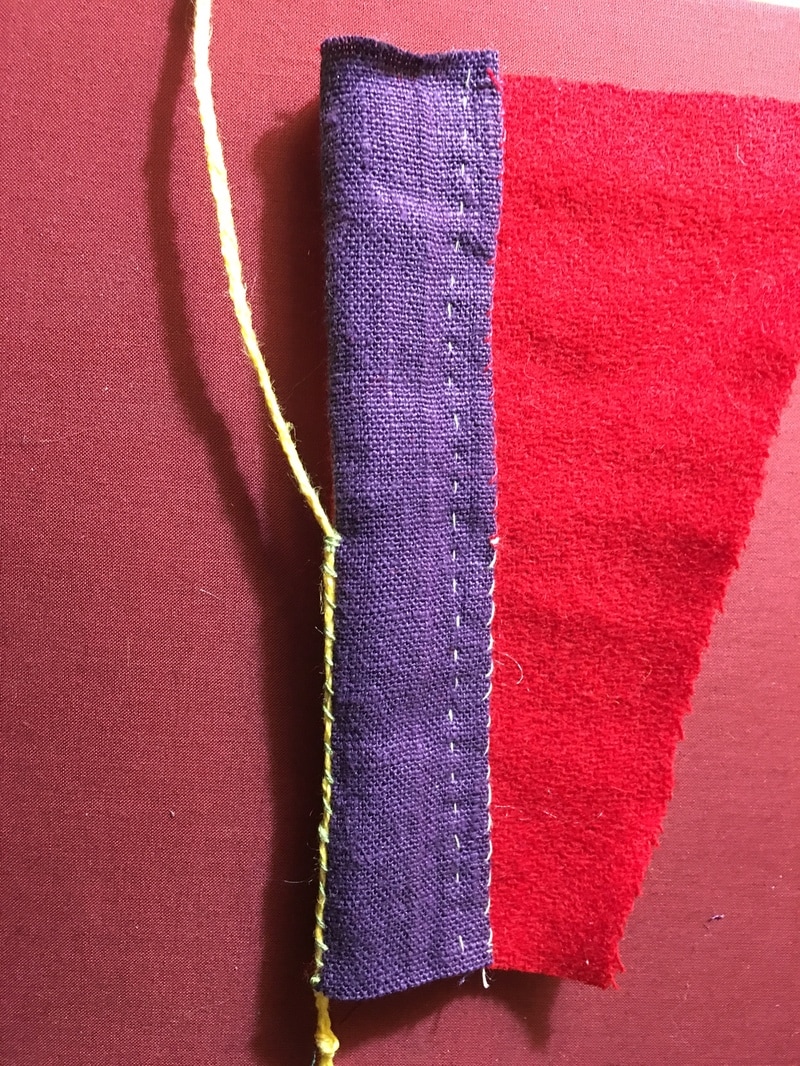
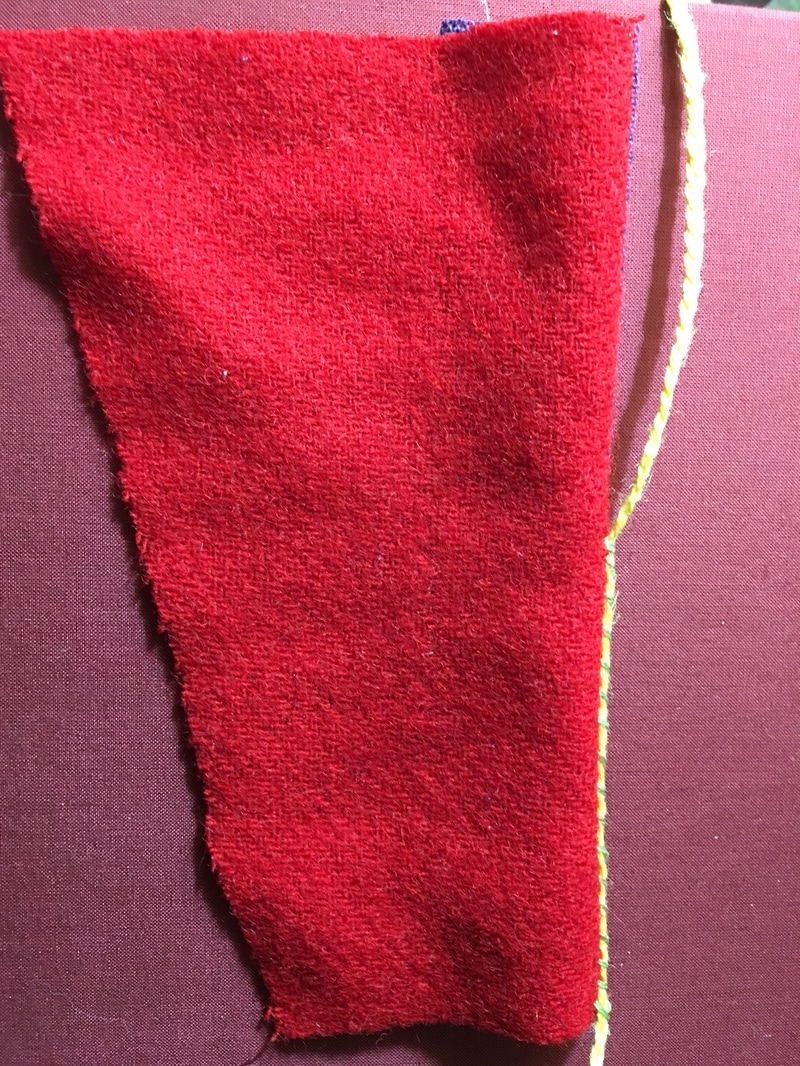
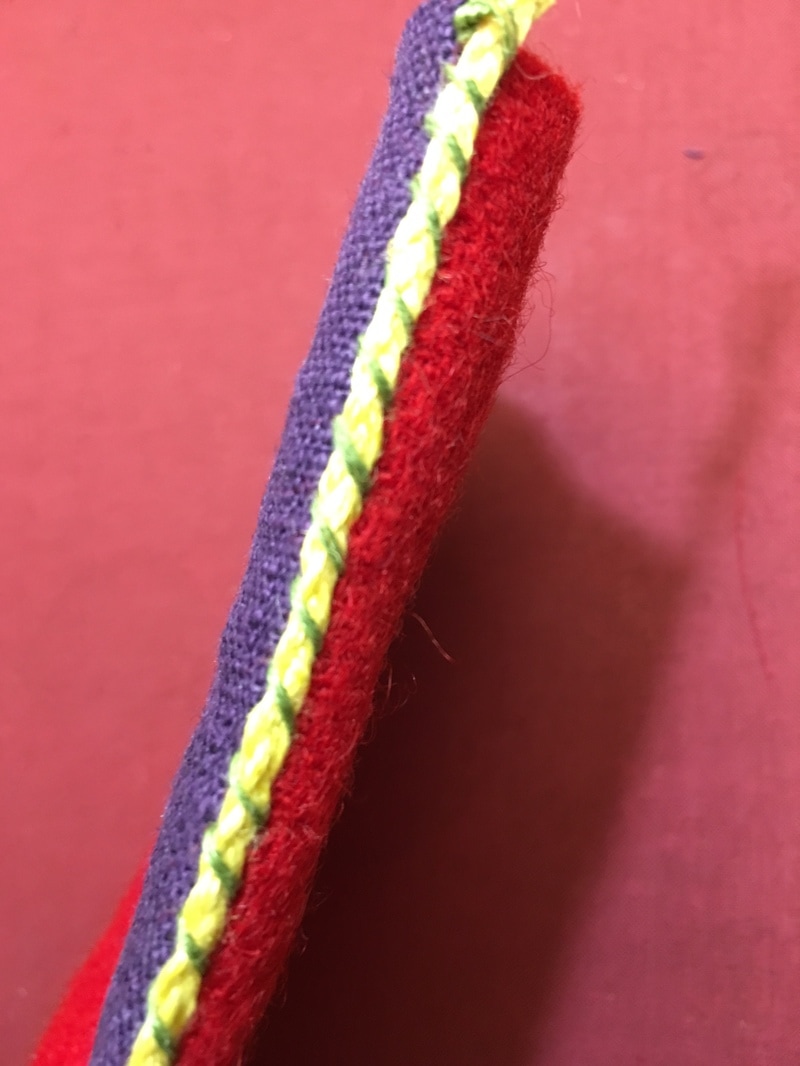
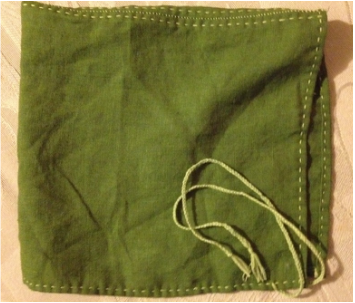
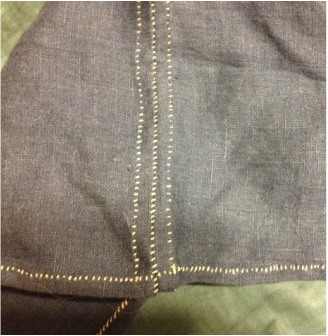
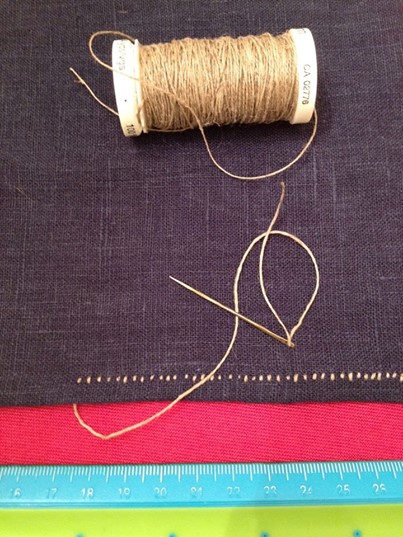
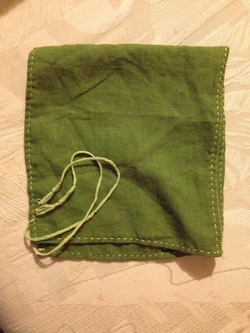
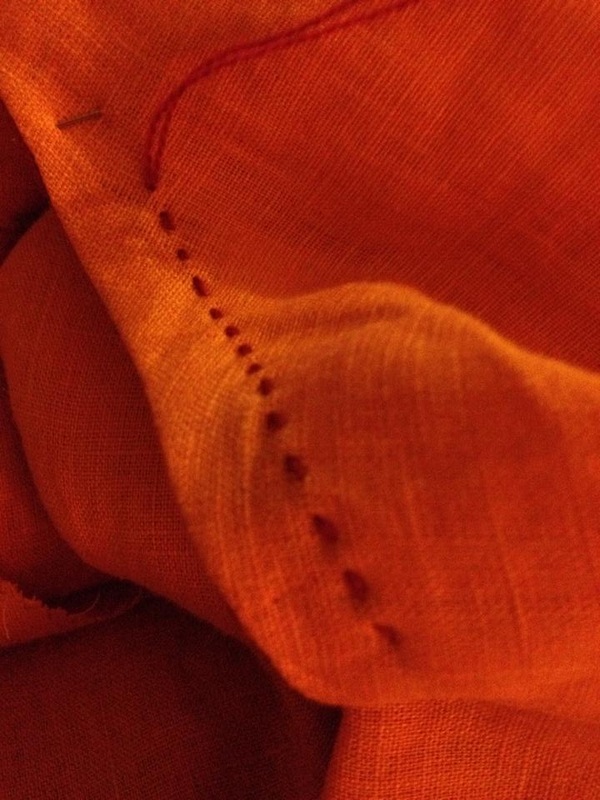
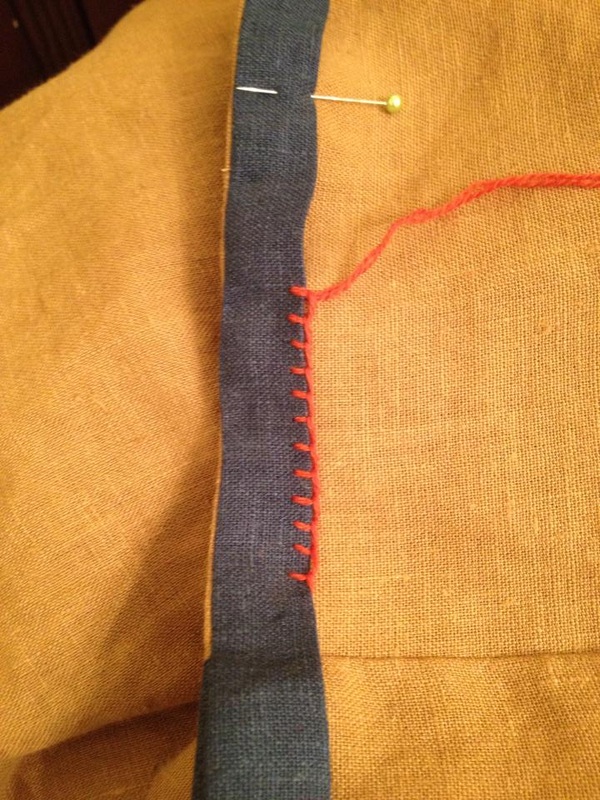
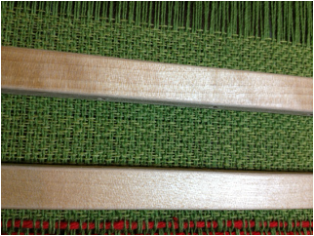
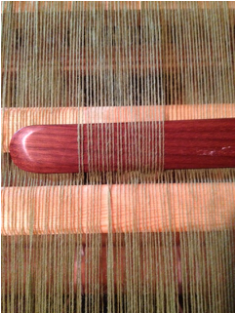
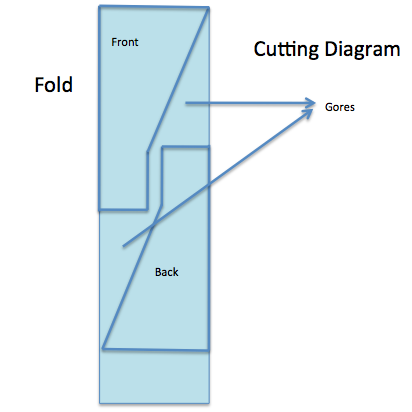
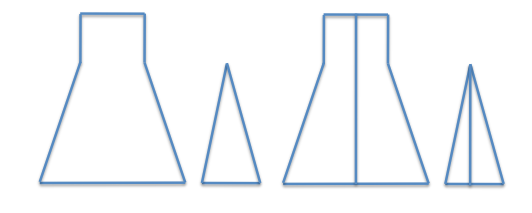
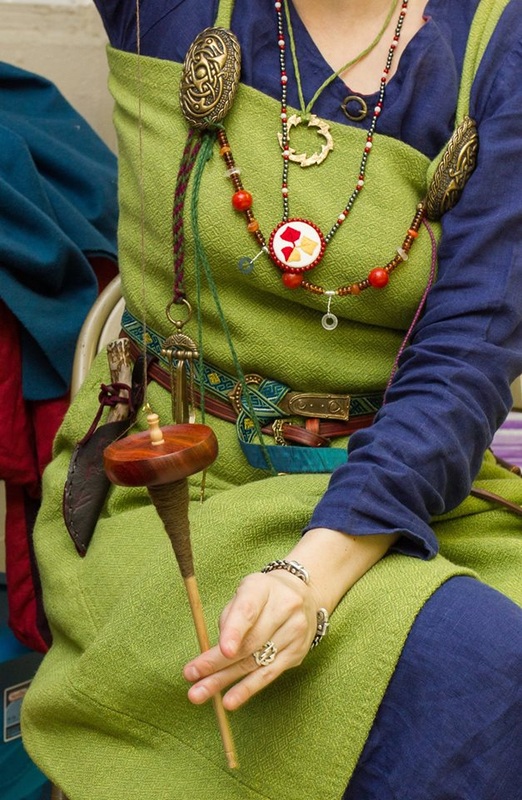
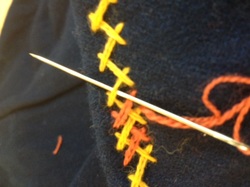
  4. Photos!  Nice, clear photos that make the garments easily readable to others.
  5. Observations - this is one of the best parts of this blog post. She already is learning what works and what might need changed, so that she (and the reader) can take the next steps better informed.

I do want to call out one additional, and very key, item.  Early in her post she makes the statement, "At this point, as the research appears to be super-new, I understand that this body of work will raise more questions than it will serve as answers, and I am willing to bring forth that needed dialogue, and accept changes will need to be made this early in the study. As far as I know, I am the first SCAdian, and possibly scholar/experimental archaeologist to try this. Please be patient with me as I iron out the kinks, and work to determine the best patterns and ideas before adding a ton of information that may not be correct. I know that some of this reads a bit choppy, I plan to flesh it out as I continue to build my arsenal of sources."

I think that sometimes we can be paralyzed with the idea of starting a new work, especially if it is something less well known.  There can be fear and trepidation of somehow doing it all wrong.  Be honest as to where you stand with the work and how far into the process.  Every single thing we do in the SCA had a start somewhere.  At one time all the Viking women were wearing two tea towels pinned at the shoulders and the more we learn, well, the more we learn.  

Part of working with history in the manner in which we do is accepting that this is an ever-evolving science, in our own personal work, as a group of re-enactors as a whole, and in the broad scope of historic studies in the world today.  We all start somewhere, and it might not be right the first time around, this is why we document things, share them, discuss them, research more, and then revise the whole process. Admitting that we do not know everything there is to know about something (even if we are currently wearing it) is not something to be ashamed of, but rather it speaks to our curiosity and our willingness to keep learning.  Baroness Anna is already digging into more resources and talking to others who work in this field to help expand her work in the area, and I absolutely am looking forward to seeing more.


0 Comments

Wearing wool (for those who don't like it)

3/27/2017

3 Comments


(Note If you bring up wool to many people, especially in America, and the first thing they think of is the itchy sweater that their grandmother knit for them (mine was red).  These memories can often make people shy away from wool fabric for reenacting purposes, but the reality is that for most of us, that would have been the choice material for our persona.  In fact, some very strict groups have requirements that state you have to make your garments out of wool to even participate.  Inevitably, this brings up the conversation about someone's wool allergies and what to do about that.

First thing that needs to be understood is that no one is actually allergic to wool itself, unless, of course one is also allergic to the hair on their own head.  Wool is made of keratin, just like our own hair and finger nails.  There are, however, some people who have reactions to it, so understanding the actual cause of the reaction is important.  
  • Scouring Agents:  When wool is processed it is "Scoured".  This is removes the lanolin (the natural oil of the sheep) before spinning.  Historically, this could be done with a variety of methods, including something as simple as repeated soaking in hot water.  In modern cloth, they use harsh chemicals to manage this work.  Some of the chemicals might be left in the material, which can cause reactions.
  • Lanolin: As mentioned before, lanolin is a wax secreted by glands of the sheep.  It helps water to be shed from the wool and also helps protect the animal's skin.  Not all scouring processes remove every bit of lanolin, so it is possible to have a reaction to lanolin if you are sensitive to it.  
  • Sizing: This is a chemical that is added after the cloth is made, to help best present it for commercial display.  This can also cause allergic reactions.  I know someone who will get puffy red hands after handling some types of cloth in a fabric store or even clothes hanging on racks in retail stores.
  • Dye: Occasionally certain fabric dyes might cause sensitivity in some individuals.
If your reaction is caused by one of these, it might be possible to remove the problem by careful washing of your cloth.  Dharma Trading (as well as other outlets) sell detergents such as Synthrapol which is specifically designed to remove chemicals, excess dye, oils, etc, from fabrics or fibers.  While this is specifically used before dying cloth to make sure that the color takes well, it can also be used to try to remove other chemicals as well.

http://www.dharmatrading.com/chemicals/synthrapol-detergent.html

There is one other factor, and likely it is the most common one, that can make people shy away from wool.  That is the "scratchiness" of the fiber itself.  This reaction can be excessively annoying and can happen for a couple of reasons.
  • Coarseness:  The wool itself might be of a low quality and thick.  The wool fiber is covered with fine, overlapping scales.  Coarse wool has more coarse scales, while fine wool has scales that lay more flat.  The former can be more irritating.
  • Spinning: If yarn is loosely spun, there might be hairs that escape the shaft of the yarn and that poke out.  This creates a fuzzy look that we often associate with woolens, but these individual fibers might irritate sensitive skin in some people.
My suggestion is to test out different wools.  Look for Merino wool, which is exceptionally fine and has very fine scales.  Many people that normally dislike wool can still wear a very soft merino sweater.  Another option is to look for worsted wools.  This process of spinning keeps the hairs aligned in the shaft of the yarn, with no fuzzy bits sticking it.  It produces a very fine, smooth cloth which is quite period for many reenactors.  Some times this will be listed as "worsted" cloth, but most men's suiting wools can be in this category as well.

Also look for a more fine cloth.  Some vendors, such as Burnley & Trowbridge, sell swatch sets of their cloth.  I recommend ordering swatches from them and other outlets to see which materials might best suit your needs an level of sensitivity.  There are 100% wool fabrics out there that surprisingly don't actually "feel" like wool at all.

Another factor that comes into play is the perception that all wool will be hot and heavy.  Much of the cloth from Norse finds is exceptionally fine with very high thread counts.   They had lightweight wools!  As mentioned above, poke around online and order swatches to see the variety of cloth that really exists.  I prefer wool for my veils and headdresses.  A wool gauze is no warmer in the summer than linen and my handwoven wool dress is no warmer than a linen of the same weight.  Avoid coatings or heavily fulled materials if heat is a concern.

Another option, for those that do not have a chemical sensitivity, or who can wash out the offending chemicals, but still find wool uncomfortable, is to make sure that the wool fabric does not touch the more sensitive areas of your body, such as your neck.  For women doing Viking age, this can be simple as you can wear a wool aprondress over a linen underdress.  However, if you need a wool tunic you can wear a wool one over linen and then you can add a linen facing inside the neckline and inside the sleeves to prevent the wool from coming in contact with your skin.  Tacking it down on the inside with small stitches will leave it invisible from the outside completely and adding a wear cord at the opening edge will further remove it from your skin.

(Note that this post is not an insistence everyone wear wool, but I do know many people who previously shied away from the fibre by working with it and figuring out how to make it work for them.  As always, your own best comfort is important so be reasonable as you test your limits!)

Picture
This sample shows a red Shetland wool cloth and a linen facing. This is the inside (the wrong side). The linen was hemmed to prevent fraying, but it could also just be rolled under once and stitched in place. It is sewn to the edge of the garment (neck or sleeve) and then turned to the inside and whip stitched down. You can see here that I am only picking up a TINY bit of the base fabric with my stitches. I used a dark cloth here for contrast, but in reality I would choose a matching linen, or opt for a neutral color (such as undyed). A facing cut on the grain (a straight strip of cloth) can lay well if you are hand sewing and do it careflully, but if you are doing the joining seam with a sewing machine, you might want to opt for a bias facing. Another option is to cut the facing the shape of the neck hole and use that.
Picture
You can see here that half of my whipstiches to hold down the facing are in linen and half are a red thread that matches the cloth.
Picture
This is the fabric viewed from the "right side". My stitches holding down the facing are completely invisible when sewn with matching thread (top half of it), and almost completely visible when sewn with natural linen (bottom half). No one ever need to know you added a facing at all.
Picture
To the edge I applied a length of linen braid (though cord will work as well). This could also be of a very fine wool such as merino or of silk if it is a status garment. This serves the purpose of keeping the edges of the cloth from wearing, but also can add one more layer of protection between your neck and the wool cloth.
Picture
Very rough diagram showing cross-section of the example piece: the cloth (red), facing (blue), and wear cord (yellow green).
3 Comments

A Deeper Look

3/27/2015

0 Comments

 
I have been working on Viking garb and arts for quite some time at this point, and given that I am heavily involved now in the fine details of textile creation, I am starting to take a closer look at the things I "learned" when I first started this journey.  Some of them I have mentioned before, and some just smacked me in the face recently.  Somethings are misrepresented by reenactors, and some, quite honestly, I just did not gaze at closely enough when I first started (and this, really, is not surprising given the volume of information that is presented to a newcomer to this field of study).

So what have I learned recently?


  1. My favorite combination of seams is not present among extant Viking textiles that I have studied.  For hand sewing I prefer (and have gotten good at) hemming the edges of each piece of my garment using a running stitch.  I then join the pieces together with an over cast stitch.  It works well, makes for a strong seam, and I can do it quickly.  The problem with this is that while both overcast and running stitches are period, I cannot adequately souce where they were used together in the way that I use them.  Could I still make a case for using this based on other combinations we do see in extant textiles?  Absolutely, but for future items that I will be documenting, I will definitely be switching to use of overcast for both the rolled edges and the seam joining.
I actually think there is a good reason for this.  I have three period reproduction needles, with two types of eyes.  Neither style works nearly as well for a running stitch where I would load up more than one stitch on the needle and then pull it through several stitches at once, as I would with my long, fine modern needles.  Rather, to get a similar looking stitch I would need to use a stab stitch (where the needle goes entirely through the fabric and then back up through).  That takes a great deal longer than using an overcast stitch to hold that initial hem.
Picture
Dublin cap using a running stitch to hem edges and an overcast to join.
Picture
Dublin cap using overcast stitch for both hemming the pieces and joining them together.
2.  I learned quickly enough that there is no evidence for large scale appliques or embroidery on Viking costume.  I've gone further to learn how few embroideries we have at all compared to the volume of total textiles recovered.  This tells me that the few items we do have were quite rare and given the context from other items in the graves, they were reserved for the very wealthy.  (I have written further about this here http://awanderingelf.weebly.com/blog-my-journey/viking-embellishment-and-embroidery-part-3 )  But what I more recently accepted is that the practices of seam embellishment (decorating an existing seam), is probably not as common as reenactors (myself included) would like.

See those two Dublin caps above?  I do not actually consider those seams embellished.  All rows of stitching are necessary and functional.  Even if I used a brilliantly colored contrasting thread, those seams still serve a purpose. (Of course, use of colored thread on seams was also a rarity, but that is a topic for another time.) Examples of true seam embellishment would be laying cord over the seam and stitching it down or doing a decorative row of stitching by using something like osenstitch to cover the seam joining.  I personally love this type of decoration, but plan to use it a bit more judiciously in the future. 

What brought me to this conclusion?  Well, as mentioned earlier, I have been in the process of reevaluating things I learned early on in my journey.  One of those things was that herringbone stitch is period for Vikings.  At the time (when making my first dress) that was good enough for me!  Looking deeper, I have discovered that the stitch so favored by reenactors was never found used as an embellishment on a garment (at least not that I can find).

What examples do we have of this stitch specifically from Viking era and place?
  • Hedeby harbor has a textile fragment that is hemmed using a herringbone stitch.  however, the herringbone is over the edge of the hem, and hence, likely that the part of the stitch we consider decorative was on the inside of the garment, with what would look like parallel rows of running stitch on the outside.  (As described by Inga Hagg)
  • The find 6-8 Pavement at York has a fragment of a hemmed garment that is worked in Herringbone.  As with the Hedeby find, the herringbone is on the inside of the garment.  (Cordage and Fiber from 16-22 Coppergate, by Penelope Walton Rogers)
  • The Mammen cushion has a variant of very closely worked herringbone over a seam (you can see that here http://www.cs.vassar.edu/~capriest/vikembroid.html ).  So here a decorative stitch is used over a seam of a household item, not a garment.  (And it is important to note that this stitching was only 2.5mm wide.  There is no open space in the stitching, making it resemble a tight, narrow braid.  This is entirely unlike the herringbone typically worked by reenactors over seams.)
  • The Skjoldehamn tunic has a stitch similar to that used at Mammen at the neckline.  The issue with this one is that this find may or may not even be Viking and if it is, it seems to reflect a very different type of fashion than we find further south and that alone makes me leery of using it as a basis for embellishment on a Viking kit without further substantiating evidence.  Beyond that, the tunic itself is dated post-Viking era.  As with Mammen, this stitch is still much more narrow than reenactors use, and, again, it is more filled in.  (http://www.ceilingpress.com/Resources/Nye%20tanker%20om%20Skjoldehamnfunnet.pdf )

  • Additionally, there is a 10th century reliquary pouch from York that uses a what Penelope Walton Rogers calls "catch stitch".  Typically catch stitch is another name for Herringbone, but in this case, the diagram in the materials shows a different type of blind catch stitch being executed. Stitches are predominantly on the inside of the item and this would not be a decorative stitch at all.  This item is described in an article in NESAT III and Textiles, Cordage and Fiber from 16-22 Coppergate, both by Penelope Walton Rogers.

Four samples only (out of hundreds of textiles), and none of them has the stitch displayed in the manner we commonly see it at events (and two of the four are different than a normal herringbone, two are inside the item, and one might not be Viking...).  This does not make a terribly good case in my eyes for extensive use of this decoration.

Now, will I remove all of my hard work from garments I have already made?  I cannot say that is the case.  I will, however, be more judicious in use of the stitch in future projects as I attempt to better recreate clothing of the past.


Over all, I think the key is, for anyone with an interest in recreation to not get so comfortable in what they "know" that they never take time to look back and reevaluate things (or accept new evidence as they find it).  It can be a little frustrating, of course, especially when one has painstakingly applied a mile of herringbone stitching to a garment.  But in reality, I find these discoveries exciting in a way.  I lets me see how far I have come, and gives me a more clear path in my journey of recreating historic arts!
0 Comments

New Things

9/11/2014

0 Comments

 
I thought I would share here that I started a new discussion group on Facebook for Viking Era fibre arts.  This group is a place to research, explore, and share projects pertaining to historical fiber arts, textiles, and experimental archaeology. Focus is on craft of the Vikings, but other cultures that had influence on the Vikings and their work are also welcome (Saxon, Merovingian, Finnish, etc.)

Every aspect of these arts are welcome on this forum, from the history of sheep, to fiber tools, fiber processing, spinning, weaving, dyeing, naalbinding and embroidery! Please share your thoughts, ideas, research and works-in-progress!

You can reach the page by clicking the image below.  Please join us :-)


Picture
I also have a few projects that are coming along nicely.  I have discovered that I very much am enjoying spinning flax.  This week I finished spinning some 2-ply sewing thread from flax.  It is a bit less than a millimeter in diameter and I am now using it to sewn a Dublin cap from linen fabric.

In addition to using the handspun thread for this project, I am also employing more period sewing techniques than I typically have been using.  The hems are only 5mm wide, and rather than hemming with running stitches (which i can do quick, while still being very neat and even by using a very long, fine modern needle) I am using a hem stitch as was more common on these caps.  I am trying to keep it to 4 stitches per 10mm and having them no more than 2mm long.  I just might go blind doing this, but it seems to be working out well (even if progression is slow and the stitches are not as even as I would prefer).

Picture
0 Comments

It is that time of year...

6/12/2014

0 Comments

 
Picture
Right now, with only 43 days remaining, half of the Known World is scrambling to make Pennsic garb.  While I no longer work on projects till the moment I walk out the door (as I find it too stressful and it dims my enjoyment of the event), I do still add a bit to the wardrobe each year.

One thing I do need, however, is headwear.  I opted in December to cut my long hair down to a pixie cut (hair was thinning and damaged and honestly, I was over it).  So now in addition to the sun protection afforded by hats, I also want to cover up my lack of hair.  I am working on a silk tablet woven fillet to wear with a veil, and am very much liking the weaving process for this one.  I may do a second in wool if there is time.

I also made a Dublin hood out of some scrap linen and it is cute and reminds me of some sort of gnome hat.  I cut out a few more last night and plan to make myself another one and make one or two for friends.   Very simple to sew, they are actually great practice for my hand stitching! 

I may even cut out a few more and take them to teach others in my camp some hand sewing skills during lazy Pennsic afternoons.  :-)


For garments, I made myself a blindingly purple Birka style underdress (from the linen stash my BF purchased last year), there is a green aprondress forthcoming to wear with it.  The color is iffy for Viking, but it was material I already had and I am always more than happy to supplement my Pennsic wardrobe and further reduce the chances that I will be doing laundry while there.  My BF has several new pairs of pants, a new tunic and new undertunic in the works.  And my dear friend Galyana will be returning to Pennsic after a hiatus of a few years so she has earned herself a new Viking outfit as well.

Now I just need to find the scraps of my handwoven fabrics to make a pouch for the Kingdom's gift basket and to make a smaller pouch to hold my flint and the tinder fungus for firestarting.

It is going to be a wonderful War!


Picture
Picture
Picture
0 Comments

Planning Projects

6/5/2014

4 Comments

 
Picture
There is an undoubted excitement that comes with planning a new project.  This unbridled enthusiasm can easily lead to one being swept away with a grand idea of how this fresh undertaking will culminate into a grand display of one's skills.

I think that most artisans (of any level) have ridden high on this tide at some point in their creative lives.  Unfortunately, I can say that without an abundance of planning that many multi-level projects can fail before they even have a chance to be fully explored.  Though I am indeed speaking from my own experience on this matter, I also have witnessed the great ideas of others fall by the wayside (on more than one occasion).  So eager are we to plunge into the act of creating, that crucial things are often missed.  These omissions in the planning process often lead to a waste of time, effort and money and result in frustration that can dissuade future growth.

I am not saying that every thought or plan should be belabored to the point where all interest is lost, but having even a small bit of planning in advance can result in a road map that will give a clear vision of what skills, material and time you would need to finish a given project.  Beyond that technical planning aspect, understanding that everything is truly a learning experience is something that should also be a given in a creative work.  Not every project will end in a satisfactory manner, but one will have learned how to better accomplish the goal when the endeavor is revisited.

One project that I often see historical recreationists start, and then quickly flounder
on, is the "I am going to spin, weave and sew my own dress from scratch".  For most individuals, that is a better long term goal than it is an immediate one, as they are not even starting with the requisite skills needed to bring the idea to fruition.  (Note that I use this specific example because it is one that I see come up frequently, and I typically see two things happen after the excited individuals publicly announce their project.  The most common is that once they actually begin their research they become so overwhelmed by what they now realize they do not know, that they are discouraged from further involvement with the project or they manage to make a meager a start and then discover that the time necessary to bring the item to from dream to reality is so vast that they are deterred from moving forward.  Those who, perhaps, lose the most are those who also invested a great deal of money in materials before they even have an understanding of the skill needed to manipulate them.)

I personally think the ideal progression of that particular concept would be to research and learn the specific garment in question first.  Learn the patterning, learn the most economical ways to cut the cloth, learn the essential methods for sewing that specific garment and made several such garments out of purchased fabric.  Knowing exactly how much fabric, of varying widths, one will need to complete that dress will assist in weaving enough yardage when the time comes.  Additionally, learning the proper hand-stitches for the garment in advance will make for a finer execution on the final project.

While exploring the sewing side of a project of this scope, it is a simple thing to purchase an inexpensive drop-spindle and some wool and begin the process of learning to spin (many SCA groups have fibre arts guilds or experts who are more than willing to coach a newcomer into this art).
  Even badly spun yarn may make for a decent weft, but to spin yarn that will hold up to being warp is a more intricate task.  Remember too, that just to practice spinning is not enough, one also needs an understanding of the type of textile of which the historic example is comprised, how fine was the yarn?  What type of spin was employed?  What direction was the twist?  A thick, soft, woolen spun yarn with a Z twist would be useless in trying to recreate a gown that was a fine worsted with an S twist. 

And of course, there is the art of weaving that needs to also be addressed.  There should be an exploration of looms (again, a local fibre arts guild can come in handy).  Will one be purchasing a loom?  Making one?  Warp-weighted looms are not complex structures and inexpensive to make, but if the end goal is to use one in the creation of a gown (on which countless hours were already spent spinning), then before the project is started there should be a understanding of weaving, of how it was done historically and of how to calculate the necessary amount of yarn is needed for a project so that there is little waste.  Weaving test pieces in advance is so highly recommended that I would say it is a "must do".  What if your hand spun wool does not hold up as warp?  What if the wet-finishing process warps the fabric because the spin technique was so rough that the cloth puckers and will not lay flat for cutting?  (The included photo shows commercial warp and handspun from my early spinning days.  The spinning is somewhat consistent in terms of grist, but amount of twist varies far too much and wet-finishing caused it to pucker up like some form of tragic seersucker.  I may yet iron this textile into submission, but I am very glad I made this mistake early on and well before I attempt something on a much larger scale.)

I will be the first to admit that I initially rebelled at weaving samples, and I have a definite preference to make use of everything I create.  So in the process of learning to spin, I have made a good deal of yarn that I am going to use (or have used) as weft in mats, pouches or rugs (all things I have created while learning the process of weaving).
  Just because it is a sample or created in the process of practicing an art does not mean that it is a waste of time in terms of material results!  Sample away and enjoy the actual process of learning a new skill!

Understand that it is not my intent with this post to discourage anyone from developing epic plans for projects.  (Indeed, I am sure that someone out there has gone straight from notion to handcrafted gown with little in the way of samples or sidetracking.  I do think that those people are minority and likely very exceptional individuals.)  I think that grand goals are something on which artisans can thrive, but I do believe that taking smaller steps on that pathway are more likely to result in actuattaining the final destination. 


4 Comments

Handwoven Aprondress (Hangerock/Smokkr)

1/28/2014

3 Comments

 
I have been waiting to get a photo of my wearing my handwoven wool aprondress (also referred too as a Hangerock or Smokkr) so that I would put my documentation on this blog.  The information below was extracted from a much longer document that details everything wool types in period to dyeing to weaving.

Weaving

Because I enjoy pushing myself, I decided that my fourth weaving project would be fabric for a Norse aprondress.  This garment has become a ubiquitous Viking dress within the SCA.  Given that the garment is simple to make, comfortable in any weather (depending on materials) and flattering on most figures, it is no surprise that its popularity seems to grow each year.  I have made many such garments, and have even hand sewn and hand embellished several and was very much intrigued by the idea of weaving the fabric for one.

Because twills, of various sorts, were more common than tabby (plain) weave in Scandinavian finds of wool from the Viking Era (Welander, et al. 167-168), I chose a broken diamond twill weave structure from Birka that was common throughout the Viking world.

For yarn, I wanted to use singles as that was what was most commonly used in extant examples for garments. Singles are unfortunately not easy to find in the fine yarn I envisioned for the project.  I was got lucky enough, however, to have a friend gift me a very large cone of very fine weaving wool that was single ply (aprox. 20/1, maybe 24/1).  The color was a very pale green so I tried to purchase a similar color in the commercially available Borgs Faro yarn (6/1).  The color match was not as close as I had hoped for, but the two look nice together in the final fabric.  Note that many of the woolen twills available to reenactors have lovely contrasting colors in the warp and weft, but because this practice was uncommon in period, I did the best I could to use colors that were close in hue and value.

Even though the the base color was chosen for me, I
also made sure that the color was attainable with period dyes.  Both Penelope Walton Rogers and Jenny Dean have demonstrated that there were yellows and blues  (weld, dyers broom and 'yellow x' for yellow and woad for blue) available in period and I know the two can be used together in an over dying process that allows for a range of greens. (Walton - Dyes, Dean)

In addition to my desire to use singles, I also knew that I wanted to reflect the disparity that was often seen in grist of the warp and weft yarns.  A thicker weft, as is common in Viking finds, allows the weaving to progress more quickly and allows one to use both a strong, fine, strong warp and a more softly woven weft (for added warmth as woolen style spinning allows air to be trapped in the fibers and offer more insulation).

In the end, I did opt to use the Faro yarn as the warp, rather then the weft (though the weaving would have gone quicker the other way) as the yarn that I was gifted had passed through several hands and I suspect that it is quite old.  I did not want to risk warping with that and discovering that it would start to fray or break.

Picture
The wool 20/1 (maybe 24/1) yarn that was gifted to me.
Picture
Borgs Faro 6/1 yarn.
I wound my warp on onto a warping board, chained it (in bundles of 60 threads) and transferred it to the loom when all 800 warp threads were ready.
Picture
A diagram showing a warp passing trough a woven band (as weft) and around pegs for measuring and then back through the band. The band becomes the header for the woven length of fabric that would be woven on a warp-weighted loom. (Harte and Ponting, 84) I use a modern peg-style warping board as I was not starting this piece with a header.
Picture
Warp chains ready for transfer.
Picture
My chosen Birka weaving draft as shown on MedievalTextiles.org
Picture
Fabric sample from from Birka (Harte and Ponting, 342)
Picture
Broken diamond twill from Oseberg (Christensen and Nockert, 181)
Picture
Fragment from Birka (Harte and Ponting, 83)
Picture
Fragment from Haithabu. (Hägg, 96)
There were two probable types of looms for fabric weaving available to the Viking-era Norse.  The first was a warp-weighted loom and the second a two-beam vertical loom.  The former is considered the most common given the number of loom weights that have been discovered at various Viking era sites.  Norway specifically has more discoveries of loomweights than any other country (dating from pre-history until the 16th century).  (Hoffman, 20)

Because I do not have a full-scale warp-weighted loom (see my article on this blog about my table-top version if you want to know more about these looms), I wove the fabric on my Oxaback Lilla countermarche loom.

I used four shafts on the loom and had a total of 800 heddles resulting in 20 epi for the warp.  My weft wove in at 32-34 ppi.  This, I feel, is about the low-middle end of the range for thread count in period grave burials.  There are extant examples of wool that can have a thread count of over 100 threads-per-inch in one system.   (Christensen and Nockert, p177-182). 

Below you can see the fabric on the loom and a detailed shot of the early stages of the weaving.

Picture
The start of weaving on my Oxaback Lilla loom.
Picture
Close-up of the weaving in progress
I experienced several issues during my weaving, most of which were due to inexperience.   The first problem that arose happened each time I would advance the warp.  The Faro yarn was exceptionally “sticky” wool that did not want to release and glide over the lease sticks.   I found that inserting a pick-up stick and lifting the top layer of warp (every other thread) helped me to advance the thread properly with no breaks.  And speaking of breaks, I had four threads break during the course of the weaving and learned how to repair the breaks but tying in new warp threads that were suspended from the back beam with metal clips as weights.  I also have one spot where I lost my place in the pattern.  The thread was too fine and too sticky to undo the six rows without risking breaks so I left the weaving error as it was.

The other major issue I had was with tension along the right hand side of the loom.  I adjusted it several times as I went by slipping folded paper into the warp, but the final fabric had a ripple to that edge because of that issue.

After the weaving was complete, I cut the fabric from the loom and wet-finished it in warm water and then pressed it with an iron.  I did not use exceptionally hot water, nor did I agitate it, as I did not want to start the fulling process as fulling did not become common until after the Viking age. (Walton - Coppergate, p 94)

My final fabric was by no means perfect, but I learned a great deal throughout the process and am happy to have, at last, woven my own fabric for a garment.

Picture
Using the pick-up stick to help separate the warp before advancing.
Picture
Woven fabric after wet-finishing.
Picture
Adding a new warp thread to repair a break.
Picture
Fabric stretched out on the floor and ready to have the pattern drawn onto it.

Dress Construction

Unfortunately, history gives us little with which to work when it comes to this particular article of clothing.  Archeological finds have left us only minute scraps of textile, often only in the form of loops, attached to the backs of brooches (which helped preserve them).  Because of the loops and layered fragments behind these pieces of metal, we know that clothing in period was often worn in layers. (Thunem; Hägg).  In addition to the textile remnants, bits of tapestry depicting human figures and from art such as the silver figurines from the 9th and 10th centuries also suggest costumes with multiple layers.  We also know that many women across the time/places where the Vikings lived were often buried with a pair of brooches at their shoulders.  (Hägg; Geijer)

The loops preserved within the brooches suggest they held up a garment (or garments), rather than than having a garment pinned through a solid piece of fabric (though it is possible that earlier in history -or even during the Viking Era in Finland- that these brooches fastened a peplos style garment - the possible predecessor of the hangerock).   Often brooches, such as one set found in Birka, as well as those from a Scandinavian woman buried in South Yorkshire, have a pair of loops on each brooch, one at the lower end of the pin, and one at the top.  (Speed and Walton, 76)  Sometimes there were multiple sets of loops, which could be evidence of a wrapped garment or of cords that suspended tools from the brooches.

Picture
Silver figurines of women. (Simpson 67-68)
Beyond the preserved loops and small textile fragments, the only large historic remnant we have of what is believed to be a tailored apron dress is from Haithabu Harbor (dated to the late 10th century).  Beyond the Haithabu fragment, there are and two pieces of dresses from Pskov and Kostrup - but neither show any evidence of being a fitted garment - and there are very small pieces from other finds such as that in Birka (dated to the 10th century). (Thunem)  The fabric from Haithabu is cut and pieced in a manner that suggests it was fitted to the wearer's figure, and has the addition of vertical darts that would allow for further tailoring. 

As the Haithabu pattern piece is one of the more complete pieces (allowing one to extrapolate construction theory), I often use this as a starting point for my recreations of this garment.

In an effort to explore some of the speculations regarding the constructions of the Haithabu dress, I have experimented with a variety of pattern shapes. My reasoning for not always recreating what exactly I felt this dress looked like is that there was more than one manner of cutting a tunic in period, and likely, there was more than one manner of cutting the elusive apron dress as well.  Further, there is so little we know about the Haithabu fabric in terms of placement, number of pieces, and additional pattern pieces that even the typical representations of the garment are based largely on speculation.

Picture
Haithabu Harbor dress fragment from Wikinger Museum Haithabu, sourced from "A Medieval Wardrobe".
I prefer aprondresses that have simple cuts that make excellent use of fabric with minimal waste.  Additionally, I try to use pieces and shapes that can be arranged in a manner that makes best use of the wide fabric one could weave on a wide warp-weighted loom. (Fabric on these looms could be as much as 2 ells - or 90 inches wide – during the Viking Age). (Simpson 63) 

Aside from the Haithabu dress remnant, there are also what appear to be seams on two separate textile fragments of apron dresses from the Birka grave finds.  Some recreationists have made the assumption that these are side seams.  Depending on the size of the wearer, this is possible, though it is just as likely that  because the seams are placed not far from the brooch, closer to the front of the garment, they might actually mark the edges of a center front panel rather than the sides of the garments.  I recreate garments based on both theories.

For this particular garment, I have chosen a cutting diagram that involves very minimal waste as I believe that during the Viking era that would have been a of exceptional importance.  When using the cutting diagram below, the dress is cut from minimal fabric with very little waste.  Because of several weaving errors, however, I chose to use the same shapes, but arrange the cutting differently to allow me to make best use of the better portions of my fabric.
Picture
My typical, low-waste, cutting diagram. Below: How the pieces look laid out with the front panel being on the far left.
Picture
How the pieces look laid out with the front panel being on the far left.
PictureMy plied weft yarn to use as sewing thread.
For my sewing thread, I chose to use the remaining weft yarn from my weaving project.  On seams that will have no stress, and for overcasting the edges to prevent fraying, I used the yarn as-is.  For the body, I over spun the yarn (Z direction) using a spinning wheel and then S-plied it. 2-ply is an appropriate choice as it was one type of thread used in the Viborg shirt.  (Fentz)

The stitch types I chose were all present in various archeological finds.  I overcast the edges of the fabric with a whipstitch to prevent fraying.  A running stitch was employed to fold the edges of each cut panel. The joining seam is a butted seam, completed in small overcast stitches placed close together.  These seams can be stress points and I prefer them stronger than the stitches I used for the folded edges mentioned above. The double fold hems are completed with a running stitch.  (Baker)

Picture
Internal view of the binding seams and overcasting.

Completed Handwoven Dress

Picture
Photo credit: Rosamund du Grasse
Picture
Photo credit: THL Orlando di Bene del Vinta

Additional Cutting Layout

For Pennsic 41 I completed a handsewn aprondress in a red wool twill.  Information (that varies from the garment above) is included below.

My cutting diagram for this dress is based heavily on finds from Birka, and the spacing between the brooches and seams.  This makes the idea of a dress constructed of four panels quite conceivable.
Picture
Locations of seams on finds from grave 464 (left) and 597 at Birka (right). Original illustration from Inga Hägg: Kvinnodräkten i Birka and sourced from Hilde Thunem.
Picture
Cutting diagram for 4 panel dress. I have created this garment with both four equal panels, and with two larger panels for the front and back and two narrower panels at the sides.
Materials:

Below, I present to you a list of materials used in my recreation of an apron dress.  With each item is the rationale for that specific choice.

The fabric is a modern machine-woven Shetland wool.

The weave is a 2/2 twill.  Examples of this can be found from Scandinavia to the British Isles. (Walton - Coppergate 1749; Christensen and Nockert 177-182)  Twills, of various sorts, were more common than tabby (plain) weave in Scandinavian finds from the Viking Era.  (Welander, et al. 167-168)

While it is certainly possible to find nice twills, both diamond twills and herringbone fabrics today are hard to come by, tend to be expensive and often have the warp and weft in different colors allowing the pattern to be more visible.  This practice of multiple colors in a weave, however, was not overly common in period textiles I have seen or researched.  Based on all of this, I chose a common period weave that I could readily get in a monochromatic fabric at reasonable cost.

On my fabric, there are approximately 25 ends per inch on both the warp and the weft. This falls within the low end of the range for the textiles from the Oseberg ship, as well as other finds (Christensen and Nockert 177-182).  Anne-Stine Ingstad noted that typical of Viking era fabrics to have a higher thread count (and finer fibre) for the warp than the weft.  Unfortunately, this is not something you can commonly find in mass-produced fabrics today.

Picture
Extant examples of 2/2 twill from the Oseberg ship. Left has an epi of 25-40/37-55 and the right has 25-30/13-15. (Christensen and Nockert 177-182)
The color for this dress is a brilliant red.  When selecting my fabric I took care to look for a color that would have existed in the Viking Era and that had been available to the Scandinavian Vikings (whether by the fact that the dye stuffs were grown there, or could have been imported).  I chose a red because both madder and bedstraw were used to dye some of the garments/fragments from actual archeological sites (Walton - Dyes 14-20).

Jenny Dean, author of the book Wild Colour, has also studied dyes used by the Anglo-Saxons (contemporaries to the Vikings) and has experimented with the colors they yield.  All colors I used for the project were rendered in her experiments.

Stitching thread used for sewing the seams is a modern wool/acrylic thread used in tailoring wool suits.  I chose this primarily because I wanted something a bit stronger than the more loosely woven threads I purchased for the decorative stitching.  It is also stronger and easier to work with than the woolen threads I attempted to unweave from the garment fabric itself to use.  Wool, linen or silk thread could have been used in period.  (Jones).  The chosen thread is, however, 2-ply which was a period-appropriate choice as it was one type of thread used in the Viborg shirt.  (Fentz)

Picture
Binding stitch being used to join the panels.
Picture
Decorative stitching created from loomwaste from tabletweaving.
Decorative yarn used for seam finishing was left over from a tablet woven band I created that will later be applied to the dress.  For the weaving, I choose to work with a fine crewel wool produced by Renaissance Dyeing.  Their yarns are all hand dyed with fresh or dried plant materials and mordanted, when necessary, with alum (a mordant used in the Viking era). (Dean)  

The yellow yarn was dyed with weld, which was known in period, but note that yellow during the Viking age could also have come from other sources. The blue yarn was produced with indigo dye, though in period the blue would likely have been achieved with woad (a relative of indigo that grows throughout Scandinavia and the British Isles).  (Walton - Dyes)

Stitch types I chose were all present in various archeological finds.  I used a running stitch at the edges (which were folded in to prevent fraying) in the weld dyed crewel wool.  Had the fabric been more tightly woven or fulled, I would not have had to turn these edges under. (Baker)   The joining seam is a butted seam, completed in small overcast stitches placed close together.  These seams can be stress points and I prefer them stronger than the stitches I used for the folded edges mentioned above. (Baker)

The small, decorative Xs along the seams were made from the blue crewel wool left from the warp ends of my tablet weaving.  Spinning, dyeing and weaving were such labor-intensive endeavors in period that little would be left to waste, even scraps of thread less than a foot long.  It stands to reason that they could be used for decorative measures even if they are not long enough for another more practical purpose.  Seams are tied off at the ends as was proper for the period.  

The hems use a running stitch and are also completed in the weld dyed crewel wool.  The top hem, under the trim, is a single fold with running stitch and the bottom hem is a double fold with running stitch.  I opted to use a blanket/buttonhole, also used in period, stitch on the straps/loops because I wanted something a bit more decorative.  (Baker)   And overcast stitch was used to apply the trim.

Trim for the dress historically would have been either tablet-woven bands or imported silk samite strips.  Both were types of items found in the Oseberg ship burial and at other Norse gravesites.  (Christensen and Nockert 383-398; Larsson 182)  It is possible that small pieces of tablet-woven bands found near the brooches in graves might actually have been remnants of the tablet weaving used at the beginning of the process of creating fabric on a warp-weighted loom.  It is also entirely possible that woven bands were created specifically to decorate the top of an apron dress.  Without intact examples, we cannot know if either or both were options.   Note that the pattern I used here, as a tablet weaving novice it is the best example of a Scandinavian-style motif (even though I feel the yarn used may have been of an acceptable quality and weight). 
Picture
Completed dress on display.
Picture
Different dress, in red linen, using the same construction as the red wool garment.

Bibliography

Baker, Jennifer. "Stitches and Seam Techniques." 2009.

Christensen, Arne Emil and Nockert, Margareta. Osebergfunnet: bind iv, Tekstilene (Universitetet i Oslo), 2006.

Fentz, Mytte. "An 11th Century Linen Shirt from Viborg." 1992.

http://forest.gen.nz/Medieval/articles/Viborg/VIBORG.HTM

Geijer, Agnes.  Birka III, Die Textilefunde aus Den Grabern.  Uppsala,1938.

Hägg, Inga.  Die Textilefunde aus der Siedlung und us den Gräbern von Haithabu (Karl Wachlotz Verlag). 1991.

Harte, N.B. and Ponting, K.G.  Cloth and Clothing in Medieval Europe, (Heinemann Educational Books), 1984.

Hoffman, Marta. Warp Weighted Loom (Scandinavian University Press), 1975.

Jones, Heather Rose. "Archeological Sewing". 2004.  http://heatherrosejones.com/archaeologicalsewing/wool.html

Larsson, Annika. "Viking Age Textiles". The Viking World (Routledge), 2011.

McKenna, Nancy, Chairperson.  Medievaltextiles.org.

Simpson, Jacqueline.  Everyday Life in the Viking Age (Hippocrene Books), 1967.

Speed, Greg and Walton, Penelope. "A Burial of a VikingWoman at Adwick-le-Street, South Yorkshire". Journal of Medieval Archeology, Volume 48.  2004.  51-90.

Thunem, Hilde.  "Viking Women: Aprondress."  January 2011. <http://urd.priv.no/viking/smokkr.html>

Walton, P. "Textile Production at 16-22 Coppergate." The Archaeology of York Volume 17: The Small Finds.  1977.

Walton, P. "Dyes of the Viking Age: a summary of recent work." Dyes in History and Archaeology" (Papers Presented at the 7th Annual Meeting, York 1988), 1988. 14-20.

Welander, RDE, Bateyt, Colleen and Cowie, T.G. "A Viking burial from Kneep, Uig, Isle of Lewis," Proc. Soc. Antiq. Scot. 1987. 149-174.

Additional Resources

Andersonn, Eva. Tools for Textile Production from Birka and Hedeby (The Birka Project for Riksantikvarieambetet), 2003.

Beatson, Peter and Ferguson, Christobel. "Reconstructing a Viking Hanging Dress from Haithabu." 2008. http://members.ozemail.com.au/~chrisandpeter/hangerock/hangerock.htm

Carlson, Jennifer. "Sewing Stitches Used in Medieval Clothing". 2002. http://www.personal.utulsa.edu/~marc-carlson/cloth/stitches.htm

Dean, Jenny. Wild Color (Potter Craft), 2010.

Graham-Campbell, James. Viking Artefacts (British Museum Publications), 1980.

Hägg, Inga.  Die Textilefunde aus dem Hafen von Haithabu (Karl Wachlotz Verlag). 1984.

Hayeur-Smith, Michele. “Dressing the Dead: Gender, Identity, and Adornment in Viking-Age Iceland”, Vinland Revisited, the Norse World at the Turn of the First Millennium, 2003.

Ingstad, Anne Stein.  "The Textiles in the Oseberg Ship". http://forest.gen.nz/Medieval/articles/Oseberg/textiles/TEXTILE.HTM 

Jesch, Judith. Women in the Viking Age (Boydell Press), 2005.

Jenkins, David. The Cambridge History of Western Textiles (Cambridge University Press), 2003.

Pritchard, Frances. “Aspects of the Wool Textiles from Viking Age Dublin,” Archeological Textiles in Northern Europe (NEASAT 4), 1992.

Priest-Dorman, Carolyn.  "Colors, Dyestuffs, and Mordants of the Viking Age: An Introduction." 1999. http://www.cs.vassar.edu/~capriest/vikdyes.html

Skre, Dagfinn.  Things from the Town: Artefacts and Inhabitants in Viking-Age Kaupang (Aarhus University Press), 2011.


3 Comments

Hand Stitches: Herringbone

10/10/2013

1 Comment

 
PictureNorse coat with herringbone stitching.
(In light of further research on my part, I will note here that I believe that the use of herringbone externally as a seam embellishment is completely a reenactorism.  We love it, but evidence for its use in period is actually quite limited, and there is no evidence of it on garments over seams at all.  It was used on a garment from Pavement and on the INSIDE of a hem at Hedeby.  A stitch similar to herringbone was used on the Mammen cushion cover (decorative item rather than a garment) and on the collar of the Skjoldehamn tunic (which may or may not even be Viking and possibly dates post-period).  I am leaving my earlier article and instructions below intact, however, for those who still wish to employ this stitch as a decoration.  See more details at: http://awanderingelf.weebly.com/blog-my-journey/a-deeper-look and
​http://awanderingelf.weebly.com/blog-my-journey/why-i-count-threads-sourcing-a-myth )

Embellishing garb (appropriately or not) is an SCA tradition.  Embroidery, elaborate trimmings, fancy stitches... these things are infinitely appealing to most of us and perfectly acceptable within the Society. 

Learning to embellish garb, however, is an art unto itself.  Learning both appropriate methods for doing these decorative touches and when and where to use them for your persona can often involve long hours of research and even more time to perfect a technique for execution (and apparently I did not do enough research first for this one, lol, oh well, we live and learn).

I very much enjoy hand embellishing my Viking garb, even though my first attempts were very crude and I had a hard time coping with what I felt were very imperfect stitches.  Learning to hand sew or embroider is much like anything else in that you have to develop the muscle memory needed to keep the stitches neat and even and you additionally have to develop an eye for spacing. 

I also had to learn to let the little imperfections slide.  Period stitches were not perfect (I believe someone even teaches a class on this at Pennsic!).  And the more garments I embellished, the better my stitching got and while my handwork is still not perfect, I am more than happy to wear and display these items and to discuss some things that helped me craft better costumes.

I also have to note here that I am not a fan of practicing something just for the sake of practicing it.  If it is using time and materials, I would prefer to still use my "practice" piece in the end.  When I am learning a new stitch I try it a few times on a piece of scrap fabric and then typically apply it to a piece of older garb or a pouch or, well, anything that I can still use rather than stuff in a pile of samples.  Would I try something totally new on my court garb?  Likely not, but I will definitely make use of it somewhere until I am competent enough to use it to decorate my finery.

Below, is a diagram of the stitch for those who might be unfamiliar with it's structure.

Picture
Picture
Aside from practice, there are quite a few things things I have done or tried to allow me to better keep the stitches even in size and spacing: 

  • To help keep the stitches appropriately spaced, and to help keep them neatly in line along the width of the row, do not stab the needle through the fabric in two motions (up from the back, and then down again from the top), but rather, insert the needle from the front to the back to the front all in one pass as detailed in the photo to the left. 


Picture
  • Use something as a visual reminder of how wide the stitches should be kept.  You can use chalk to mark the line on the fabric or, as in this photo, I am using the width of my thumbnail to measure how far I set the inside edge of the stitches from the hem. 

  • It is also possible to use a sewing machine to lay in a two even rows of basting stitches and use those as the outer guides for the herringbone stitches and remove the machine basting later.


Picture

  • To help keep the spacing of the cross even you can line up each new stitch with the end point of the stitch above or below it.  (This can also help to keep the herringbone stitch compact as you sew, as there is a tendency in beginners to make each stitch a bit longer than the previous one until the pattern is somewhat sprawling in appearance.)

Picture

  • Periodically look at the back of your project.  You will see two parallel rows of stitching, which should be fairly consistent in length and in how far they are spaced.

Picture
Cheat:

If you happen to have a sewing machine that allows for very wide stitches and that has a series of building complex stitches, you can try this cheat to help develop the muscle memory for working with this stitch. 

To the left is an image of the screen from a Husqvarna Designer SE.  #13 is a Herringbone stitch.  Now, stitched out I do not actually find this very convincing (even when done with wool machine embroider thread) because it actually breaks each segment of the stitch into smaller stitches.  But, you can machine stitch on your fabric with thread that exactly matches your fabric or thread that exactly matches the hand stitching thread you plan to use (I find the former method actually hides the machine work better) and then use the machine sewn lines as a guide and sew over them by hand with your thicker hand sewing thread or yarn.  The hand stitches should completely cover the machine stitches and render them invisible unless someone happens to turn the fabric over and look at the reverse.

Now, this method has a couple of drawbacks.  One is that it is actually very slow as the machine can take time to stitch out a complex pattern like this.  Another is that it will make that area of the fabric somewhat stiff.  Finally, it takes an expert touch (which I do not have) to guide the machine evenly over seams (where the fabric is several layers thick) and this can have a tendency to distort the machine stitches and make them longer or shorter when crossing a seam line.

(The tan plaid fabric depicted further down was created by laying down a row of machine stitches first.  I did a few pieces with a machine laid row as a guide and now now longer need that crutch to keep my rows of stitches in order.)

Picture
What else can you do with this stitch once you have mastered it?

  • Adding a second row of stitches, woven into the original one can look wonderful.  (The key is to make sure that you always go over and under the same stitches as noted in my diagram below.)

Picture
Picture
Picture
  • While this stitch is often used to decorate a hem, a seam or one its own as a purely decorative element, it can also be functional.  All of the stitch examples I have used above are red and yellow wool thread on very dark blue wool fabric.  The stitches are actually hemming the fabric of an aprondress (both the top and bottom hem).
  • Speaking of hems... a very compact herringbone can actually hide a machine sewn hem, especially if the yarn adds some sort of texture to the project that detracts from the machine stitching underneath.

Picture
  • Finally, I have to mention there are many ways (not necessarily period, but that are pretty) that you can further embellish a herringbone stitch.  To the left you can see that I added a small stitch at each cross in a darker color.  A few quick searches of the internet will yield many more options for additional elaboration!

1 Comment

Little Updates

5/21/2013

0 Comments

 
Picture
Sometimes I have too many things going on at once.  The good thing about that is that it usually keeps me from getting bored with any one of them before it is all finished.

I am still working on this piece of cloth.  I have learned a lot during this process and there are many things I will do differently the next time I weave something this fine.

One of the things I have learned is to repair broken threads.  You can see here a new warp that I pinned to the fabric to weave back in.  There is a weight hanging from the other end off the back beam.

Picture
And here is a nearly-finished tunic for my BF.   The color does not read true in the photo.  It is cobalt linen with marigold and dark red handwoven (not by me) wool fabric used to trim the cuffs and neck.  Next to the applied trim is a row of osenstitch that is worked in a deep madder crewel wool from Renaissance Dyeing. 

I am more than pleased with this garment and only have to finish the hem for it to be complete.  I was inspired by some of the positively lovely garb I saw some of the European re-enactors wearing in online albums.

Picture
And finally, here is my baby flax!  This was actually taken a bit over a week ago, but it is definitely growing and I am quite pleased so far with what is actually coming up. 

Hopefully I will get some more photos of it soon (in between preparing the pasture for a picnic and packing for Pennsic)! 

0 Comments

When All Else Fails

5/7/2013

0 Comments

 
Picture
Sometimes you just have to Use What You Have.

For some projects, I set out to make something very period, buy the best materials I can get my hands on and away I go with it.  Other projects, however, do not have as much pre-planning or time to collect the appropriate resources.  I am using a piece of my weaving (using my hand-spun weft) as an A&S entry soon and needed to hem the edges.  I have no linen or wool thread in neutral colors (nor any uncolored) and most of the colored thread is actually part of other projects, so I could not justify it for this even if I didn't mind, for example, bright red thread.

Unfortunately, the idea of using regular Gutermann also made me twitch.

I came up with a solution that I like well enough now to later expand upon!  I made my own handsewing thread.

Picture
I have Vaxbo linen singles yarn from my weaving experiment in both 8/1 and 12/1.  I had actually used a bit of the 8/1 for sewing some time ago but found that the act of sewing was causing the thread to untwist, lose its strength, and eventually, pull apart. 

Sewing thread, however, is not single ply, rather it is a strong plied yarn that can hold up much wear.  My solution for this, was to make my own thread.  I took the 12/1 (the thinner of the two) and plied it more tightly (Z spun, as is the original direction of the yarn's twist) with my spinning wheel onto two bobbins.  I then plied those with the wheel in the opposite (S) direction.  I used a small plastic hank from some camping rope to wind and block it by submerging in hot water and allowing it to dry.

The result is unevenly spun (I was varying my amount of twist as I went so that I could determine how much to use in the future) but the result is still a nice, strong thread for heavy sewing.

I actually am considering ordering the 20/1 Vaxbo linen yarn and making a more fine thread for general purposes.  I also am not confident that the very fine weft in my current weaving project will ply nicely into a thread that I can use to sew the final garment.


0 Comments
<<Previous

    About Me

    I am mother to a billion cats and am on journey to recreate the past via costume, textiles, culture and food.

    A Wandering Elf participates in the Amazon Associates program and a small commission is earned on qualifying purchases. 
    ​

    Archives

    November 2022
    October 2022
    September 2022
    June 2022
    May 2022
    March 2022
    March 2021
    February 2021
    September 2020
    August 2020
    July 2020
    June 2020
    May 2020
    March 2020
    January 2020
    December 2019
    November 2019
    September 2019
    July 2019
    June 2019
    May 2019
    April 2019
    March 2019
    February 2019
    January 2019
    November 2018
    October 2018
    September 2018
    August 2018
    July 2018
    June 2018
    May 2018
    April 2018
    March 2018
    February 2018
    January 2018
    December 2017
    November 2017
    September 2017
    August 2017
    July 2017
    June 2017
    May 2017
    April 2017
    March 2017
    February 2017
    January 2017
    December 2016
    November 2016
    October 2016
    September 2016
    August 2016
    July 2016
    June 2016
    May 2016
    April 2016
    March 2016
    February 2016
    January 2016
    December 2015
    November 2015
    October 2015
    September 2015
    August 2015
    July 2015
    June 2015
    May 2015
    April 2015
    March 2015
    February 2015
    January 2015
    December 2014
    November 2014
    October 2014
    September 2014
    August 2014
    July 2014
    June 2014
    May 2014
    April 2014
    March 2014
    February 2014
    January 2014
    December 2013
    November 2013
    October 2013
    September 2013
    August 2013
    July 2013
    June 2013
    May 2013
    April 2013
    March 2013
    February 2013
    January 2013
    December 2012
    November 2012
    October 2012
    September 2012

    Categories

    All
    12th Night
    14th Century
    AEthelmearc
    Aprondress
    Awards
    Bog Dress
    Dance
    Dance Name
    Distaff
    Dyeing
    Embroidery
    Fiber Arts
    Flax Growing
    Food
    Glass
    Haberci
    Headcoverings
    Inspirations
    In The News
    Library
    List Of Links
    Machine Embroidery
    Metal Clay
    Mid Month Inspiration
    Migration Era/Iron Age
    My Documents
    Ottoman
    Ottoman Fabrics
    Pennsic
    Publications
    Research
    Rigid Heddle
    Sca
    SCA Camping
    SCA Forestry
    Sca Name
    Sca Newcomer
    Sewing
    Sheep
    Spinning
    Tips
    Totally Not SCA
    Viking
    Viking Bead Research
    Viking Costume: Beyond The Myth
    Viking Swatch Book
    Viking Textiles Looking Deeper
    Weaving
    Wool


      Email Updates

    Subscribe to Newsletter

    Blogroll of SCA & Costume Bloggers

    Below is a collection of some of my favorite places online to look for SCA and historic costuming information.

    More Amie Sparrow - 16th Century German Costuming


    Gianetta Veronese - SCA and Costuming Blog

    Grazia Morgano - 16th Century A&S

    Mistress Sahra -Dress From Medieval Turku 

    Hibernaatiopesäke

    Loose Threads: Cathy's Costume Blog

    Mistress Mathilde Bourrette - By My Measure: 14th and 15th Century Costuming

    More than Cod: Exploring Medieval Norway

    RSS Feed


Proudly powered by Weebly