A Wandering Elf
  • A Wandering Elf
  • Blog: My Journey
  • Iron Age Celtic Studies
  • A Wandering Elf in the Woods
  • Classes
  • Resources: Sheep & Wool
  • Resources: Costume and Textiles
  • Resources: Migration Era
  • Resources: Historic Glass Beads

A Wandering Elf

My original site exploring both Viking Age textiles and clothing and discussing topics relevant to the SCA.

Quick Link to Viking Textiles

Ancient Embroidery (or the lack thereof)

3/2/2020

8 Comments

 
I have talked at length about the relative lack of embroidery in Viking Age finds, but I am going to summarize those earlier discussions here as a preface to some new thoughts.

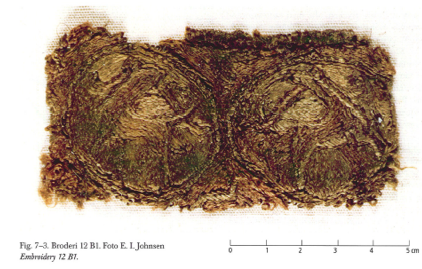
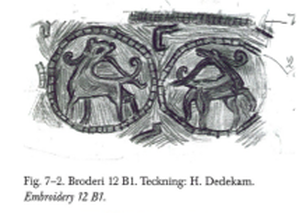
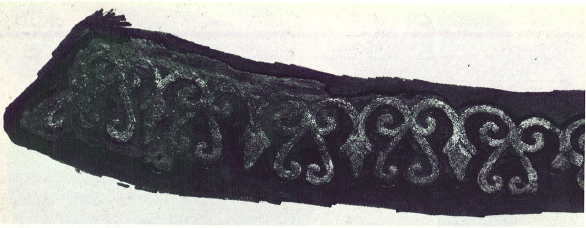
Embroidery as a whole in the Viking Age is exceptionally rare, compared to the thousands of textile finds that we have.  Figurative embroidery (rather than just a line of stem stitches, such as that that covers a hem seam at Birka) is even more rare.  Of the few samples we do have, some can possibly be attributed to other cultures (such as some of the glorious work from Oseberg being possibly Saxon, Mammen has also been considered as such by some authors, the metal thread embroidery from Valsgarde is thought to either be Byzantine or Slavic, or a copy of the work of those cultures).  Even if all of these were native work, the number of these items is minuscule compared to the over all body of textile finds from the period.

It also is smaller than the number of woven patterns in period.  (I have started a collection of this evidence here:  http://awanderingelf.weebly.com/blog-my-journey/patterned-weaves-preliminary-data ).  Tablet weaving itself is rare compared to prior periods, but that too is a type of woven patterning that exceeds the number of embroidery finds.

I have often wondered why this was the case.  To a modern person, embroidery is an easier art to adopt (and certainly needs less in the way of space or equipment), but in period weaving was dominant way to decorate textiles.  I have seen it argued that this was not a culture of linear art (they were not taught to draw from a young age as we were), and that makes sense.  I also wonder if there was something symbolic in it (we know that many ancient cultures have textile arts playing a prominent role in their mythology), or perhaps ritual.

As I read more about other cultures, times and areas, I see that this lack of embroidery in Northern Europe is reflected elsewhere as well.  Johanna Banck-Burgess notes the same phenomena in Central Europe in early Celtic works as well (this shows up in both her work on the Hochdorf burial and in the article "Prehistoric textile patterns: transfer with obstruction").  There we have various types of patterned weaving that are a result of manipulation of the web on the loom (whether it be by the turn of cards in tablet weaving, or supplemental threads used in soumak-like techniques or insertion of metal rings into the the weave of the cloth).  Embroidery is completely absent in some areas in early Celtic cultures, and very rare in others.

And you know what?  It does not stop there.  In the article, "Unravelling the Tangled Threads of Ancient Embroidery" by Kerstin Droß-Krüpe and Annette Paetz, the idea that mistranslation might play a role in perceptions of profuse embroidery in the ancient world.  I found this rather riveting to read because it very much parallels the conclusions I have come to about later textiles as well, that the number of embroidered items are very low compared to textiles that are either undecorated or decorated by means of weaving.

And of course, now I want to know the why of this even more.
8 Comments

A Brilliant Discussion

6/28/2017

2 Comments

 
If you are a regular around here you will have seen my numerous posts on over-embellishment by reenactors (and know that at one time I too fell into that trap), but you will also see my rationale for NOT employing things such as lavish embroidery to a period kit.

This topic is typically heated in online forums and is accompanied by every Woulda/Coulda/Shoulda that one can imagine.  

Well, I discovered yesterday that these conversations even happen in later period forums (though, I have to say, with far less vehemence than some I am used to).  I am going to link a thread below for the Elizabethan Costume group on Facebook because the conversation is educational, civil and very, very similar in context to the things earlier period reenactors should be considering when planning a kit. The conversation includes discussion on social status, expectations of that, and more.  (Also, poke around this forum if you have any interest at all in later historical costume.  There are WONDERFUL samples of people's work and many engaging discussions!)

https://www.facebook.com/groups/29374273995/permalink/10155428435723996/

2 Comments

Why I Count Threads & Sourcing a Myth

10/24/2016

3 Comments

 
 I have friends who joke about me counting threads in cloth.  I can readily laugh with them about it because textiles are a passion for me.  In part, because the historic construction of cloth fascinates me, but in part also because this is one of the few facets of Viking costume for which we have a definitive model.  Most of us who recreate these ancient bits of clothing know that we do so with great limitations regarding what patterning, cut and construction was used (particularly when it comes to women's dress).  There is always a great deal of guesswork involved on part of the costumer.

The cloth itself, however, we have thousands of examples of.  We know what this cloth looked like, we can see, even today, the texture and quality of textiles that the early Norse women crafted.  My patterning of garments is largely guesswork, but the cloth itself I can at least analyze and try to attempt to find textiles that bear similar visual qualities, including thread count.  Of course, one can bring up the argument that there are still faults with this (such as wrong breed of sheep or improper width of yarn leading to a more dense or loose cloth than that of a specific period example).  I still believe that studying the fabric yields us a wealth of information about dress in the past and can help us better reach the goal of more faithfully reproducing it.

One of the hardest things that I had to overcome (and I have mentioned this in past entries), is that notion that the Viking Era Norse were barbarians, that their craft was crude and clumsy.  While that might be true in some areas, the wealth of extant textiles does not bear this out.  There were fabrics, of wool, that had thread counts in excess of 150 threads per inch in the warp.  That cloth was exceptionally fine, even by today's standard.  A person of some status, who wore metal brooches and a string of beads, certainly did not garb herself in cloth as coarse as burlap.

Breaking those stereotypes should not stop with the fabric.  Another example (again, something that I have discussed at length in this forum, in online groups and in my classes) is that other elements could, perhaps, reflect the same sort of refinement and quality as did the cloth.

Long have I pondered how the large, open, and often poorly wrought (I have too many examples of this on my own costume) Herringbone Stitch has made itself so prevalent in Viking costume. 

I think part of this, has to do with some modern mentality of equating over-embellished design elements with wealth and status.  We love to see miles of trim or stitching on costume, and see it as a perfected work, rather than one that is over-wrought.  Interesting, I think, given that one of the staples of a modern woman's wardrobe is the rather understated, but always elegant, "Little Black Dress".  Simplicity can often speak volumes in the modern wardrobe, but we often bypass that concept in costuming because it, like the concept of fine wool fabric, does not fit with our own internal visualization of the past.

To look again at the scant evidence for the Herringbone stitch, see below:
  • Hedeby harbor has a textile fragment that is hemmed using a herringbone stitch.  However, the herringbone is over the edge of the hem, and hence, that the part of the stitch we consider decorative was on the inside of the garment, with what would look like parallel rows of running stitch on the outside.  (As described by Inga Hagg)
  • The find 6-8 Pavement at York has a fragment of a hemmed garment that is worked in Herringbone.  As with the Hedeby find, the herringbone is on the inside of the garment.  (Cordage and Fiber from 16-22 Coppergate, by Penelope Walton Rogers)
  • The Mammen cushion has a complex variant of very closely worked herringbone over a seam (you can see that here http://www.cs.vassar.edu/~capriest/vikembroid.html).
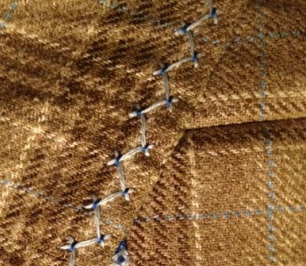
  • The Skjoldehamn tunic has a stitch similar to that used at Mammen at the neckline.  The issue with this one is that this find may or may not even be Viking and if it is, it seems to reflect a very different type of fashion than we find further south and that alone makes me leery of using it as a basis for embellishment on a Viking kit without further substantiating evidence.  Beyond that, the tunic itself is dated post-Viking era.  As with Mammen, this stitch is still much more narrow than reenactors use, and, again, it is more filled in.  (http://www.ceilingpress.com/Resources/Nye%20tanker%20om%20Skjoldehamnfunnet.pdf )
Picture
Example of Herringbone Stitch (incorrectly used in this case).
Picture
The variation of Herringbone from the Mammen cushion cover. Note this is a much more complex version of the stitch than is usually seen as a decorative element on costume.
Breaking the Myth

So where did we go wrong with this?

I think the first fault lies in our own taste.  In our own desire to make something "rustic" that fits in with our own misconceptions of the capabilities of these people, we opt for things that fit in with this ideal, but also that are simple enough for anyone to add to their attire.  We also have this concept that "more stuff" means higher status.

The second issue is with the evidence, or rather, our misinterpretation of it.  One of the most circulated articles online is one entitled "Viking Embroidery" by Mistress Thora Sharptooth.  She has been a powerful inspiration in the SCA for digging deeper into Viking costume and textiles.  She has a series of works posted on-line that I think most of us would give credit as the best aids we had when starting out.  In her embroidery work there is a paragraph concerning the ornamentation of seams.

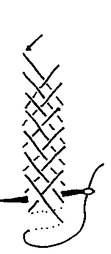
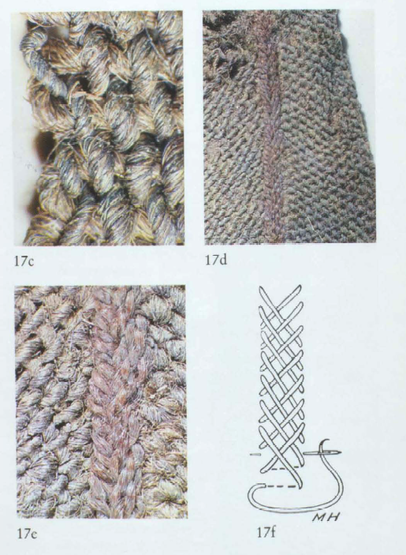
One additional type of embroidery that seems to have been practiced even before the Viking Age was the ornamentation of seams. This practice occurred in an earlier related context, on a seam from a seventh-century pillow cover from the Sutton Hoo textiles (Crowfoot, 422), possibly indicating a tradition of some antiquity in north Europe. In the ninth century, one of the Oseberg garment seams is oversewn in some sort of loop stitch with a thread used double (Ingstad, 92). In similar fashion, some of the ninth- and tenth-century Hedeby and Birka finds display corded or braided thread appliqué over the seams (Hägg 1984, 169). The tenth-century Mammen grave contained a wool cushion with embroidery over a seam (Hald, 282). The stitches used on the Sutton Hoo and Mammen finds are similar: both yield a thick, wide strip with a plaited appearance. But whereas the stitch used on the Sutton Hoo pillow was a complex interlaced variant of Vandyke stitch (see the figure on the left below, redrawn from Crowfoot), the stitch used on the Mammen cushion was simpler, a closely-worked variant of herringbone (see the figure on the right below, redrawn from Hald).
I feel the need to further elaborate on the statements contained in this measure, and help to provide context (as it is researching these items that helped me to better trace the origins of the myth).
  1. Sutton Hoo - The author used this as a way to show possible evidence of a practice in Europe.  Note though, that this is not evidence of Vikings doing this (it is not Norse and it is too early).
  2. Oseberg - The ring motif was used on a garment from the grave, but it does not, to me, appear to follow along a structural seam.  Perhaps it followed the edge of a neckline?  It is very unlikely that this followed something like the vertical seam of an aprondress (and even so, it is entirely unlike a herringbone stitch, in both form an execution for it to be considered valid evidence of that practice).  The rings are delicate and well formed, not something I would class in the same category with an oversized herringbone stitch.  I will note here that there is another small sample of embroidery from this grave that looks as though it could have followed a seam edge (or not), but it looks to be more akin to the type of work used at Mammen as it appears part of a larger decorative effort.  Regardless, this item again, does not cover a seam, but might have followed a line of the garment if the shape of the fragment represents a shaped piece of cloth (rather than something that degraded into this shape over time).
  3. Hedeby and Birka - mentions cord and braid applied over a seam.  Unfortunately, I cannot actually find anything that really shows cord applied over a joining seam.  Rather, I have cataloged a number of uses of cord, braid or stitching used at the edges of a garment (where it can also serve an additional functional purpose of saving the edges from wear). The closest thing here that I see to our "seam embellishments" would be the braid laid over the darts at Hedeby. Once again, these are very different treatments than a herringbone worked over a joining seam (or on the outside of a garment in any fashion).  The edge treatments can all be found at the site here.  http://awanderingelf.weebly.com/blog-my-journey/viking-clothing-a-deeper-look-at-edges
  4. Mammen cushion - Finally, we see an actual seam treatment from the Viking age.  This find is somewhat contested, as some researchers believe it to be an import (perhaps Saxon and from the same tradition as the Sutton Hoo cushion), while others see it as a local product.  There are also small hats from the Netherlands that have similar stitching that are dated to the same time period.  It has also been suggested that these hats might also be imported goods from the British Isles.

Context

Putting the evidence into context is of paramount importance.  Understanding something being referenced in that article is not necessarily proof that all of our notions of "seam embellishments" are documentable.  It is absolutely not documentation that a standard Herringbone, or catch stitch, was ever used in such a manner either.

Looking deeper at the sources and meanings of each item is valuable as we move beyond beginner and progress on a journey as a costumer who is attempting to recreate the past. 

My own opinion is that seams were likely not embellished.  Not only due to lack of archaeological proof, but because of the time it would take to craft something that would make reuse of a textile less likely.  It would be hard to take in that garment if it were so embellished.  I often also see people citing that it "reinforces" the seams.  Why then would you need to reinforce the seam of an aprondress (a garment that Hagg describes as only "slightly fitted"), when you are not taking time to sew that stitch around an armhole of a dress, or down the seam in the back of the sleeve at the elbow.  Both of those areas are far more likely to break from stress than a side seam of a slightly fitted dress.  Why not instead use these complex stitches (and the stitch from Mammen is indeed time consuming) on a functional textile such as the cushion cover that you will not need to alter, and that might possibly need the strength from the applied needlework?

Scale

And finally, I need to mention Scale, because I think a lack of understanding regarding scale is one of the main contributors to the reenactorism of "decorative herringbone".  As I mentioned above, the only thing close to the reenactor's use of herringbone is the Mammen cushion cover.  It is important to view that piece in proper perspective.
Picture
Image from _Mammen : Grav, kunst og samfund i vikingetid_ by Mette Iverson.
What we typically see of this find is the diagram in the lower right corner.  This usually appears on our screen at a size of about a half an inch wide.  The weave of the needlework for the diagram is open, to better show how the stitches interlace.  What many people have not seen, is the actual photos of the cushion, which I have included here.  Note that the stitch is tightly worked, with no negative space visible to the eye.  In fact, it looks at first like applied braid.  And perhaps the most important thing here is to consider the scale of the piece.  That line of braid is a mere 3mm wide.

I think the single biggest perpetrator of the "herringbone seam embellishment" myth is a misunderstanding of that diagram (or rather, lack of understanding about its context).  If indeed you were to opt to use this type of stitching, I think the only credible way to do so would be to apply it in the same manner of the original.  While I personally do not think it would have been used over a dress seam, I can at least understand where the tradition stands historically and it reads as something that might be plausible for the Viking age.
3 Comments

Agincourt

10/19/2015

0 Comments

 
This weekend I attended Agincourt in the Barony-Marche of the Debatable Lands.  The event was lovely!  The site was beautiful, the company and food in the vigil rooms were amazing, the A&S display was inspiring and most of all, I was so very happy to be there for Morien McBain's elevation to the Order of the Pelican.

Despite the rather cold weather, there was much in the way of martial activities happening and inside the two nice buildings there were a number of other things going on.  The Environmental Center provided a spectacular room for Court, with large windows over looking a wooded area.  There was a very large room dedicated to A&S and there were 25 entries in the competition!  That is impressive to me, given that the last few non-war events I attended only had a couple of entries (more on that coming in a post this afternoon).  A few of my favorite entries are in the photo album below.

The best part of the event, however, was Morien's elevation.  I was so happy to be part of this day for him (and I crafted the cloak).  He has always been an inspiration to so many, and never fails to lend a hand to anyone in need.  He definitely has acted as a Peer and I am happy to seem him elevated to their ranks.

(The cloak is red wool twill, with black linen lining and gold silk border.  The Pelican was wool embroidery on wool, save for the blood, which was silk, and then that was appliqued onto the cloak.  Applique is a new skill to me, and I have done little embroidery prior to this, so I learned a great deal during the making of this garment.  I look forward to doing more of both in the future!)


0 Comments

A Deeper Look

3/27/2015

0 Comments

 
I have been working on Viking garb and arts for quite some time at this point, and given that I am heavily involved now in the fine details of textile creation, I am starting to take a closer look at the things I "learned" when I first started this journey.  Some of them I have mentioned before, and some just smacked me in the face recently.  Somethings are misrepresented by reenactors, and some, quite honestly, I just did not gaze at closely enough when I first started (and this, really, is not surprising given the volume of information that is presented to a newcomer to this field of study).

So what have I learned recently?


  1. My favorite combination of seams is not present among extant Viking textiles that I have studied.  For hand sewing I prefer (and have gotten good at) hemming the edges of each piece of my garment using a running stitch.  I then join the pieces together with an over cast stitch.  It works well, makes for a strong seam, and I can do it quickly.  The problem with this is that while both overcast and running stitches are period, I cannot adequately souce where they were used together in the way that I use them.  Could I still make a case for using this based on other combinations we do see in extant textiles?  Absolutely, but for future items that I will be documenting, I will definitely be switching to use of overcast for both the rolled edges and the seam joining.
I actually think there is a good reason for this.  I have three period reproduction needles, with two types of eyes.  Neither style works nearly as well for a running stitch where I would load up more than one stitch on the needle and then pull it through several stitches at once, as I would with my long, fine modern needles.  Rather, to get a similar looking stitch I would need to use a stab stitch (where the needle goes entirely through the fabric and then back up through).  That takes a great deal longer than using an overcast stitch to hold that initial hem.
Picture
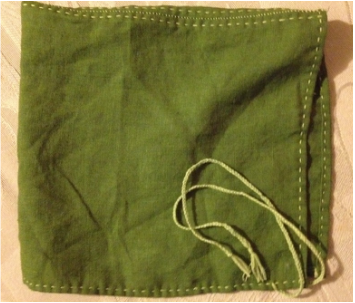
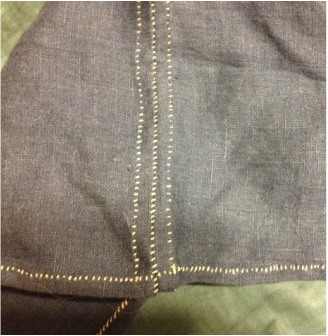
Dublin cap using a running stitch to hem edges and an overcast to join.
Picture
Dublin cap using overcast stitch for both hemming the pieces and joining them together.
2.  I learned quickly enough that there is no evidence for large scale appliques or embroidery on Viking costume.  I've gone further to learn how few embroideries we have at all compared to the volume of total textiles recovered.  This tells me that the few items we do have were quite rare and given the context from other items in the graves, they were reserved for the very wealthy.  (I have written further about this here http://awanderingelf.weebly.com/blog-my-journey/viking-embellishment-and-embroidery-part-3 )  But what I more recently accepted is that the practices of seam embellishment (decorating an existing seam), is probably not as common as reenactors (myself included) would like.

See those two Dublin caps above?  I do not actually consider those seams embellished.  All rows of stitching are necessary and functional.  Even if I used a brilliantly colored contrasting thread, those seams still serve a purpose. (Of course, use of colored thread on seams was also a rarity, but that is a topic for another time.) Examples of true seam embellishment would be laying cord over the seam and stitching it down or doing a decorative row of stitching by using something like osenstitch to cover the seam joining.  I personally love this type of decoration, but plan to use it a bit more judiciously in the future. 

What brought me to this conclusion?  Well, as mentioned earlier, I have been in the process of reevaluating things I learned early on in my journey.  One of those things was that herringbone stitch is period for Vikings.  At the time (when making my first dress) that was good enough for me!  Looking deeper, I have discovered that the stitch so favored by reenactors was never found used as an embellishment on a garment (at least not that I can find).

What examples do we have of this stitch specifically from Viking era and place?
  • Hedeby harbor has a textile fragment that is hemmed using a herringbone stitch.  however, the herringbone is over the edge of the hem, and hence, likely that the part of the stitch we consider decorative was on the inside of the garment, with what would look like parallel rows of running stitch on the outside.  (As described by Inga Hagg)
  • The find 6-8 Pavement at York has a fragment of a hemmed garment that is worked in Herringbone.  As with the Hedeby find, the herringbone is on the inside of the garment.  (Cordage and Fiber from 16-22 Coppergate, by Penelope Walton Rogers)
  • The Mammen cushion has a variant of very closely worked herringbone over a seam (you can see that here http://www.cs.vassar.edu/~capriest/vikembroid.html ).  So here a decorative stitch is used over a seam of a household item, not a garment.  (And it is important to note that this stitching was only 2.5mm wide.  There is no open space in the stitching, making it resemble a tight, narrow braid.  This is entirely unlike the herringbone typically worked by reenactors over seams.)
  • The Skjoldehamn tunic has a stitch similar to that used at Mammen at the neckline.  The issue with this one is that this find may or may not even be Viking and if it is, it seems to reflect a very different type of fashion than we find further south and that alone makes me leery of using it as a basis for embellishment on a Viking kit without further substantiating evidence.  Beyond that, the tunic itself is dated post-Viking era.  As with Mammen, this stitch is still much more narrow than reenactors use, and, again, it is more filled in.  (http://www.ceilingpress.com/Resources/Nye%20tanker%20om%20Skjoldehamnfunnet.pdf )

  • Additionally, there is a 10th century reliquary pouch from York that uses a what Penelope Walton Rogers calls "catch stitch".  Typically catch stitch is another name for Herringbone, but in this case, the diagram in the materials shows a different type of blind catch stitch being executed. Stitches are predominantly on the inside of the item and this would not be a decorative stitch at all.  This item is described in an article in NESAT III and Textiles, Cordage and Fiber from 16-22 Coppergate, both by Penelope Walton Rogers.

Four samples only (out of hundreds of textiles), and none of them has the stitch displayed in the manner we commonly see it at events (and two of the four are different than a normal herringbone, two are inside the item, and one might not be Viking...).  This does not make a terribly good case in my eyes for extensive use of this decoration.

Now, will I remove all of my hard work from garments I have already made?  I cannot say that is the case.  I will, however, be more judicious in use of the stitch in future projects as I attempt to better recreate clothing of the past.


Over all, I think the key is, for anyone with an interest in recreation to not get so comfortable in what they "know" that they never take time to look back and reevaluate things (or accept new evidence as they find it).  It can be a little frustrating, of course, especially when one has painstakingly applied a mile of herringbone stitching to a garment.  But in reality, I find these discoveries exciting in a way.  I lets me see how far I have come, and gives me a more clear path in my journey of recreating historic arts!
0 Comments

Viking Embellishment and Embroidery - Part 3

12/5/2014

7 Comments

 
(The earlier segments of this article can be found here:  http://awanderingelf.weebly.com/blog-my-journey/viking-embellishment-and-embroidery-part-2  and here http://awanderingelf.weebly.com/blog-my-journey/viking-embellishment-and-embroidery-part-1 )

Embroidery, while evidenced, was not common, and often what we have is considered to be imported goods.

First, let me make a comment about how I differentiate types of embroidery that are often discussed among reenactors.  Often I see someone come onto a forum and ask about Viking embroidery.  Others quite often launch into long dissertations about how Vikings did not do embroidery.  What the poster sometimes means, however, is often not figurative, large-scale embroidery, but rather the seam embellishments that are frequently employed by reenactors.  For the purpose of this post I am going to categorize those three types differently as “seam embellishments”, "functional stitches" and “embroidery”.

Seam embellishment, while (in my opinion) over done by reenactors (myself included), is at least plausible and in evidence in several places.  The Hedeby Harbor aprondress fragment had a braid applied over a dart.  There is also mention of embroidery covering a seam in one of the Oseberg scraps and some of the apron dresses from Birka had narrow cording sewn to the top edge of the garment.

Functional stitches, on the other hand, are exactly what they sound like.  They are stitches that serve a purpose (to create a seam or to hold open the seam allowance) but because part of the stitch rests on the surface of the cloth, it can be quite attractive when stitched in a different color of thread. (Even something as simple as unbleached linen thread against a dark blue dyed linen garment can be striking in its simplicity.)

(Note 9/22/15: I was rereading Hilde Thunem's excellent paper on aprondresses and am really thinking hard about a remark the author made "Inga Hägg comments that the hemming stitches would usually be invisible on wool, but would show up clearly on linen. She believes that the reason that the band has been placed lower on the linen smokkr could be to cover the stitches."  I need to go back and look at Hägg's comments and some other things as well.  I want to chart out the extant seams from various finds and see what I can figure out about the visibility of the stitching and the threads used.  It could well be that they Viking era Norse preferred a very clean look, with little in the way at all of stitches showing.)

Ideas for using seam embellishment and functional stitches to create a more accurate impression:
  • Dot not cover every inch of a garment with decorated seams.
  • Fine cord or braided string as an edging has ample evidence (on apron dresses a string, especially if it were linen or silk, at the top might serve a functional purpose in helping the top of the garment to not stretch as much with wear).
  • If the stitch serves a functional purpose, it actually makes more sense in use (example a running or overcast stitch on the surface that actually is part of a hem).  There is one example from the Hedeby Settlement (S 27) that uses buttonhole stitch to join two textiles.  Note though, that that was only one of several types of stitches used on that garment. (S 27 information added 9/30/15)
  • Keep stitches narrow and compact, there is no evidence of an inch wide herringbone stitch anywhere.
  • If you must add stitching, employ stitches that were used in period – examples of some stitches are running stitch, stem stitch, split stitch, osenstitch (though most of the the extant examples of this are metalwork).  Note here that while we as reenactors love herringbone, evidence for its use in period is actually quite limited.  It was used on a pouch from York and on the INSIDE of a hem at Hedeby.  A stitch similar to herringbone was used on the Mammen cushion cover (decorative item rather than a garment) and on the collar of the Skjoldehamn tunic (which may or may not even be Viking), but it was not the sprawling herringbone seen in the reenactment community.  For a deeper look at Herringbone see my post HERE.


And now on to the controversial topic of larger, decorative embroidery. 

The examples that we have are often are thought to have been Saxon, Rus or Byzantine imports (the first is thought to be the case with the larger Oseberg pieces in particular).  It is very important to understand that some of these were also considered to likely be from decorative goods, rather than garments.  This proves that the technique of heavily filling an area with stitching existed at the time, it does not at all indicate that this was applied to garments in period.  Also worthy of note is that all of these items were very, very high status.

Mistress Þóra Sharptooth has a good article about extant embroidery here:  http://www.cs.vassar.edu/~capriest/vikembroid.html

Picture
Picture
Embroidery found at Oseberg that is considered to be a Saxon import. (Osebergfunnet, bind iv)
Picture
Valsgärde embroidery, 10th Century. This is worked in metal thread and is thought to have originally been part of an ecclesiastical garment.
Ideas for using embroidery to create a more accurate impression:
  • Use embroidery very, very sparingly.
  • Use appropriate stitches, threads and colors.
  • Only use embroideries for very wealthy personas of high status and use the embroidery only on textiles worthy of that class.  Look for high thread counts and a well-dyed cloth in period appropriate colors.
  • Be conscientious in your chose of patterns and motifs.  Celtic knotwork is always inappropriate for a Viking kit.  Yes, there is fabulous Jelling style knotwork that lends itself well to embroidery, but nothing has been found to support the notion that these motifs were replicated in textiles. 
  • Scale is very important.  Most of the extant pieces are quite small.
  • Consider using embroidery that uses only outline as some of the items from Mammen did. 
  • Or, consider researching Saxon, Rus or Byzantine embroidery, creating a piece and then cutting it down for use on a Viking kit (as if your persona had traded for the item and then re-purposed it as decoration).  Actually, that could be a pretty interesting project, maybe I will try that!


The Argument

Often someone will have their heart set on embroidering a large scale, fantastical beast onto a garment and when looking for advice they are confronted with the facts that this style of decoration seemingly did not exist in our period.  The most common argument I have heard to defend their position is that that people had “all winter trapped indoors to work on these things”. 

Yes, there were long winters, but people were as busy then as they were at other times of the year.  Women were responsible for spinning, weaving and sewing garments for their entire family.  Yes, a wealthy woman might have had slaves or servants to help with these tasks, but that also means that those slaves and servants also needed to be clothed.

Let us look for a moment at the time involved in just these tasks.   In Tools for Textile Production by Eva Andersson, the author comments on experiments in which she took part that showed wool could be spun at 21 yards an hour while the experiments at Ribe show that an average of 61 yards of linen could be spun an hour.  (The difference in the two is that the combing included in the wool time from Andersson’s work, whereas the flax would have already been prepared before the spinning begins).  

If I need 3 yards of 50” wide fabric for a dress (that is roughly what I use for the tunic type gowns I wear under my aprondresses) and I want to craft a textile that is 25 ends per inch for the warp, I need 4200 yards for my warp.  If the weft was slightly thicker yarn (as was often the case) and set at 18 picks per inch, I would need 3478 yards of weft.  That is 7678 yards of yarn for one garment.  Based on the prep/combing/spinning time that Andersson lists you would need 365 hours to accomplish JUST the spinning portion of your garment creation.  If you work on this for ten hours a day, you are looking at over 36 days just spent spinning for a solitary garment.

(And because we are discussing embellishment, which is something reserved for higher classes, here is the calculation for a more finely crafted textile than the modest one mentioned above.  With a warp sett of 50 ends per inch (knowing that this is still not nearly as fine as some of the extant textiles), I would need 8400 yards of warp yarn and another 5799 yards of weft that would be set at 30 threads per inch.  676 hours of spinning.)

Both the experiments at Ribe and Andersson agree that setting up the loom takes 2 days of work (approximately 20 hours of time total).  Weaving was listed as 27-31 inches a day by Andersson.  That 25epi tunic I would make for myself would take me over 3 and a half days to weave if I spend 10 hours a day doing nothing but that. 

The result of all of those figures?  One dress of decent, but not exceptional cloth, takes approximately 43 days of work at 10 hour days.  And this does not include time spent cutting or sewing, this is merely time spent in textile production.  Consider then that I would likely also need a smokkr (aprondress) and possibly a new caftan or mantle.  And do not forget that one would also be crafting garments for a spouse and children. 

I simply find it implausible that there was much time to spare even when "trapped" indoors in the winter.

Assume now that when you are finished with the necessities to cloth your family or fill your house and that you do indeed have extra time.  Would you embellish your attire as befits your station?  Certainly!  I think, however, that would you would choose to add silk strips to your garments (which would provide a costly, but time effective embellishment), or use the thrums from weaving to decorate a seam, or make use of tablet weaving which is a technique that is already considered a status symbol in your community, as is evidenced by the number of wealthy finds that include tablet weaving.  Additionally, it is likely that there is a long tradition of this type of weaving in the Viking areas and this skill been passed down to you by your mother or grandmother.  There is far more logic and evidence to me to support the use of these techniques, rather than the assumption that someone would have chosen to employ elaborate embroidery (which they may indeed never have even seen in their life, which means essentially they would be inventing a new art form...). 

Understand that my goal with this article is not in anyway to stifle an individual’s creative spirit when it comes to embellishing their costume!  I enjoy seeing creative works and often compliment artisans on the skill it took to construct their elaborate garments.  Instead, I am giving my own personal reasoning based on my research as to what I think is realistic in terms of Viking embellishment and why some techniques might have been used more often than others.

And note also that I do not discount that someday we could find that even a farmer's wife did indeed own heavily embroidered clothing.  Personally, I would love to see that, and when it happens, I will happily revise my thoughts on this subject!  :-)


7 Comments

Viking Embellishment and Embroidery - Part 1

11/26/2014

5 Comments

 
There are several arguments that come up repeatedly on Viking costuming forums.  Many of them surround appropriate decoration techniques for costumes of the era (in contrast to things that are pure fantasy).  Large scale embroidery is likely the most contentious of the techniques commonly employed by reenactors today.  I have seen garments created and heavily embellished by individuals that were awe inspiring in their form and complexity, but realistically, there is no evidence for that type of work.

To begin this conversation, let me break down what we do know from archaeological evidence about garment embellishment:

We know that they had tablet woven bands. 

There are dozens of band fragments from many areas ruled by the Vikings.  Scandinavia, Ireland, York, Iceland even further east to places such as the Ukraine all have ample evidence of the use of tablet weaving.  Most of these bands were brocaded, rather than the simple threaded-in patterns you commonly see used by reenactors.  I have seen no evidence at all of decorative bands that use a method of simplistic 4 forward, 4 backward style of turning to create basic patterns such as diamonds.  Rather, the patterning in most examples was created by brocading, a hand manipulating technique that produces an intricate design on the surface of the band, often executed with metallic thread (typically hammered silver or gold, or hammered metal wrapped around a silken core).

It is important to remember that there were only decorative bands found in less than 5% of graves, making even this type of treatment quite rare.  
​
Most bands were less than a half an inch wide and were woven from silk, or a warp of half silk and half linen with the linen never showing on the surface.  This allowed the weaver to use less of their costly silk while still creating a luxurious band.  Wool has also been found as tablet woven bands.


Picture
Picture
Picture
Extant bands from Birka. (from Birka III: Die Textilfunde aus den Gräbern)
Picture
Tablet weaving on a mantle ribbon (Mammen). Photo credit - National Museum of Denmark
I personally have only had limited experience with tablet weaving, though adding brocading to my skill set is part of my eventual plan.  I fault no one for using their learning attempts (typically simple threaded in patterns) to embellish their garb, and have done so myself because I prefer to use everything I make, even if it is a ‘learning process’ type of project.  Indeed, I think this style of handwork still makes a better addition to a costume and purchased jacquard trim!  I do, however, think it important for those who seek to improve their overall historic impression to understand what techniques were actually employed and work to master those.

Picture
My simple tablet woven band in 24/2 wool. The technique used for this is not evidenced in the Viking age.
Ideas for using tablet weaving to create a more accurate impression:
  • Use narrow bands (most finds were half an inch or less)
  • Stick to silk, wool or linen when possible (or cost saving substitutes such as tencel for silk), and use very fine rather than thick threads
  • Use brocading techniques to create motifs on the band or explore other methods of patterning done in period
  • Choose your colors based on those available with natural dyes
  • Only apply silk tablet woven bands to garments made from high quality textiles
  • Opting to only use bands on a small portion of your kit, rather than decorating every available edge with a band, as the finds were rare

Part 2 can be found here:  http://awanderingelf.weebly.com/a-wandering-elfs-journey/viking-embellishment-and-embroidery-part-2


5 Comments

Hand Stitches: Herringbone

10/10/2013

1 Comment

 
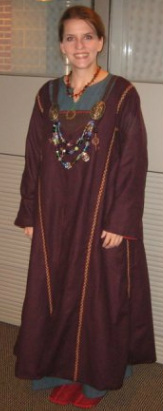
PictureNorse coat with herringbone stitching.
(In light of further research on my part, I will note here that I believe that the use of herringbone externally as a seam embellishment is completely a reenactorism.  We love it, but evidence for its use in period is actually quite limited, and there is no evidence of it on garments over seams at all.  It was used on a garment from Pavement and on the INSIDE of a hem at Hedeby.  A stitch similar to herringbone was used on the Mammen cushion cover (decorative item rather than a garment) and on the collar of the Skjoldehamn tunic (which may or may not even be Viking and possibly dates post-period).  I am leaving my earlier article and instructions below intact, however, for those who still wish to employ this stitch as a decoration.  See more details at: http://awanderingelf.weebly.com/blog-my-journey/a-deeper-look and
​http://awanderingelf.weebly.com/blog-my-journey/why-i-count-threads-sourcing-a-myth )

Embellishing garb (appropriately or not) is an SCA tradition.  Embroidery, elaborate trimmings, fancy stitches... these things are infinitely appealing to most of us and perfectly acceptable within the Society. 

Learning to embellish garb, however, is an art unto itself.  Learning both appropriate methods for doing these decorative touches and when and where to use them for your persona can often involve long hours of research and even more time to perfect a technique for execution (and apparently I did not do enough research first for this one, lol, oh well, we live and learn).

I very much enjoy hand embellishing my Viking garb, even though my first attempts were very crude and I had a hard time coping with what I felt were very imperfect stitches.  Learning to hand sew or embroider is much like anything else in that you have to develop the muscle memory needed to keep the stitches neat and even and you additionally have to develop an eye for spacing. 

I also had to learn to let the little imperfections slide.  Period stitches were not perfect (I believe someone even teaches a class on this at Pennsic!).  And the more garments I embellished, the better my stitching got and while my handwork is still not perfect, I am more than happy to wear and display these items and to discuss some things that helped me craft better costumes.

I also have to note here that I am not a fan of practicing something just for the sake of practicing it.  If it is using time and materials, I would prefer to still use my "practice" piece in the end.  When I am learning a new stitch I try it a few times on a piece of scrap fabric and then typically apply it to a piece of older garb or a pouch or, well, anything that I can still use rather than stuff in a pile of samples.  Would I try something totally new on my court garb?  Likely not, but I will definitely make use of it somewhere until I am competent enough to use it to decorate my finery.

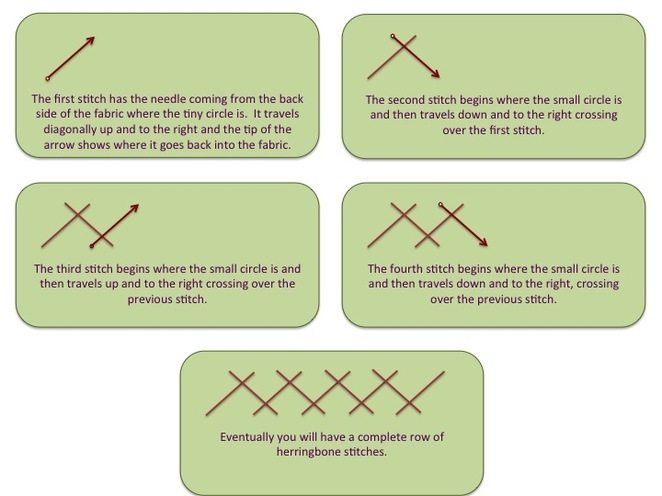
Below, is a diagram of the stitch for those who might be unfamiliar with it's structure.

Picture
Picture
Aside from practice, there are quite a few things things I have done or tried to allow me to better keep the stitches even in size and spacing: 

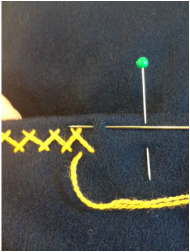
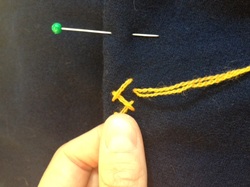
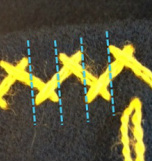
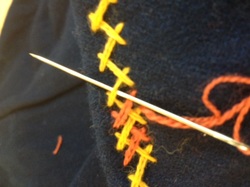
  • To help keep the stitches appropriately spaced, and to help keep them neatly in line along the width of the row, do not stab the needle through the fabric in two motions (up from the back, and then down again from the top), but rather, insert the needle from the front to the back to the front all in one pass as detailed in the photo to the left. 


Picture
  • Use something as a visual reminder of how wide the stitches should be kept.  You can use chalk to mark the line on the fabric or, as in this photo, I am using the width of my thumbnail to measure how far I set the inside edge of the stitches from the hem. 

  • It is also possible to use a sewing machine to lay in a two even rows of basting stitches and use those as the outer guides for the herringbone stitches and remove the machine basting later.


Picture

  • To help keep the spacing of the cross even you can line up each new stitch with the end point of the stitch above or below it.  (This can also help to keep the herringbone stitch compact as you sew, as there is a tendency in beginners to make each stitch a bit longer than the previous one until the pattern is somewhat sprawling in appearance.)

Picture

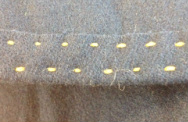
  • Periodically look at the back of your project.  You will see two parallel rows of stitching, which should be fairly consistent in length and in how far they are spaced.

Picture
Cheat:

If you happen to have a sewing machine that allows for very wide stitches and that has a series of building complex stitches, you can try this cheat to help develop the muscle memory for working with this stitch. 

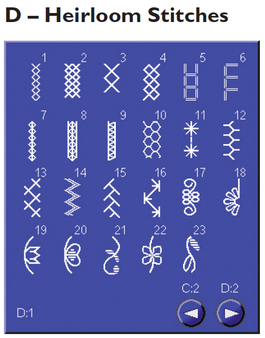
To the left is an image of the screen from a Husqvarna Designer SE.  #13 is a Herringbone stitch.  Now, stitched out I do not actually find this very convincing (even when done with wool machine embroider thread) because it actually breaks each segment of the stitch into smaller stitches.  But, you can machine stitch on your fabric with thread that exactly matches your fabric or thread that exactly matches the hand stitching thread you plan to use (I find the former method actually hides the machine work better) and then use the machine sewn lines as a guide and sew over them by hand with your thicker hand sewing thread or yarn.  The hand stitches should completely cover the machine stitches and render them invisible unless someone happens to turn the fabric over and look at the reverse.

Now, this method has a couple of drawbacks.  One is that it is actually very slow as the machine can take time to stitch out a complex pattern like this.  Another is that it will make that area of the fabric somewhat stiff.  Finally, it takes an expert touch (which I do not have) to guide the machine evenly over seams (where the fabric is several layers thick) and this can have a tendency to distort the machine stitches and make them longer or shorter when crossing a seam line.

(The tan plaid fabric depicted further down was created by laying down a row of machine stitches first.  I did a few pieces with a machine laid row as a guide and now now longer need that crutch to keep my rows of stitches in order.)

Picture
What else can you do with this stitch once you have mastered it?

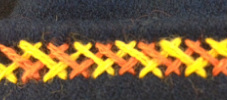
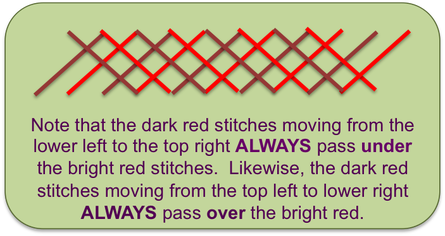
  • Adding a second row of stitches, woven into the original one can look wonderful.  (The key is to make sure that you always go over and under the same stitches as noted in my diagram below.)

Picture
Picture
Picture
  • While this stitch is often used to decorate a hem, a seam or one its own as a purely decorative element, it can also be functional.  All of the stitch examples I have used above are red and yellow wool thread on very dark blue wool fabric.  The stitches are actually hemming the fabric of an aprondress (both the top and bottom hem).
  • Speaking of hems... a very compact herringbone can actually hide a machine sewn hem, especially if the yarn adds some sort of texture to the project that detracts from the machine stitching underneath.

Picture
  • Finally, I have to mention there are many ways (not necessarily period, but that are pretty) that you can further embellish a herringbone stitch.  To the left you can see that I added a small stitch at each cross in a darker color.  A few quick searches of the internet will yield many more options for additional elaboration!

1 Comment

12th Night Dress - Needlework Progress

11/21/2012

0 Comments

 
Picture
The embroidery is underway!  (My design inspiration can be found in an earlier post here http://awanderingelf.weebly.com/1/category/12th%20night/1.html )

I can do hand embroidery, but often do not choose too.  Part of the reason is an issue I have with my hands, though I can still sew by hand for short spells at a time.  The larger issue though, is with my head.  ;-)

See, I am a perfectionist about the things that I make and while I love the look of hand sewing and hand embroidery, my hand work does not live up to my own expectations.

Yes, I know, practice makes perfect, but I also have a hard time sitting around making "practice pieces" just for the heck of it.  If I spend time on it I want to use it, right?

At some point though, I decided to get over myself and do what hand work I could.  Ironically, the more I do, the less I feel it needs to be visually perfect.  I am starting to love the more organic nature of handwork and to me it now looks more real.

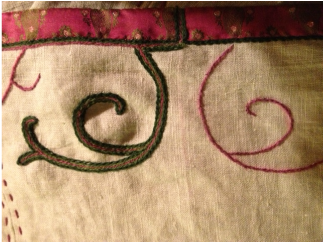
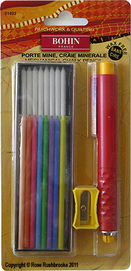
For this piece, the pattern was drawn first on paper and I had indended to use a transfer paper to shift the design to the fabric.  Unfortunately, my transfer sheets eluded me.  Instead, I took a pin, poked a series of holes along the design line, laid it on the fabric and drew over it with a chalk pencil.  After removing the stencil, I sketched over my lines and started stitching. 

Stitches used here are chain, split and stem (all worked in Renaissance Dyeing's crewel wool).
Picture
For one of the BEST sewing tools every, rush out now and buy yourself one of these! A talented friend recommended this to me a couple of years ago and I cannot imagine how I lived so long with out it!
0 Comments

12th Night Dress Progress

10/18/2012

1 Comment

 
Picture
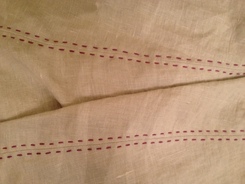
This project is not progressing quick enough!

Part of the problem is just a general lack of time, but another part is medical.  I started having some issues with my hands in January.  Numbness, lack of blood flow, too much blood and bursting veins, pain... After visiting several specialists we learned it was actually an issue with the muscles in my neck reacting to certain tasks and/or stress.  The result of this is that I can not sit for any length of time doing one thing (which happens to coincide nicely with my typical ADHD mental state). 

What does this mean for my projects?  Well, I can only work on any given item for a short span of time - typically less than half an hour - before I need to stretch and work on something else.

The apron dress, thus far, is pictured above.  The color is off, its a pale green color called Willow by the shop from which it came.  I wish I had time to hand sewing this garment, but with real-world-work being exceptionally busy, there was just not time for it.  Seams are done with the sewing machine but the surface stitching (which is finally finished) is done by hand with the crewel wool I love so much from Renaissance Dyeing.

Picture
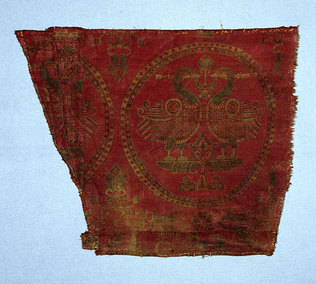
Silk samite with confronted ducks standing on split palmette enclosed in double pearl roundel. Central Asia, 9th Century. Source: http://www.asianart.com/exhibitions/aany2006/carlo3.html
The next step is to cut the silk into strips and applique it to the top edge of the garment.  The particular silk I will be using falls into the UWYH (Use What You Have) category.

In period the the vikings would take imported silks (samite specifically), cut it into strips and apply them to their garments as trim.  I do not have any access to samite, so opted to search out other silks that might have patterns that look at lease somewhat similar to those found on period samite (which often came from Byzantium,Central Asia or Asia).  Many of the extant pieces, such as the one above, featured rondel motifs that repeat. 

If you want to see applied silks on an extant Viking textile, an image of the Lund find is here:  http://www.netvike.com/VIKINGS/VIKINGHISTORY/VIKINGCLOTHING/CLOTHING1011AD/CLOTHPICS/LUNDSILK1.png

Picture
Picture
While I could not find many (inexpensive) silks that featured rondels, I did find a few that have large repeating patterns that will work nicely when sliced into strips.  Both of the above were purchased on Etsy as fat quarters.
Picture
Unfortunately, as I was choosing my silks, the "Oooo Shiny" mentality struck and I ended up with several items that I just chose because of I liked them and they were silk and pretty and whatever, rather than because they were the best choice for my projects.  This is where UWYH comes into play.  I've already bought and paid for them so I will just use the items as best I can and just be more careful in my choosing next time.

To the left is the silk I will be hacking up for this dress.  Paisley?   Not a good choice at all, but when I cut the fabric into strips I will do it in such a way that the actual pattern can not be determined.

Picture
Picture
What I would LOVE to find in the future are silks that have a distinct geometric pattern to them.  There were many textiles like this found on the Oseberg ship and I have yet to find anything I can afford that are at all like these.

To the left are the watercolor paintings of two such silks (art by Sophie Kraft from Osebergfunnet, Volume 4).
1 Comment
<<Previous

    About Me

    I am mother to a billion cats and am on journey to recreate the past via costume, textiles, culture and food.

    A Wandering Elf participates in the Amazon Associates program and a small commission is earned on qualifying purchases. 
    ​

    Archives

    July 2024
    January 2024
    October 2023
    September 2023
    August 2023
    July 2023
    May 2023
    March 2023
    February 2023
    November 2022
    October 2022
    September 2022
    June 2022
    May 2022
    March 2022
    March 2021
    February 2021
    September 2020
    August 2020
    July 2020
    June 2020
    May 2020
    March 2020
    January 2020
    December 2019
    November 2019
    September 2019
    July 2019
    June 2019
    May 2019
    April 2019
    March 2019
    February 2019
    January 2019
    November 2018
    October 2018
    September 2018
    August 2018
    July 2018
    June 2018
    May 2018
    April 2018
    March 2018
    February 2018
    January 2018
    December 2017
    November 2017
    September 2017
    August 2017
    July 2017
    June 2017
    May 2017
    April 2017
    March 2017
    February 2017
    January 2017
    December 2016
    November 2016
    October 2016
    September 2016
    August 2016
    July 2016
    June 2016
    May 2016
    April 2016
    March 2016
    February 2016
    January 2016
    December 2015
    November 2015
    October 2015
    September 2015
    August 2015
    July 2015
    June 2015
    May 2015
    April 2015
    March 2015
    February 2015
    January 2015
    December 2014
    November 2014
    October 2014
    September 2014
    August 2014
    July 2014
    June 2014
    May 2014
    April 2014
    March 2014
    February 2014
    January 2014
    December 2013
    November 2013
    October 2013
    September 2013
    August 2013
    July 2013
    June 2013
    May 2013
    April 2013
    March 2013
    February 2013
    January 2013
    December 2012
    November 2012
    October 2012
    September 2012

    Categories

    All
    12th Night
    14th Century
    AEthelmearc
    Aprondress
    Awards
    Bog Dress
    Bronze Age
    Dance
    Dance Name
    Distaff
    Dyeing
    Embroidery
    Fiber Arts
    Flax Growing
    Food
    Glass
    Haberci
    Headcoverings
    Illumination
    Inspirations
    In The News
    Library
    List Of Links
    Machine Embroidery
    Metal Clay
    Mid Month Inspiration
    Migration Era/Iron Age
    My Documents
    Ottoman
    Ottoman Fabrics
    Pennsic
    Publications
    Research
    Rigid Heddle
    Sca
    SCA Camping
    SCA Forestry
    Sca Name
    Sca Newcomer
    Sewing
    Sheep
    Spinning
    Textile Charts
    Tips
    Totally Not SCA
    Viking
    Viking Bead Research
    Viking Costume: Beyond The Myth
    Viking Swatch Book
    Viking Textiles Looking Deeper
    Weaving
    Wool


      Email Updates

    Subscribe to Newsletter

    Blogroll of SCA & Costume Bloggers

    Below is a collection of some of my favorite places online to look for SCA and historic costuming information.

    More Amie Sparrow - 16th Century German Costuming


    Gianetta Veronese - SCA and Costuming Blog

    Grazia Morgano - 16th Century A&S

    Mistress Sahra -Dress From Medieval Turku 

    Hibernaatiopesäke

    Loose Threads: Cathy's Costume Blog

    Mistress Mathilde Bourrette - By My Measure: 14th and 15th Century Costuming

    More than Cod: Exploring Medieval Norway

    RSS Feed


Proudly powered by Weebly