A Wandering Elf
  • A Wandering Elf
  • Blog: My Journey
  • Iron Age Celtic Studies
  • A Wandering Elf in the Woods
  • Classes
  • Resources: Sheep & Wool
  • Resources: Costume and Textiles
  • Resources: Migration Era
  • Resources: Historic Glass Beads

Documentation and the "Thing That Changed My Life"

4/14/2017

0 Comments

 
I love doing research, and love compiling documentation.  Yes, it actually might be one of my favorite parts of doing what I do.  I always learn new ways to improve my documentation every time I produce something, and I want to share one item that really changed now only how I document a project, but how I THINK about a project.

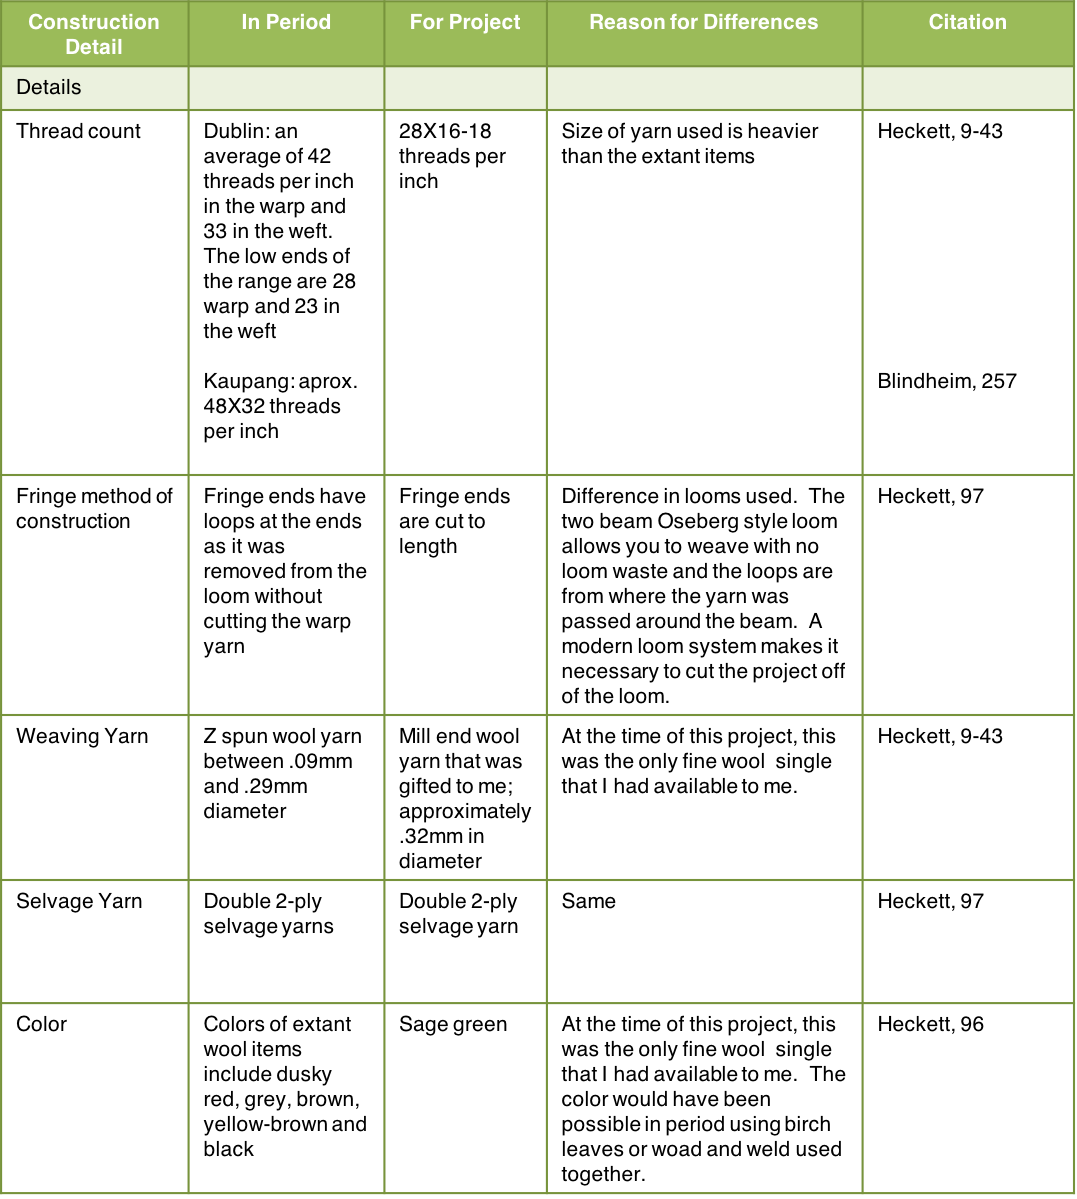
Mistress Ragnveig Snorradottir shared with me some of her documentation for a pentathlon competition.  At the end of her documentation there was a chart, a decision making matrix (which was actually suggested to her by Mistress Sigrid Briansdotter).  It allows you to readily lay out all project details for the benefit of the judges.  I have discovered that using a chart like this actually helps me to organize a project, and keep track of the most relevant details.  This allows me to not only have a quick reference for my own work, but it sometimes makes me stop and thing about my choices as I work.

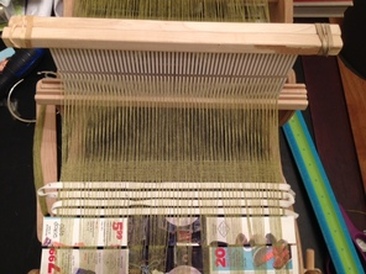
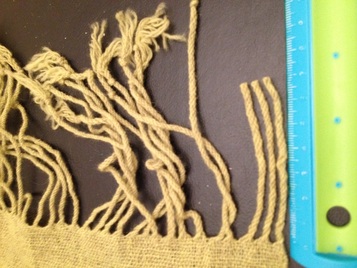
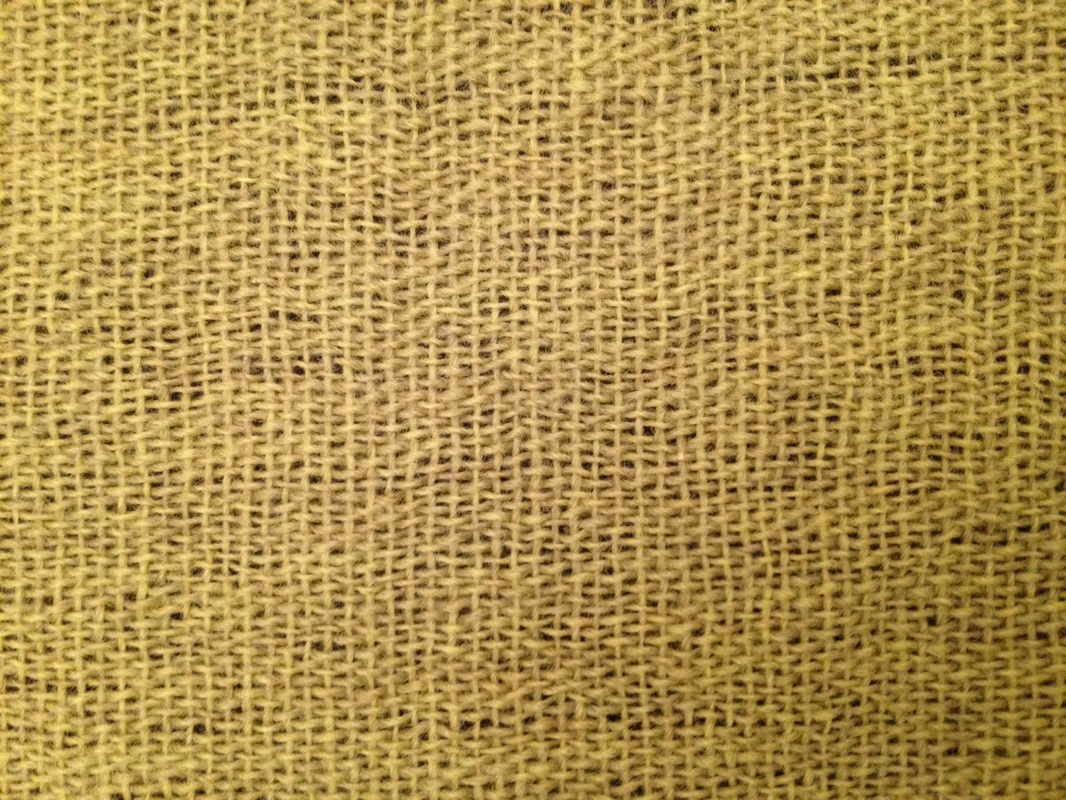
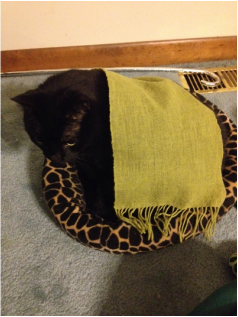
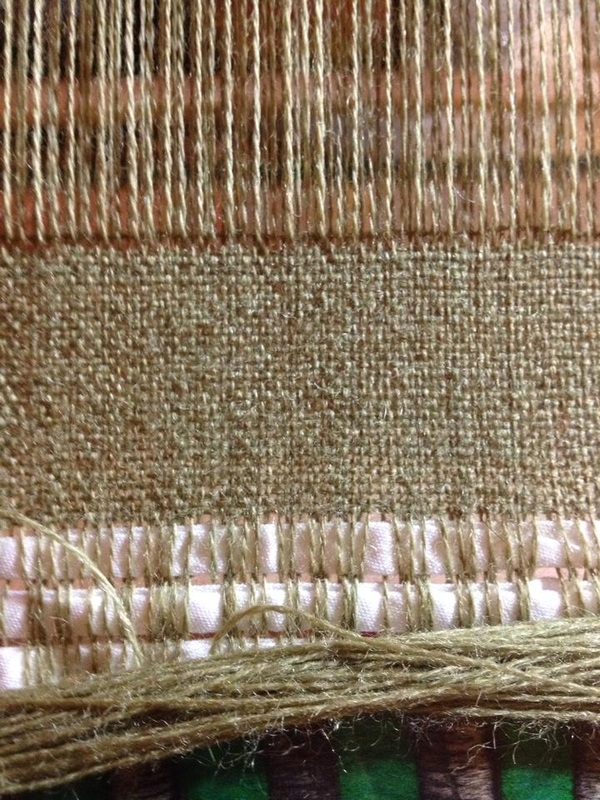
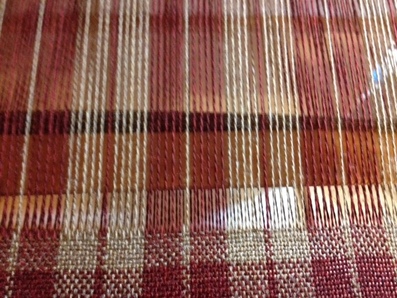
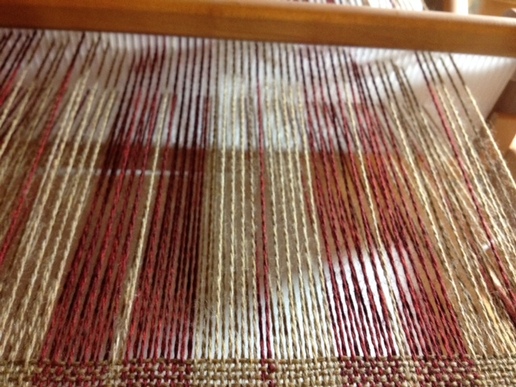
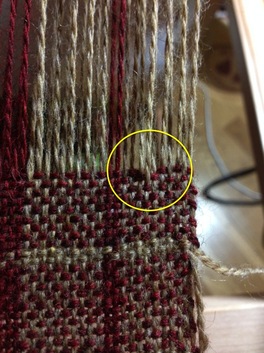
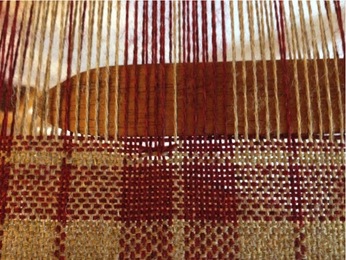
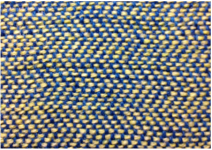
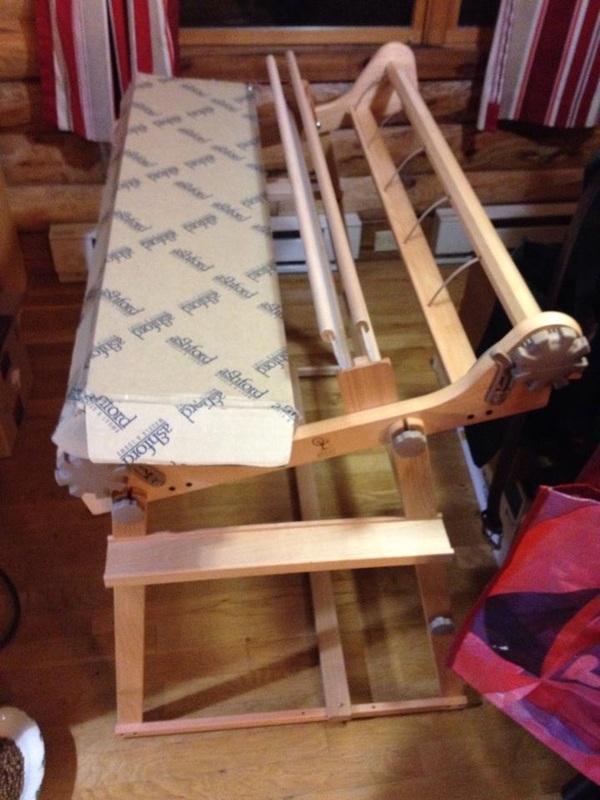
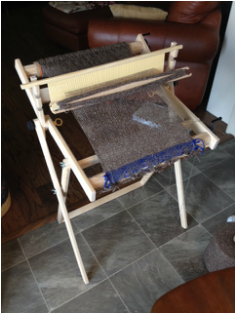
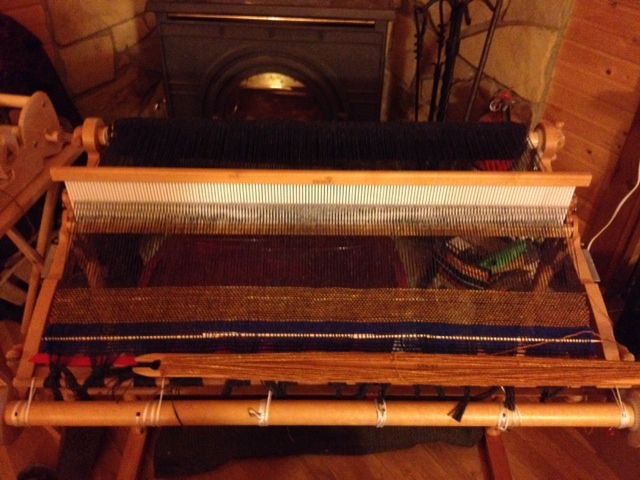
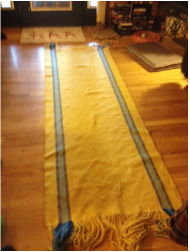
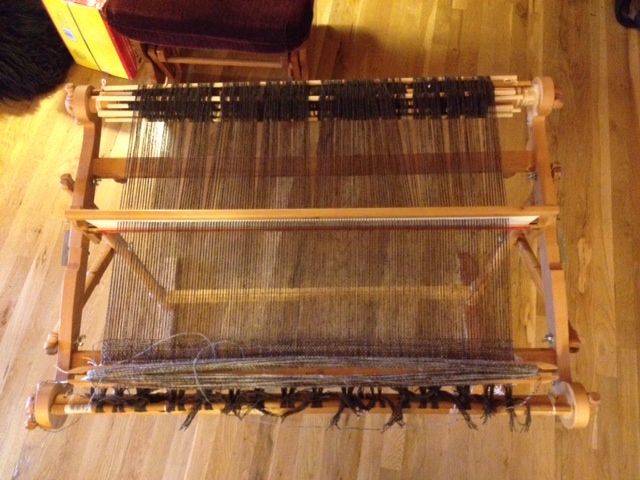
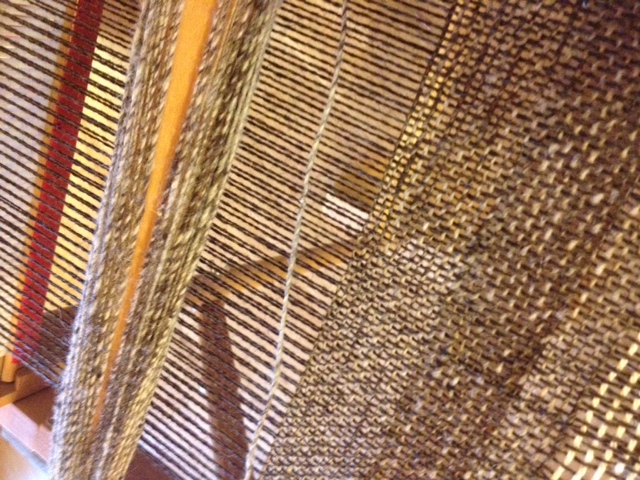
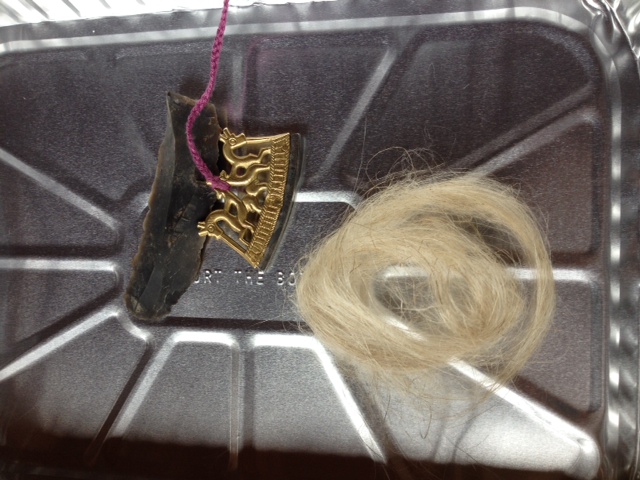
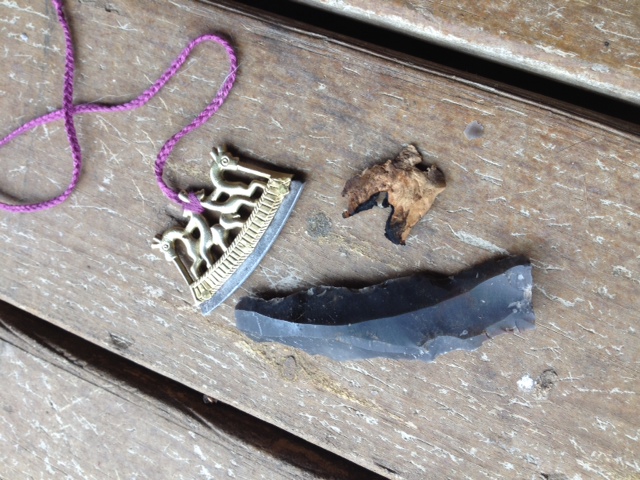
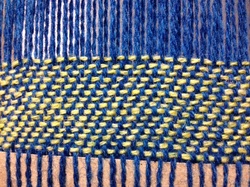
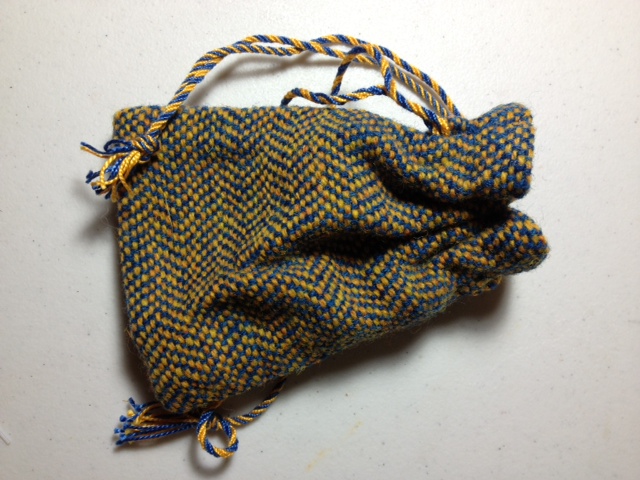
Below is the chart as I used it in a competition entry for Atlantia's Kingdom Arts and Sciences Faire in 2016.  This specific one is from a woven Norse headcovering that I entered.  A link for the full documentation can be found below the chart. 
Picture
kasf_headcovering.pdf
File Size: 28552 kb
File Type: pdf
Download File

0 Comments

Dublin Scarf - Finished

3/6/2015

2 Comments

 
I mentioned recently that I was working on a wool gauze fabric for a Dublin style scarf.  I finished the weaving last week and finally finished twisting the fringe today.  At last the project has been wet-finished and trimmed and while I have a few errors, I am really rather pleased with the outcome.

The original post that shows how I warped this with two heddles on a small rigid heddle loom can be found here: http://awanderingelf.weebly.com/a-wandering-elfs-journey/more-sampling-stuff

I used a very, very fine wool single that was a mill-end. Unfortunately, it was not as fine as the yarn typically used in period as mine measures approximately .33mm while most of the extant wool scarves were under .20mm.  There was one item that ranged up to .29 so using what I had was not unreasonable. 

While weaving the sett (ends per inch) was 24, after wet-finishing compressed to 28 (with the weft packed in less densely).  The weave is tabby, as that is the weave from all of the original items (and it is the most ideal weave to use on a rigid heddle loom).  The majority of the extant pieces had a much higher thread count than I manged with my loom (which has a fixed sett), but one was as low as 29-33 threads per inch, which is not terribly off my 28 that I managed in the warp.  My weft is much less dense at 16-18 per inch despite my beating hard.  I believe that this too was a limitation of the loom.  It seems that I can get a tighter beat if I am using a loom with more distance between my shed and the weaving.  (Note also that I was not using the rigid heddle as a beater.  Instead I used a weaving sword to pack the weft as would have been done on any loom in period.)  Despite the differences, I think this item still has the proper feel as a gauzy wool and I am happy with the results.

One place where I much need improvement on small projects like this is my draw-in.  The weaving started at 9.125 inches wide and by the end it was 8.5 inches (after wet finishing it is 8.5 on one side and 8 on the other).  The length went from 20inches to 18 which was a bit more shrink than I anticipated.  Both the length and the width, however, are within range of the period examples.  I plan to warp another of these soon, so I will wear this one and use the other (hopefully better) one for display purposes.

I used a double selvedge as was seen in one of the extant pieces.  In that example, two strands of two plied yarn was used, so I plied the same singles I used for weaving to use for that purpose.

The fringes in the extant scarves range from 20mm to 100mm.  I opted to cut mine at 70mm initially assuming that I can cut them down later if I so choose. It is interesting to note that the extant items often have fringed ends that end in loops, presumably because they were woven on a small two beam vertical loom like that found at Oseberg.  When the weaving was complete, the piece could be slipped off of the beam leaving the warp ends as intact loops.  My chosen method of weaving did not allow for this so I opted to twist my cut fringe, then wet-finish and cut to desired length.

I choose to separate out 8 warp threads for each fringe.  I Z twisted those in groups of two and then two the resulting 4 strands and S cabled them.  I did tie a knot in the bottom of each until the piece was properly wet-finished just to hold the twist as I set it.  This method plying small groups and then cabling them was evident in the extant pieces.  The first quarter of the fringes I did entirely with my fingers, but it was hard on my wrist so I switched to a LeClerc fringe twister to finish them.  There is no difference at all in the fringes I twisted in my fingers and those for which I used the contraption.

If you want to learn more about the headcoverings I highly recommend the book Viking Age Headcoverings from Dublin by Elizabeth Wincott Heckett.  It is a fantastic work that gives intricate detail on the history of the textiles and how they were constructed.


Picture
My weaving on a Schacht Cricket Loom with two heddles.
Picture
Fringe being measured after wet-finsihing
Picture
Oseberg sprang loom (two beam vertical loom)
Picture
LeClerc fringe twister
Picture
Finished scarf
Picture
Close up of the weave
Picture
My lovely model, who would not wear it on her head like a proper Viking woman.
2 Comments

Weaving Fine on the Rigid Heddle Loom

1/28/2015

2 Comments

 
I started a sample piece of weaving to test out the use of the RH loom with very fine wools.  For this I am using two 12.5 dent heddles and a tabby weave.  This gives me 25 ends per inch, which is not bad.  I was worried that the friction caused by moving the heddle back and forth would abrade the wool enough that I would only be able to use it as a shedding mechanism and I would have to pack the weft with a weaving sword.  Fortunately, the worsted spun 18/2 yarn from EPiC (sold through the Yarn Barn of Kansas) works exceedingly well on this type of loom and there are no issues at all.

I plan to cut off the sample this weekend and wash it to see how it drapes.  It is dense (but so were many period wool fabrics), so I might also sample it at 20 epi.  After these, I will sample with Jaggerspun 20/2 and eventually their 18/2 Superfine as well.

Picture
2 Comments

Working with Wool on a Rigid Heddle Loom

1/16/2015

0 Comments

 
I have made a couple of posts recently about rigid heddle looms in general and also how to use them for SCA projects.  Because I think these are a great gateway to the weaving world, I plan to continue to add to those posts in hopes of helping new weavers make use of these tools.

In the SCA time period, a good deal of the textiles were wool.  In some areas and times it was the predominant fiber type and often individuals seeking to upgrade their look start looking to add wool garments into their kit.

Fortunately, wool is a great material for weaving!  Wool has a natural give and does not require high tension to bewoven (some fibers, like linen need to be at a high tension for it to behave on the loom).  Of course, not all wool is created equal and many that are nice for weaving can stump the new artisan when problems do arise.  Here are a few tricks that might help the new rigid heddle weaver have a better experience with wool.

  • Use a tried and true wool for your first time working with this fiber if possible.  Harrisville Shetland comes in unwashed cones in a nice range of colors.  This yarn (as opposed to it's washed form, which you can buy on skeins) has a smooth finish with few stray fibers.  It allows for easy warping and a clean shed.  You can find this yarn at many stores online and a 10 dent heddle is perfect for weaving this yarn into plain weave cloth: https://halcyonyarn.com/yarn/0094080C/harrisville-shetland-yarn-_-unwashed-cones   It makes a medium to heavy fabric that would be good for a cloak, hood, pouches, blankets.  It could even work for a heavy garment.  It also fulls well after weaving if you need fulled fabric for your project.  (Fulling is a process that uses water, agitation and heat to shrink the cloth while locking the fibers together to make a thick cloth that both sheds water and is very insulating.)

  • Hand spun, softly twisted yarn and single ply yarn can sometimes be problematic to even an experienced weaver. 

  • If you are using stick shuttles, it can be beneficial to wrap them only on one side (as is shown to the right, rather than around both, or in the center of the shuttle.  It should look like the image below.  This really allows you to do two things.  The first is that it keeps the bulk on one side of shuttle and you can keep that aimed at the rigid heddle, where the shed is at its widest. This prevents the yarn on the shuttle from grabbing at the warp too much. 

Picture
PictureThe back of the stick shuttle pressing towards my finished weaving allows me to see which threads are truly on top, and can let me see a potential error before I make it.


The other reason to wrap only on one side is that you can then use the clear side of the shuttle to press press towards you occasionally to verify that all threads are where they are supposed to be and you are not skipping a thread because it is not rising as it should.   A good tutorial for wrapping can be found at this link - though note that rigid heddle weaving I prefer to wrap it only on one side.  http://askthebellwether.blogspot.com/2009/12/how-do-you-wind-on-stick-shuttle.html#.VLleOSeoA6E


Picture
  • Eventually you might want to use a more fine yarn to create a suitable cloth for garments that will not be too thick or war.  For this you will need to use a smaller heddle or possibly two heddles to create fine cloth.  Sometimes you will encounter yarns that want to stick to each other, causing the shed to not open properly.  You can see in the image above that on the right hand side of the weaving some of the threads do not pop up to the top the way the rest do.  This is because the fuzzy, loose fibers of this particular yarn (KnitPicks Palette Yarn) can cling to their neighbors and prevent them from moving as they should when the shed is changed.

    There are two solutions for this problem.  The first is to check your tension.  Wool stretches over time, and sometimes you will need to tighten the tension on the loom (just turn the front beam one notch tighter if you think this is the case).  If I see that a good many threads are doing this, tension is usually the culprit.  You will see most of them move into proper alignment when you tighten the beam.

    Occasionally, you will have one thread that is just tensioned as well as the other threads.  If you are already too far into your weaving to retie that one, you can take a paper clip or metal shower hook (or even a loop of yarn) with some nuts or washers added as weight and hook it over the offending thread at the back of the loom.  This extra weight will cause that thread to tighten up.  It might take some experimentation to get the right weight so that it matches the surrounding threads, but it is a very simple fix.

    Sometimes adjusting the tension does not help, or only helps a bit.  This can be the case with a very, very sticky yarn.  The best thing to do here is to periodically clear the shed yourself.  You can do this by inserting another stick shuttle, a weaving sword or a pick-up stick in the shed and pressing a way from the rigid heddle with it - it will force the yarns to move apart.  You can see that in the image below.  I insert the stick into the warp and move it towards me a small group at a time.  I have to do this periodically with the KnitPicks Yarn as it is both stretchy and clingy.  If you do not have a clear shed, it can lead to errors in the weaving.

    Note:  If your yarn is sticky and you do have to unweave a portion to correct it, you might have to clear EVERY shed as you reverse it as the yarn will start to grab and lock in place when you beat it.
Picture

  • And of course, you will always have errors.  Some may require unweaving if you cannot live with them (though I will admit that fulling fabric can help conceal them).  In a woolen tabby (plain weave) they will show as longer threads floating over the surface of the weaving.  You can correct these by reversing your steps and undoing each row of weft until you are back to the row with the error.  As I mentioned earlier, you might have to clear the shed with a pick up stick (or any beveled, smooth piece of wood) as you go.
Picture
Picture

0 Comments

Rigid Heddle Weaving for SCA Use

12/29/2014

1 Comment

 
Picture
Band weaving from the Codex Manesse - 1300-1340.
A couple of days ago a reader (andy) said that he got a RH loom for Christmas and is having a hard time finding SCA appropriate projects for the loom and asked if I could post with some ideas.  While I do not at the moment have drafts or project sheets drawn up for specific projects, I can absolutely post information on things you can create (even as a new weaver) on the RH loom for the SCA!

Rigid Heddle weaving in period was used to make narrow bands (and were often used in conjunction with band looms).  While I have never seen the wide rigid heddle looms we have now from the SCA period, that does not mean that they cannot be used to produce items for SCA use, display or competitions!  RH weaving at its simplest produces a tabby woven cloth (also known as plain weave) and that structure can be seen throughout history.
PictureHerringbone twill woven on the RH loom. I turned the samples I did for this into pouches for my BF and for largess.
I actually would highly recommend that a new weaver first purchase a RH loom, to explore the art of weaving, before investing in a much larger (and much more costly) floor loom.  Even if one opts to move into multi-shaft weaving at a later point, the RH loom still has many uses for those who want to recreate historic items.  My suggestion for the new weaver is to undertake two things at the same time.  The first is to just put some yarn on the loom and explore!  Learn to weave, work with perfecting tension and selvedges, work with incorporating colors via stripes or plaids, and generally get comfortable with the art of weaving.  As you do this, start to explore what historic items might be of use to you, learn about the weaves common in a particular area or part of history.  You might not be able to produce a cloth with a thread count of 80 ends per inch on this type of loom, but there are many fabrics you can make with some practice!

I highly recommend either of these two books to the new weaver:
  • Hands on Rigid Heddle Weaving by Betty Lynn Davenport
  • Ashford Book of Rigid Heddle Weaving by Rowena Hart (this one is out of print for the moment, but you might come across one used at a decent price)
Both cover the basics of warping the loom and the process of weaving.  They also have a host of simple projects that can be adapted to SCA uses.  I highly recommend that one follow the instructions for direct warping the loom.  It is fast and painless and gets you weaving quickly.  This is one nice advantage a RH loom has over floor looms and one reason that I wanted a larger RH loom myself.

If you are like me, you do not want to create something just for the purpose of practicing.  You want to make something that one can actually use.  So, some starting items that I can suggest are:
  • Weave a few narrow pieces in wool (Harrisville Shetland is a fantastic 2-ply yarn that works very well in a Rigid Heddle loom).  This gives you practice time weaving, as well as the chance to get comfortable working with wool (a most fantastic fiber).  Narrow cloths can very easily be sewn up into bags or pouches!  Make them for yourself, friends or as largess!  Everyone loves handwoven goods and items like this are sure to be used and admired for many years.  (I will work on an article with specific instructions for this after I finish weaving some more fabric.  For now, there are likely quite a few tutorials for fabric pouches online.  They really are simple!)
  • If you happen to have one of the larger looms, wider fabric can be turned into coverings for benches or boxes in tents, narrow runners or small rugs for the floor or even pillows.
  • Remember that you do not need to weave the full width of the loom!  Narrow bands can be woven as straps, belts or trim.
  • With a 28-48" wide loom you could also weave enough fabric to create heavy woolen garments (remember that the highest thread count produced with one rigid heddle is 12.5 threads per inch).  This could become cloaks, hoods, hats, or even something like a tunic if you need warm weather gear.  (Depending on your loom, you might need to weave two lengths of cloth to produce enough yardage for one of these larger projects.)  Something like a Norse Aprondress would work fabulously on this type of loom if you choose a style that is more conservative of fabric!  NOTE: After weaving a piece you will need to wet-finish the garment, and this will shrink it a bit, so weave test swatches first to get an idea of how much it will shrink so that you can weave enough for your final item.

Of course, weaving, even on an RH loom, does not end with tabby!  Most looms have the ability to add a second heddle.  This allows you to weave items in plain weave twice as fine as you could previously (two 8 inch heddles would weave at 16 ends per inch, or two 12.5 would weave 25 threads per inch).  While much of the fabric from upperclass graves, even in early periods, tended to be much more fine than we often imagine, a 24 or 25 thread per inch cloth is more than suitable for Viking garments.  (I have not done much exploration on garments later in history, so that would require some research to figure out what thread count is appropriate to accurately reproduce something.)

Further, the use of a second heddle allows you the option of more complex weaves!  Yes, you can weave twill on a rigid heddle loom!  Two heddles can easily let you weave three shaft patterns with a little extra effort.  Ability to weave twill means more options for garment creation and even for narrow items like men's winnegas/wicklebander (Viking legwraps).  In some times and places, twills of various sorts were more common that tabbies.

A second heddle also allows for doubleweave, a technique that can allow you to make cloth that is twice as wide as your loom's weaving width.  (This could make an excellent cover for a chair or cot at events!)

And it does not stop there!  You can add a third heddle and move on to weaving many things that would normally require a 4 shaft loom.  If you make it to Pennsic, I believe that Dread Countess Seelie is the one that teaches how to use the rigid heddle loom to reproduce a broad range of historic textiles.  I have not made it to her classes (yet!) myself, but I know quite a few people who have and who have said only good things about her teaching.  I did get a chance one year to have her show me a bit of her weaving that was set up at war and I was quite impressed.

I will finish this article with a few additional tips specifically aimed at the new weaver:
  • Experiment a lot.  For SCA use, you will want to avoid some of the bulky knitting yarns with many plies, but if you already have those in your stash from other hobbies, use them to practice with before spending more money on better yarns.  Experiment with different brands of yarn, different types of wool (shetland, merino, etc), practice plaids and stripes, pick-up patterns.  Play around with the loom as often as possible!
  • Play with spacing of the yarn.  Try the same yarn in two different reeds and see what it does to the density of the cloth.  Wet-finish it different ways (hot water with friction, versus warm water with no agitation) to see how the final cloth differs.  Knowing this before you attempt larger projects is very useful and can help you avoid errors during finishing that might make you unhappy with your final resulting cloth.
  • I think that 2-ply fingering weight yarns work well for many SCA projects.  Try to use wool (or wool blends if that is what you have access too or can afford) when possible.  If you are making something for a competition, it is best to have an understanding of what historically would have been used for your item in period.  Put that information in your research documentation as well as information on which type of loom you would have used in period as well.  It is always know how it was done back then, even if we use a more modern means of reproduction.  Rug wool is, of course, nice for rugs!
  • Lace weight yarns (and singles) can be exceptional for projects, but might fray too much (resulting in broken threads) if you are using the RH to beat the weft into place.  If you find this is the case, use the RH to change the shed, but beat it into place with a weaving sword - a beveled piece of wood meant for packing the weft.  One can also use a pick up stick with a beveled edge for this purpose.  This will reduce friction on the yarn and will result in less broken threads.
  • Learn about colors used historically.  There are many members of the SCA who do amazing work with dyes who can guide you when it comes to learning who had what colors throughout history.  There are many modern variegated yarns that are quite appealing to the modern eye, but that are also quite wrong for recreation purposes.  Learning what colors were used historically can aid in perfecting a project (as well as making for better documentation for A&S displays).  And if you cannot resist those lovely modern yarns, there are always scarves that can be made for non-SCA holiday gifts!
  • Remember that things will go wrong.  Warp tension can be off, threads can break, you can mis-thread the loom or colors.  It will all happen at one point or another and it is all a learning experience.  learn from it and continue to weave.
  • Finally, enjoy your new art form of weaving!

The looms that I prefer for RH weaving are my small Schacht Cricket loom and my 32" Ashford.


Picture
I was playing around with making Viking era fake fur trim. The warp and weft are both hand spun Icelandic tog. You can see the pin in the weaving that is being used to hold a new thread in place (one of my warp threads broke because of the friction from using the RH as a beater).
Picture
Icelandic handspun weft with Harrisville Shetland warp.
Picture
My first project on my 10" Cricket loom. I made this pouch in Harrisville Shetland wool and while the style is not period, it makes a great pouch for carrying my wallet and phone at Pennsic. I am still using this purse 5 years later! (This was a project in one of the weaving books I referenced above.)
Picture
This is the "use up all the leftovers" project. I have on the loom another Harrisville Shetland warp and am using the partial cones and balls of yarn I have laying around to weave table covers and small rugs for use in the tents at Pennsic.
1 Comment

Happy Holidays!

12/22/2014

2 Comments

 
Christmas came a bit early for me as my BF and I exchanged gifts this weekend.  He bought me a 32" wide Rigid Heddle loom!  I love to be able to do mindless weaving while we watch movies together, and have been borrowing a loom of this type for that purpose for the past year.  Now I can continue to use up my stash while making rugs and table coverings for our tents!  (And he was extra awesome and also bought the second heddle kit and two 12.5 dent reeds!)

For those new to weaving and who do not want to purchase a floor loom before they know if they enjoy weaving, I highly recommend starting with a rigid heddle loom.  There are many models on the market and they come in various sizes, including some that fold in half for traveling.  My first loom (aside from a potholder loom as a child, lol) was a Schacht Cricket loom that my mother bought me for Christmas a few years ago.  I love it and I still use it for weaving small projects, teaching others and for tablet weaving. 

The loom I have been borrowing is a Kromski Harp.  This loom folds in half for travel and has a weaving width of 32".  The stand you get get for it has an adjustable angle, which is nice, but I do not like that the ratcheting mechanism is located next to your weaving, which allows your threads to possibly get tangled in it (actually, I am not overly fond of the ratchet on this one at all).  Overall though, this weaves well and also
also has an option for a second heddle block (which allows you to use two rigid heddles at once to weave finer fabrics or even twills). 

The new loom I was gifted for Christmas is the Ashford Rigid Heddle loom, also 32".  This is not the Ashford Knitters loom (which is their folding model), but I plan to mostly use the loom in the living room so was not concerned with portability.  The stand is sturdy, and you cannot adjust the angle of the loom (though it sits at the same angle as I had set on the one I was borrowing so it works perfectly fine for me).  The mechanics of the ratchet and pawl system work very well on this loom, and all parts are located to the outside, which saves angst on my part.  This loom also has an optional second heddle block (which my BF also got for me)!  I do recommend getting that from this start if you get this loom, as the heddle blocks have to be attached with wood screws and you are probably better adding that item to begin with rather than unscrewing the initial one and attaching the new one later.  In general, I am very happy with many of Ashford's products.  I love my Ashford Traditional spinning wheel, and my first drop spindles were all Ashford.  They seem to have good quality and well thought out functionality across their line of products.

I so excited about my gift and absolutely cannot wait to get it warped with a project! 

Wishing everyone out there a fantastic holiday!  Have a warm, fun and safe New Year!  :-)

Picture
2 Comments

Finishing Up and Helping Out

5/19/2014

0 Comments

 
Picture
I think I might have neglected to mention how fantastic the Maryland Sheep and Wool Festival was this year!  I came home with another lovely Icelandic pelt and three new spindles for my collection.  Including a new Spanish Peacock spindle (I have one that I got in a barter situation with someone last year and it is hands down my favorite spindle to use). Now I need to get to work to build a shelf with holes in it that I can place the spindles in when not in use (to prevent the shafts from warping).

A dear friend and Household member also purchased a new rigid heddle loom at the festival and I went over to her house this weekend to help her warp it.  The weaving she has started looks lovely and I hope she has fun with her new toy.

Picture
Sorcha's new loom with its first bit of weaving begun!
Picture
After starting Sorch's warp, I came home and rewarped the large RH loom I am borrowing from another friend. I have lots of stray cones of yarn I got at an auction and want to make some small covers and possibly pouches for largess out of handwoven fabric.
Picture
I also finally got to pull two projects off the looms at home.  This one is handspun Icelandic wool weft with a Harrisville Shetland warp.  After wetfinishing, it is just shy of two yards and I hope to make a hood for my boyfriend out of it.

Picture
And FINALLY, I finished the fabric on my floor loom!  This piece is just shy of 8 feet and is woven of rug wool.  It is going to be a rug for my boyfriend's Viking tent :-)

Next project to go on that loom will be another yellow rug wool warp (I have a ton of that stuff) to be woven into a rug for my tent and possibly some small gift rugs.

0 Comments

Moving Forward

3/31/2014

1 Comment

 
This winter I borrowed a 32" wide rigid heddle loom from a friend.  I wanted to be able to have two weaving projects going at once and have one of them be portable, so this loom is doing exactly what I need it too.  It is warped up with an ash brown unwashed Harrisville Shetland wool and the weft is  Icelandic that I spun from roving my boyfriend purchased at the Shenandoah Fiber Festival a year and a half ago.  (Yes, I am doing some stash busting and trying to wrap half-finished projects up!)

Because the warp is unwashed, it will compress and fluff on washing, filling in the gaps of the weaving and tightening the whole textile up.  I hope to have enough finished fabric to sew for him a hood.
Picture
Picture
The other bit of project fun this weekend was to finally try to use the reproduction firestarter that I got at Pennsic (from Viking U Like/Feed the Ravens).  I had flint imported from England, my firesteel, a ball of unspun flax and a piece of dried Tinder Fungus (Fomes fomentarius) that was given to me when I purchased the firestarter. 


I tried many times, striking the flint over and over with the steel.  Sparks came easily, but it took some time before one landed in the right spot on the mushroom to ignite it (and when it took, it REALLY took).  The flax next served well to catch fire so I could see how this method served well in the past.  Unfortunately, there are no images of the actual fire because we were both so surprised when it actually took that no one thought to reach for the camera (and, to be honest, I almost dropped it I was so surprised)!
Picture
Picture
Now I just need to find some more of that fungus so that I can create more material on which to catch the spark.
1 Comment

3 Shaft Twill

10/22/2012

0 Comments

 
Picture
Even though I don't yet own a floor loom, I have been itching to experiment with weaves beyond tabby.  I opted to get a second heddle for my rigid heddle loom and experiment with some three shaft twills.

Once again, I opted to use the Harrisville Shetland wool yarn for my project.  It's diameter makes it great for working on the RH loom and it wears well for the projects I have used it for.

You can see the start of a basic twill to the left.

I used a combination of instructions I found online to work out this threading and weaving process.  My sources included:

http://weavolution.com/group/rigid-heddlers/rh-wal-3s-twill-sampler-12118

http://askthebellwether.blogspot.com/2009/02/what-can-you-weave-with-2-heddles-on.html

http://weavolution.com/group/rigid-heddlers/do-we-have-wal-11984

http://sueknitsandspins.blogspot.com/2009/02/twill-on-rigid-heddle-loom.html

I only ran a couple of inches of basic twill before switching my lift pattern to work a herringbone twill.  I used the blue warp and enough bright yellow, golden yellow and wine as weft to make three separate hand-sewn pouches.  The first went in the Royal gift basket at war, the second is shown below and is my boyfriend's change purse and the third is still waiting to be assembled ;-)

Picture
0 Comments

    About Me

    I am mother to a billion cats and am on journey to recreate the past via costume, textiles, culture and food.

    A Wandering Elf participates in the Amazon Associates program and a small commission is earned on qualifying purchases. 
    ​

    Archives

    November 2022
    October 2022
    September 2022
    June 2022
    May 2022
    March 2022
    March 2021
    February 2021
    September 2020
    August 2020
    July 2020
    June 2020
    May 2020
    March 2020
    January 2020
    December 2019
    November 2019
    September 2019
    July 2019
    June 2019
    May 2019
    April 2019
    March 2019
    February 2019
    January 2019
    November 2018
    October 2018
    September 2018
    August 2018
    July 2018
    June 2018
    May 2018
    April 2018
    March 2018
    February 2018
    January 2018
    December 2017
    November 2017
    September 2017
    August 2017
    July 2017
    June 2017
    May 2017
    April 2017
    March 2017
    February 2017
    January 2017
    December 2016
    November 2016
    October 2016
    September 2016
    August 2016
    July 2016
    June 2016
    May 2016
    April 2016
    March 2016
    February 2016
    January 2016
    December 2015
    November 2015
    October 2015
    September 2015
    August 2015
    July 2015
    June 2015
    May 2015
    April 2015
    March 2015
    February 2015
    January 2015
    December 2014
    November 2014
    October 2014
    September 2014
    August 2014
    July 2014
    June 2014
    May 2014
    April 2014
    March 2014
    February 2014
    January 2014
    December 2013
    November 2013
    October 2013
    September 2013
    August 2013
    July 2013
    June 2013
    May 2013
    April 2013
    March 2013
    February 2013
    January 2013
    December 2012
    November 2012
    October 2012
    September 2012

    Categories

    All
    12th Night
    14th Century
    AEthelmearc
    Aprondress
    Awards
    Bog Dress
    Dance
    Dance Name
    Distaff
    Dyeing
    Embroidery
    Fiber Arts
    Flax Growing
    Food
    Glass
    Haberci
    Headcoverings
    Inspirations
    In The News
    Library
    List Of Links
    Machine Embroidery
    Metal Clay
    Mid Month Inspiration
    Migration Era/Iron Age
    My Documents
    Ottoman
    Ottoman Fabrics
    Pennsic
    Publications
    Research
    Rigid Heddle
    Sca
    SCA Camping
    SCA Forestry
    Sca Name
    Sca Newcomer
    Sewing
    Sheep
    Spinning
    Tips
    Totally Not SCA
    Viking
    Viking Bead Research
    Viking Costume: Beyond The Myth
    Viking Swatch Book
    Viking Textiles Looking Deeper
    Weaving
    Wool


      Email Updates

    Subscribe to Newsletter

    Blogroll of SCA & Costume Bloggers

    Below is a collection of some of my favorite places online to look for SCA and historic costuming information.

    More Amie Sparrow - 16th Century German Costuming


    Gianetta Veronese - SCA and Costuming Blog

    Grazia Morgano - 16th Century A&S

    Mistress Sahra -Dress From Medieval Turku 

    Hibernaatiopesäke

    Loose Threads: Cathy's Costume Blog

    Mistress Mathilde Bourrette - By My Measure: 14th and 15th Century Costuming

    More than Cod: Exploring Medieval Norway

    RSS Feed


Proudly powered by Weebly