In an effort to help folks better their ability to choose textiles for historic projects, I am compiling a series of articles aimed at those less familiar with the source material and textiles in general. I hope this helps those who are looking to recreate Bronze Age costumes better source their cloth!
I am starting with the dating systems used to better help frame the discussed textiles with timeline. According to some dating systems, the Bronze Age in Scandinavia covers the years 1700BCE to 500BCE, while others start at 1800BCE (see chart used by Lise Bender Jorgensen from Northern European Textiles) and come to the same final point. The period is broken down into the Early Bronze Age and Late Bronze Age (either 1700-1000BCE or 1800-1000BCE for Early, depending on the source). More recent work has sought to use carbon dating as a means of ‘finalizing’ the 6 subcategories in the periods with the following being the results (Olsen, et al):
Phase 1 – 1700-1500
Phase 2 – 1500-1300
Phase 3 – 1300-1100
Phase 4 – 1100-950/920
Phase 5 – 950/920 – 800
Phase 6 – 800-530/520
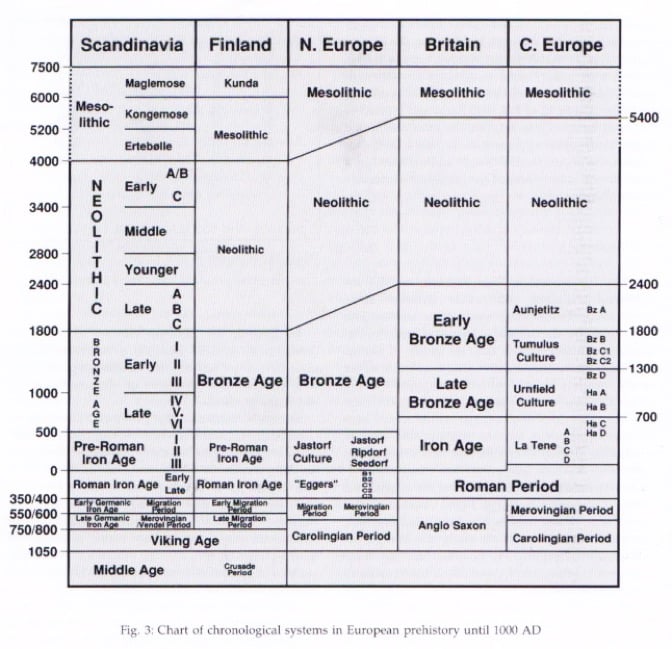
Timeline credit to Lise Bender Jorgensen
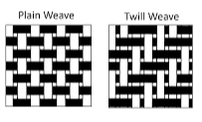
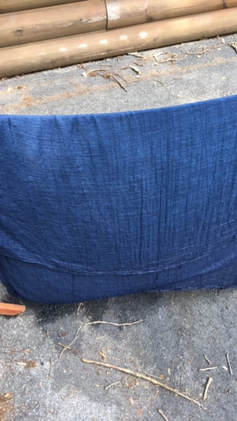
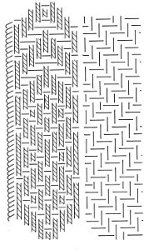
Note that while I am adding this to my blog category for “Textile Charts”, I have to note that there really is no actual chart to be had for this topic because the textiles from this period were almost entirely tabby/plainweave. For those new to textiles, basic tabby cloth is what you usually see in linen fabrics, particularly those sold at popular vendors like Fabrics-Store.
In her work, Forhistoriske Textiler I Skandinavien, Lise Bender Jørgensen details the textiles from each grave in each specific time period for Scandinavia. The book has both a catalog and an analysis of textiles, including spin direction. All figures in the next few paragraphs are summarized from that source. The book does not, however, have detailed information on color or density of weave. In total, there are 185 Bronze Age graves containing textiles. Most of these are from Denmark, with only 2 finds from Norway, 20 graves were from Sweden (from Scania and Halland) and 10 graves from Schleswig and Holstein, which are now part of Germany. Overwhelmingly, the textiles are wool in tabby weave.
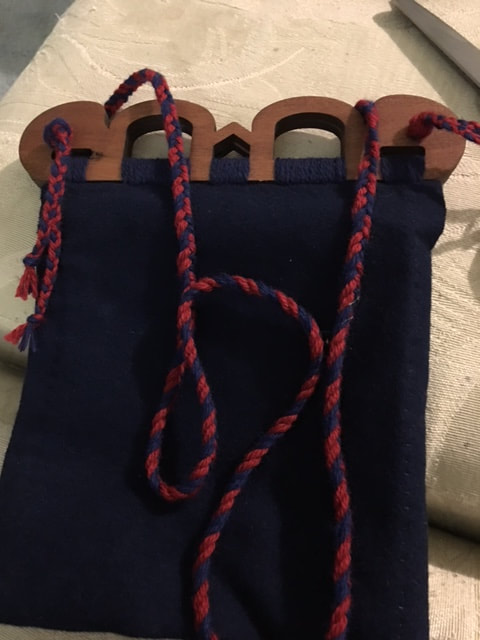
For the Early Bronze age (Phases 1-3), Phase 1 has only one grave and all items were repp-like tabby weave. In a repp weave, one thread system covers the other giving it a ribbed effect. If you have seen inkle weaving, you have seen repp weave. 82 graves from Phase 2 contained 107 tabby textiles, 13 repp (these include bands and starting borders), sprang was present in 4 graves and there were a few other more unique items as well, including men’s caps with pile (fuzzy hats!) in 7 graves. All of the actual fabrics were tabby or repp. The last Phase for the Early Bronze age (Phase 3), had 52 graves with textiles yielding 79 items with a determinable weave. 68 of these were tabby, 9 are repp and the remaining fall into the category of other (again, containing items like sprang and plaiting).
For the Early Bronze age (Phases 1-3), Phase 1 has only one grave and all items were repp-like tabby weave. In a repp weave, one thread system covers the other giving it a ribbed effect. If you have seen inkle weaving, you have seen repp weave. 82 graves from Phase 2 contained 107 tabby textiles, 13 repp (these include bands and starting borders), sprang was present in 4 graves and there were a few other more unique items as well, including men’s caps with pile (fuzzy hats!) in 7 graves. All of the actual fabrics were tabby or repp. The last Phase for the Early Bronze age (Phase 3), had 52 graves with textiles yielding 79 items with a determinable weave. 68 of these were tabby, 9 are repp and the remaining fall into the category of other (again, containing items like sprang and plaiting).
The Late Bronze Age is comprised of Phases 4-6, but there was a switch during this period to cremation graves which leaves little material for us to explore. Most of the textiles from this time are found in Phases 4 and 5, where we find 13 graves with textiles and with only 21 textiles that are preserved well enough to categorize. 18 of these are tabby, one is repp and two are a 2/2 twill. Twill cloth has a diagonal weave to it (think of blue jeans here). Both of these twill textiles are dated to Phase 5.
The Late Bronze Age is comprised of Phases 4-6, but there was a switch during this period to cremation graves which leaves little material for us to explore. Most of the textiles from this time are found in Phases 4 and 5, where we find 13 graves with textiles and with only 21 textiles that are preserved well enough to categorize. 18 of these are tabby, one is repp and two are a 2/2 twill. Twill cloth has a diagonal weave to it (think of blue jeans here). Both of these twill textiles are dated to Phase 5.
Of course, knowing what weave to shop for is only part of the problem for the costumer. Fibre type is the second thing that we must consider. For the Early Bronze Age in Scandinavia, this decision is also simple. All of the Early Bronze Age textiles were not only tabby or repp, they were consistently wool. The only exception at all is in the Late Bronze Age (900-700BCE) there was a single instance of a tabby woven nettle textile. (Jorgensen, Forehistoriske, p292; Gleba & Mannering, p97)
Nettle is a bast fibre similar to linen, hemp is also found as a woven good later in time in Scandinavia. Typically, these types of fibres do not survive well in environments that preserve wool, which makes it hard to know definitively if the people had them or not. In Textiles and Textile Production in Europe from Prehistory to 400AD, it is suggested that it is possible that these fabrics, or maybe even flax, existed during the Late Bronze Age, but there is nothing to prove this time.
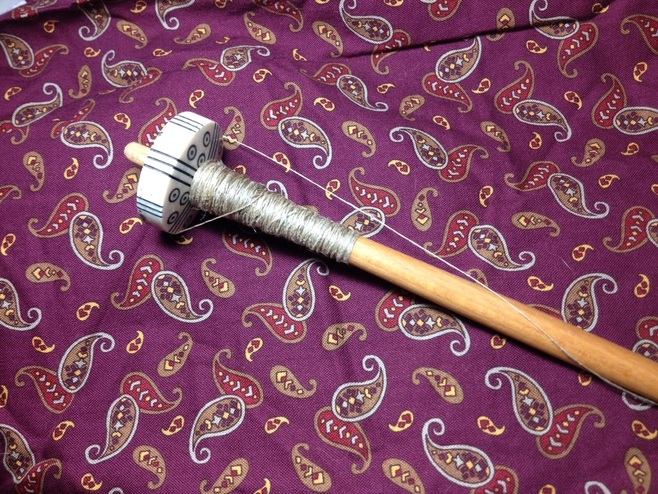
This is a good time to segue to a discussion on thread counts. When we “count threads” we are merely looking at the number of threads in the warp (the thread that runs from one beam to the next on the loom) and also the weft (the thread that runs over and under the warp threads across the loom). By looking at thread counts in archaeological textiles we can compare those to items for sale to see how close we are to the existing items which can help inform our purchasing choices.
That nettle textile mentioned above was one of the finest examples from the entire Bronze Age in Scandinavia. It had 45.7 threads to the inch in one system and 33 threads to the inch in the other system (Gleba & Mannering, p97) If you want to know what that looks like, the Rustic Linen from Fabrics-Store has a somewhat similar thread count (38/32), while the All-Purpose that most of us are familiar with is a little finer at 46/37. Note though, this fabric was an anomaly not only unique in its fibre content, but also in how fine it was! The bulk of textiles were what we would consider to be coarse and had a very low thread count. The wool cloth was typically more coarse than even the 10oz canvas from Fabrics-Store. The most common thread count in the early part of the Early Bronze Age in wool was 10 threads to the inch in both systems. The highest thread counts were seen in the repp woven items. Buy Phase 3 we are looking at thread counts of roughly 18 to 23. This still is much more coarse than even the canvas weight linens with which many of us are familiar.
Nettle is a bast fibre similar to linen, hemp is also found as a woven good later in time in Scandinavia. Typically, these types of fibres do not survive well in environments that preserve wool, which makes it hard to know definitively if the people had them or not. In Textiles and Textile Production in Europe from Prehistory to 400AD, it is suggested that it is possible that these fabrics, or maybe even flax, existed during the Late Bronze Age, but there is nothing to prove this time.
This is a good time to segue to a discussion on thread counts. When we “count threads” we are merely looking at the number of threads in the warp (the thread that runs from one beam to the next on the loom) and also the weft (the thread that runs over and under the warp threads across the loom). By looking at thread counts in archaeological textiles we can compare those to items for sale to see how close we are to the existing items which can help inform our purchasing choices.
That nettle textile mentioned above was one of the finest examples from the entire Bronze Age in Scandinavia. It had 45.7 threads to the inch in one system and 33 threads to the inch in the other system (Gleba & Mannering, p97) If you want to know what that looks like, the Rustic Linen from Fabrics-Store has a somewhat similar thread count (38/32), while the All-Purpose that most of us are familiar with is a little finer at 46/37. Note though, this fabric was an anomaly not only unique in its fibre content, but also in how fine it was! The bulk of textiles were what we would consider to be coarse and had a very low thread count. The wool cloth was typically more coarse than even the 10oz canvas from Fabrics-Store. The most common thread count in the early part of the Early Bronze Age in wool was 10 threads to the inch in both systems. The highest thread counts were seen in the repp woven items. Buy Phase 3 we are looking at thread counts of roughly 18 to 23. This still is much more coarse than even the canvas weight linens with which many of us are familiar.
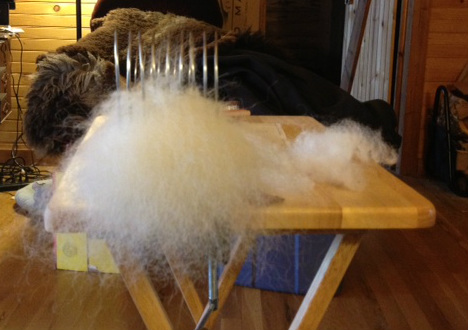
The surface of the wool cloth was also fulled, which makes it a bit fuzzy but improves the way it sheds water, insulates and renders the cloth unable to fray at the edges (meaning things like bottom hems or complex French seams were often unnecessary as the cloth will not ravel).
As a side note here, if anyone is interested in learning to weave, these garments, particularly the cropped blouses in several women’s graves, would be great projects for a novice. They could even be done on a wide rigid heddle loom, which is a very good way to get started with the craft. (See information on this type of weaving here - http://awanderingelf.weebly.com/blog-my-journey/rigid-heddle-weaving-for-sca-use )
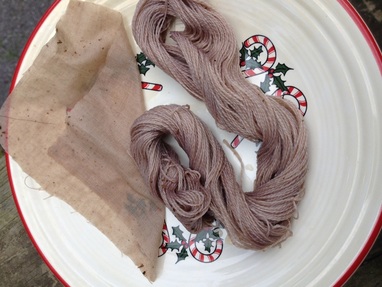
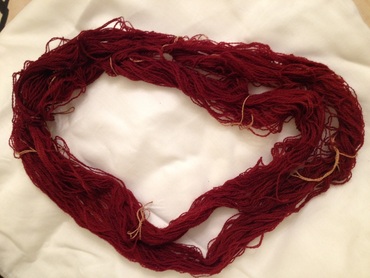
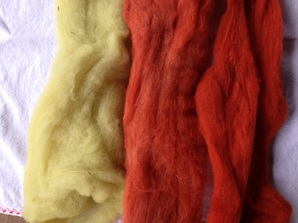
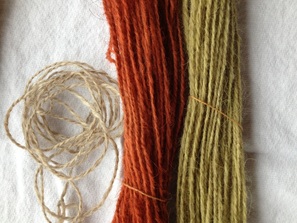
The next question that folks often have is what color to purchase. In this case, the Bronze Age in Scandinavia also makes this easy. Aim for Brown. There is no evidence of organic dye from this time and place (Frei, Mannering, et al, p652). We do see natural pigmentation from the sheep, primarily brown, in the cloth and white wool seemed rare. Soay sheep are a Bronze Age Breed, so it does not hurt to aim for those shades of brown for your textiles.
And finally, the last question, embroidery? Figurative embroidery is not represented at all in these finds. If you want decorative stitching for Early Bronze Age, I encourage you to look to the Skyrdstrup blouse and the beautiful needlework on it.
As a side note here, if anyone is interested in learning to weave, these garments, particularly the cropped blouses in several women’s graves, would be great projects for a novice. They could even be done on a wide rigid heddle loom, which is a very good way to get started with the craft. (See information on this type of weaving here - http://awanderingelf.weebly.com/blog-my-journey/rigid-heddle-weaving-for-sca-use )
The next question that folks often have is what color to purchase. In this case, the Bronze Age in Scandinavia also makes this easy. Aim for Brown. There is no evidence of organic dye from this time and place (Frei, Mannering, et al, p652). We do see natural pigmentation from the sheep, primarily brown, in the cloth and white wool seemed rare. Soay sheep are a Bronze Age Breed, so it does not hurt to aim for those shades of brown for your textiles.
And finally, the last question, embroidery? Figurative embroidery is not represented at all in these finds. If you want decorative stitching for Early Bronze Age, I encourage you to look to the Skyrdstrup blouse and the beautiful needlework on it.
It is important to note here that the complete costumes we have from the Bronze Age in Denmark, including those from Borum Eshoj, the Egtved Girl, and Skrydstrup, all fall into the EARLY Bronze Age designation. That means that if you are looking for appropriate textiles for these items, then your best bet is to seek out a coarse wool tabby. The mentioned nettle textile and the two twills fall very much outside of the period for these costumes. Given that most folks seeking to represent this period will be opting for these looks (given how broad the amount of base material there is), I will summarize specifically for the Early Bronze Age period:
- Weave structure: Tabby, with repp being a lesser possibility for cloth, and likely for something like belts
- Fibre content: Wool
- Thread Count: This cloth is what we would consider very coarse. The textiles were most commonly 10 threads to the inch in each system. There were a scant handful of wools that were more fine, but still coarse by today’s standards. Because wools from this period were fulled, you can also look for wool flannels in a tabby weave that will help conceal a lower thread count. It is possible that one might also locate something meant for more casual sport coats or jackets that will work.
- Color: Brown
- Stitches used: Running, overcast and buttonhole (Gleba & Mannering, p101)
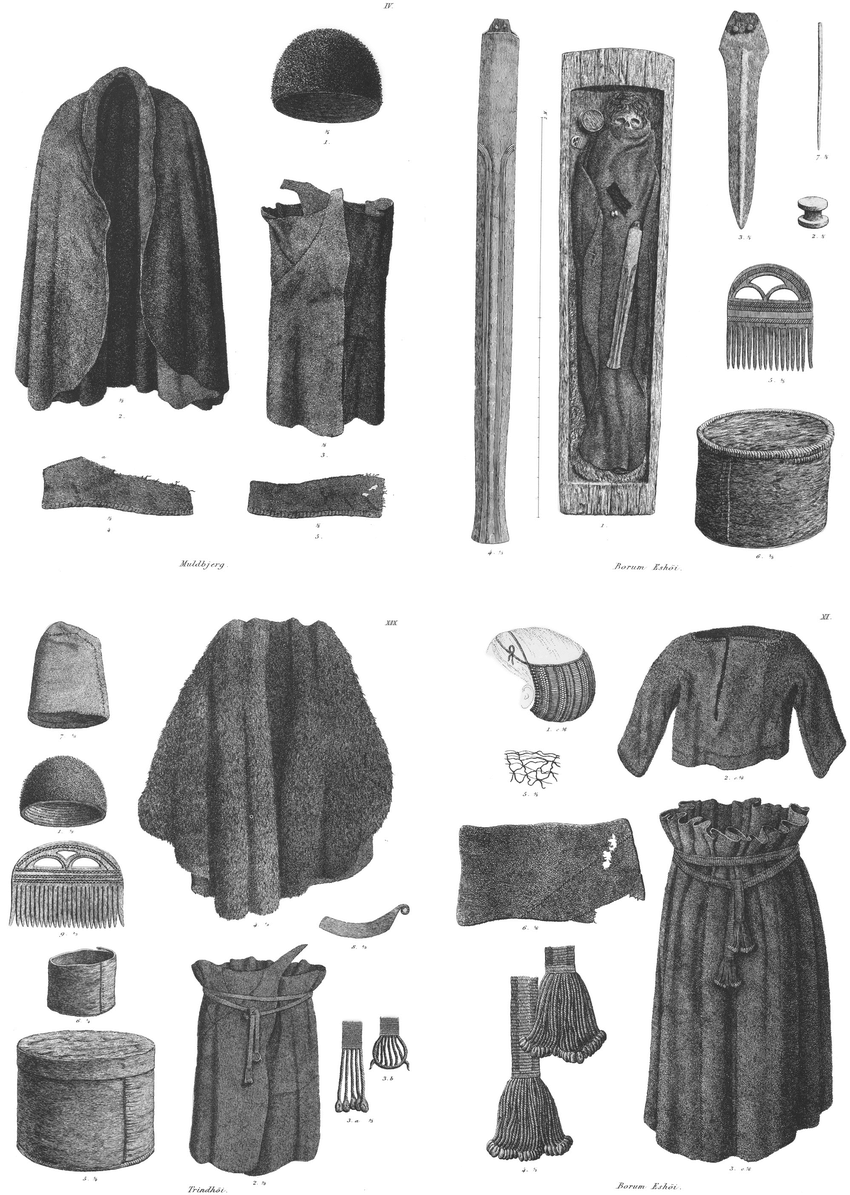
Image of costumes from prehistoric Denmark from Textiles and Textile Production in Europe - Credit to Margarita Gleba and Ulla Mannering, the chapter on Denmark can be downloaded here: https://www.researchgate.net/publication/333151629_Denmark
If you want more information on Bronze Age costume, I have a list of sources in my Egtved Girl bibliography here: http://awanderingelf.weebly.com/iron-age-celtic-studies/egtved-bibliography
Resources:
Barber, E.J.W. Prehistoric Textiles, Princeton University Press, 1991.
Bender Jørgensen, Lise. Forhistoriske Textiler I Skandinavien, 1986.
Bender Jørgensen, Lise, Joanna Sofaer and Marie Louise Stig Sørensen. Creativity in the Bronze Age: Understanding Innovation in Pottery, Textile, and Metalwork Production, February 2018.
Brandt, Luise Ørsted. “Species identification of skins and development of sheep wool”, PhD Thesis, The SAXO Institute, 2014.
Frei, Karin Margarita, Ulla Mannering, Ina Vanden Berghe, and Kristian Kristiansen. “Bronze Age Wool: provenance and dye investigations of Danish Textiles”, June 2017. https://www.researchgate.net/publication/317347024_Bronze_Age_wool_Provenance_and_dye_investigations_of_Danish_textiles
Gleba, Margarita and Ulla Mannering. Textiles and Textile Production in Europe from Prehistory to 400AD, Oxbow Books, 2012.
Hald, Margarethe. Ancient Danish Textiles from Bogs and Burials, National Museums of Denmark, 1990.
Olsen, Jesper, et al. “Chronology of the Danish Bronze Age Based on 14C Dating of Cremated Bone Remains”, (2011). Radiocarbon, 53(2), 261-275.

 RSS Feed